
Error 7 TWRP fix without using a computer or laptop during the installation of custom ROM. In this easy steps guide, we’ll manually solve the status 7 error in CWM or TWRP custom recovery. Sometimes while flashing custom ROMs on your rooted Android phones, do you encounter certain errors?
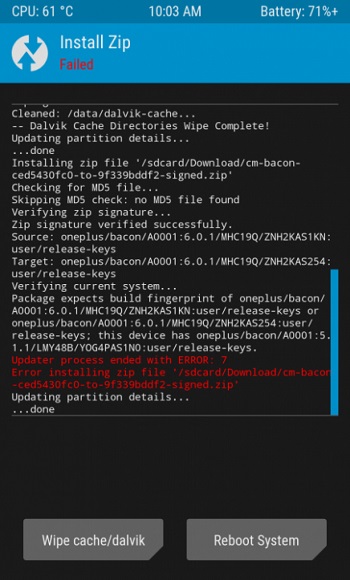
Some of these errors are, ‘Updater process ended with an error: 7 error installing zip file’ or ‘Error Status 7 Installation aborted’ or even ‘zip signature verification failed twrp’. As soon as this error appears in TWRP or CWM, the flashing process stops going further and eventually fails.
Related Post:
How to Fix TWRP Error 70 while installing GApps
How to Solve Error Executing Updater Binary In Zip
How to Fix Blocked by Play Protect Error
Since Android is open-source, users tend to perform tweaks and tricks on their devices. For older phones, the manufactures usually do not provide the latest OTA updates. This makes the users to run behind custom ROMs. Root Android, flash custom ROMs, kernels, mods, etc. is also a way to customize and improve the performance of a device.
Unfortunately, implementing these operations is risky and involves the invitation to many errors. Your Android device can be stuck into boot loops, encounter error 7, or get hard brick. But don’t worry, as we’ll these issues using simple steps tutorial.
What is a Status 7 error?
There is an updater-script file present in every custom ROM. This file (also called as asserts) is used to verify the compatibility of your Android mobile with the custom ROM. This works as a safety mechanism so you don’t accidentally flash any incompatible ROM on your Android device. But sometimes you may encounter these errors even if you have the correct ROM for your device.

‘Status 7 error installation aborted’ appears when a certain ROM’s assert file does not contain your device model. Besides, it can also show an ‘installation aborted due to validation failure’ error if your device model is mentioned but the script is generated for other models. For example, if you try to install Galaxy S10 firmware on a Galaxy S9 device, it can result in hard-bricking your phone.
But instead, if you get Status error 7, that means the updater-script file just saved your mobile by working as a safety mechanism. Hence, this error is indirectly saving your device and thus is of great help. But there are times where you will get status error 7 twrp even if you have correct firmware for your phone.
This is probably due to an error in the updater-script file by the developer while compiling the ROM. Because of this, many users try to flash new custom recoveries, but eventually, the result remains the same. Sometimes updating custom recovery like CWM or TWRP can solve this problem. But it is a very rare scenario.
What if you update to the latest recovery and still encounters status error 7 while flashing ROM? To fix the Status 7 error, all you need is to edit the updater-script file and get rid of the asserts. In our step by step tutorial given below, we will remove status 7 error OTA update, philz recovery status 7 error and lineage OS status 7 error etc. You will find various ways to fix error 7, but every method involves the use of a computer or laptop. However, to be different than everyone, we will solve this error without using a PC. The only thing you need is your Android device, that’s it. If you are ready to solve (Status 7) Installation aborted error, then move on to our actual article given below.
Disclaimer
Proceed at your own risk. Also, ensure that the zip file you are flashing is compatible with your Android phone.
Downloads
Steps to Fix Status 7 Error
- Download and install both Android apps on your phone.
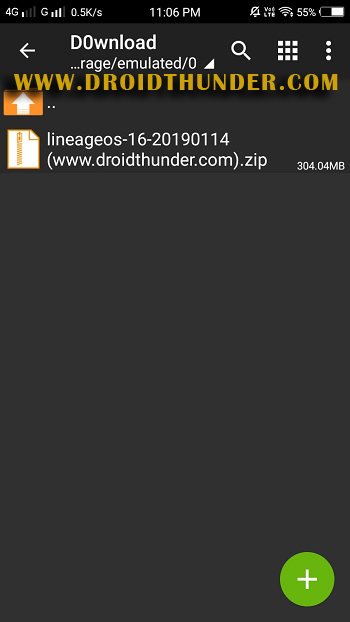
- Copy the .zip file (which is giving a status 7 error) into an empty folder on your phone.
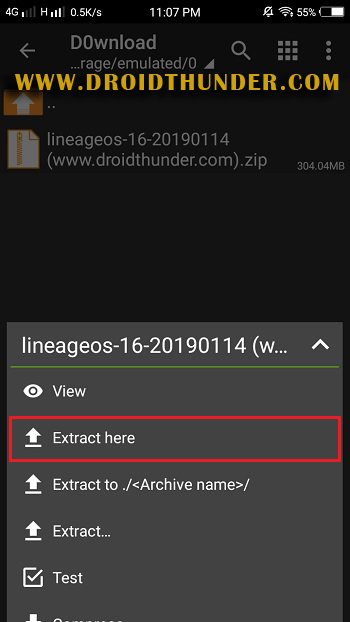
- Launch the ZArchiver app and go to the location where you’ve copied the zip file. Then tap on that .zip file
- Now click on Extract here option.
- This will start the extraction process.
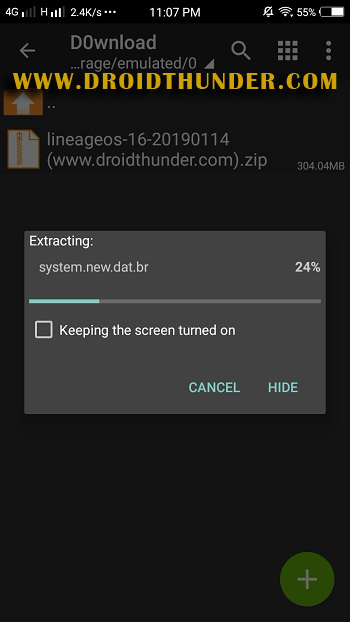
- As soon as the extraction completes, you’ll see Archive successfully decompressed message.
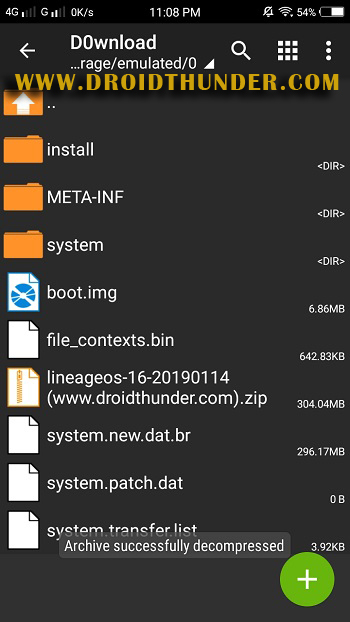
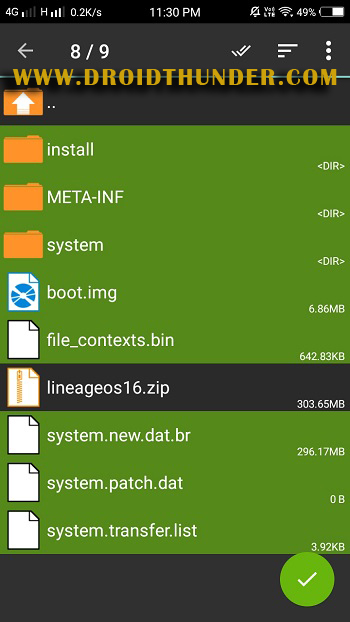
- After extracting, you’ll find Install, META-INF, and System folders along with other files.
- Note: Files may differ from shown in the image.
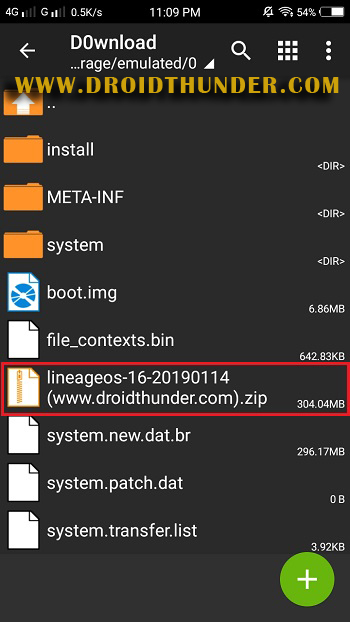
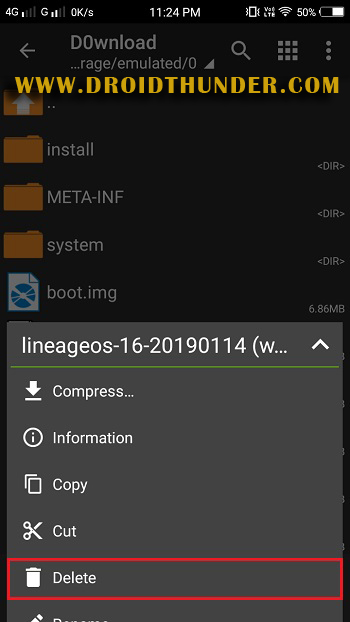
- After extracting, delete the .zip file as you no longer need it.
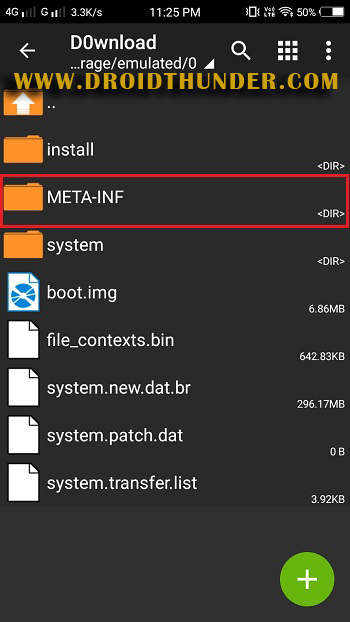
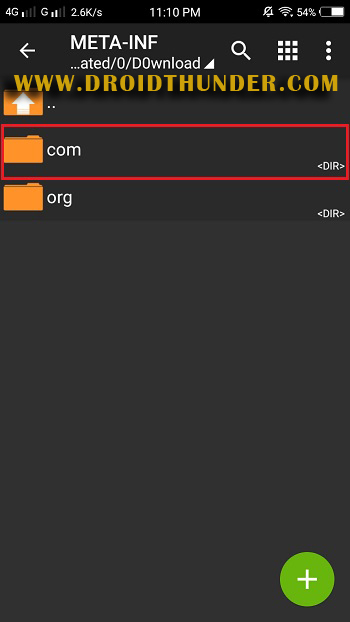
- Now open the META-IN folder.
- On the next screen, open the com folder.
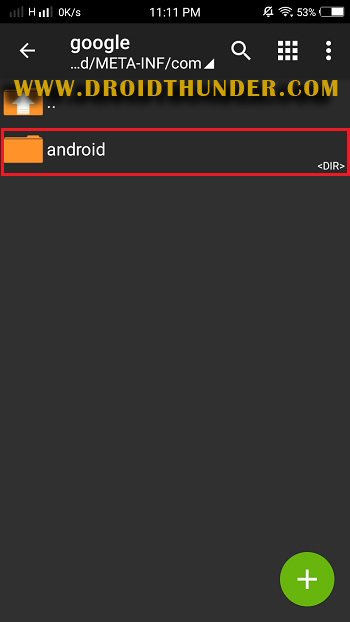
- Then open the google folder.

- Lastly, open the android folder.
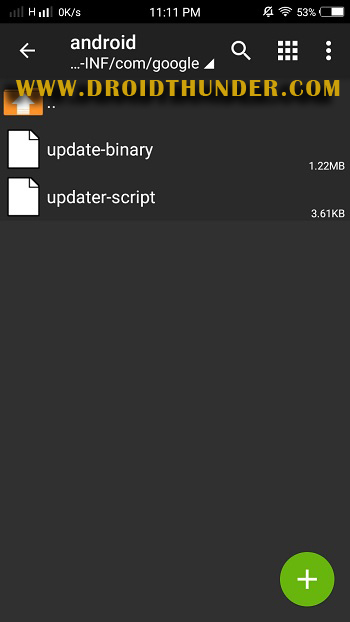
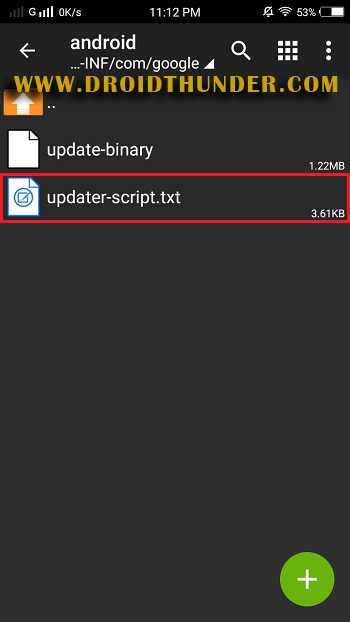
- Here, you’ll find these two files: update-binary and updater-script.
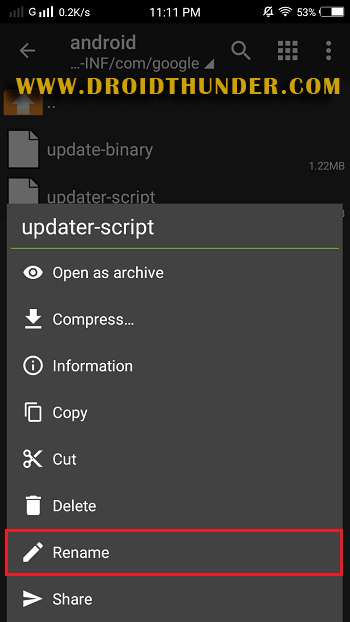
- Long press on the updater-script file.
- From the popup menu, click on the Rename option.
- Rename the updater-script to updater-script.txt.
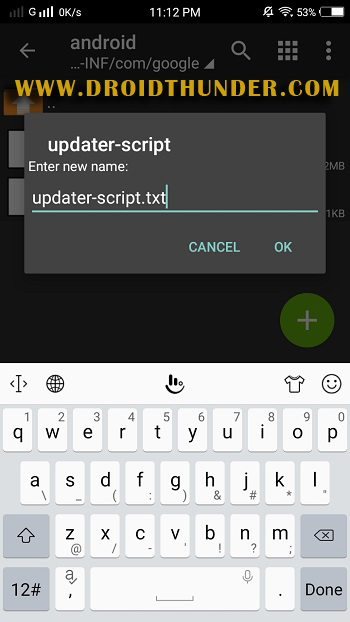
- Then tap OK.
- After renaming, just tap on the updater-script.txt file.
- Click on Open.
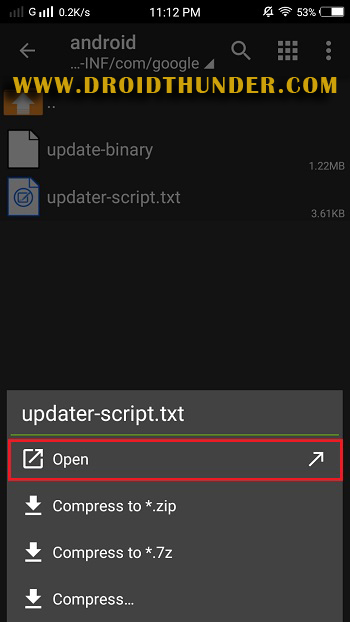
- Note: Open this file only in ES Note Editor.
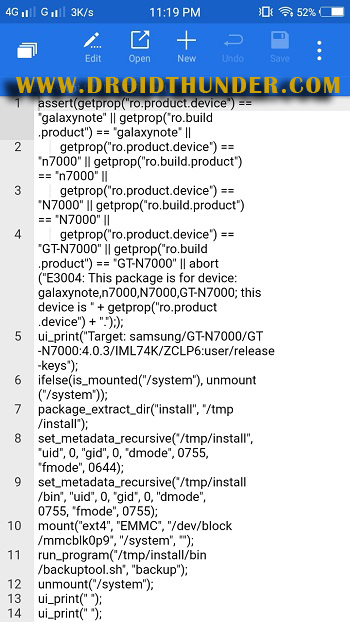
- Click on the Edit option.
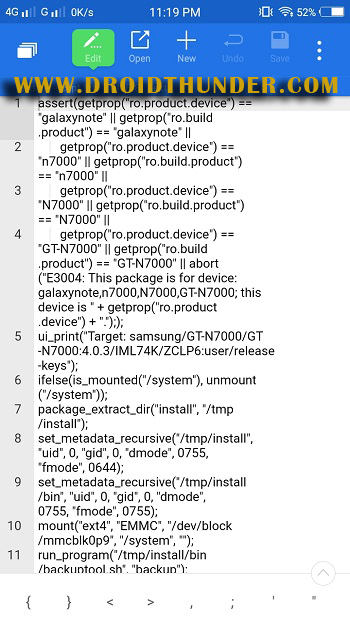
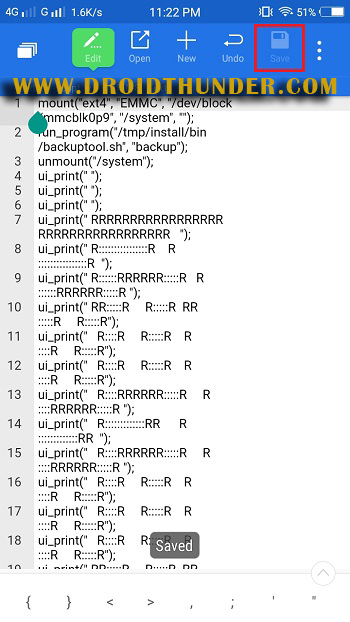
- Now select the line starting with ‘assert’ and select everything until the command ‘mount’ is visible.
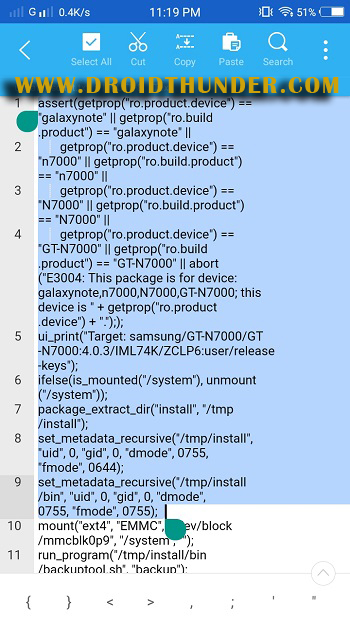
- Delete the selected lines.
- Now your first line will start from mount.
- Click on the Save button to save the text file.
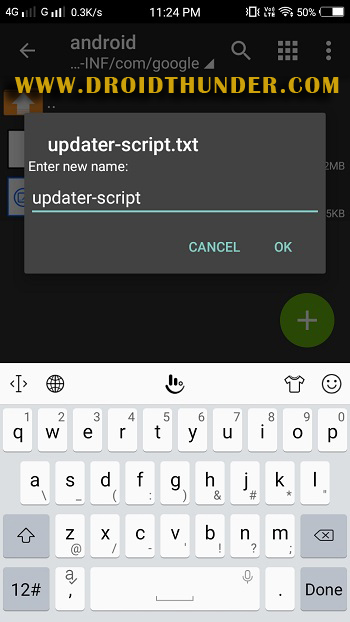
- After saving, long press on that updater-script.txt file.
- Click on Rename from the popup menu.
- Remove the .txt extension and press OK.
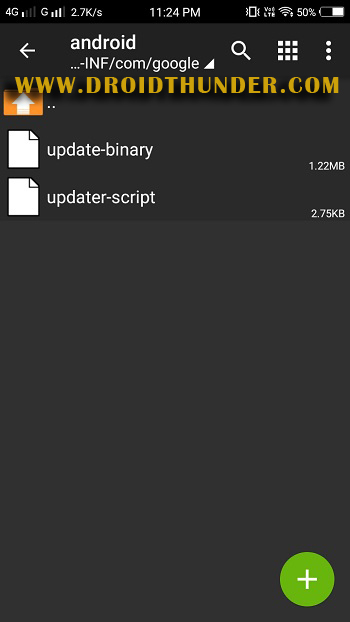
- Go back to the origin folder.
- Click on the ⋮ present on the top right corner.
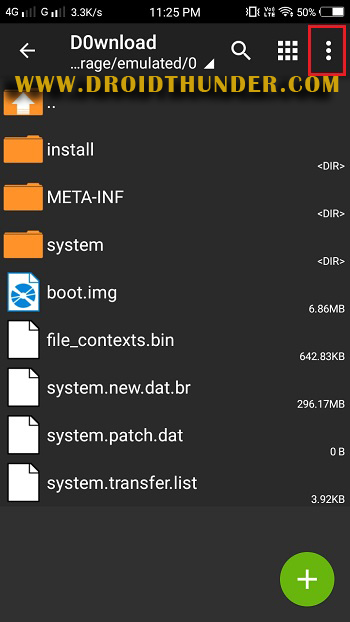
- Then click on the Multi-select option.
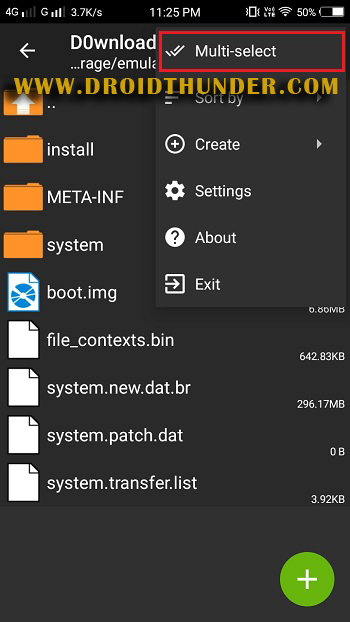
- Then select all files and folders.
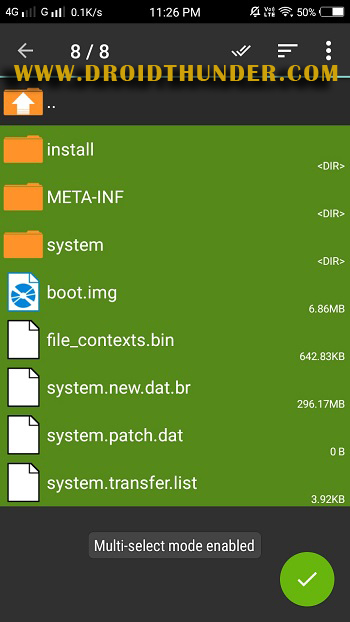
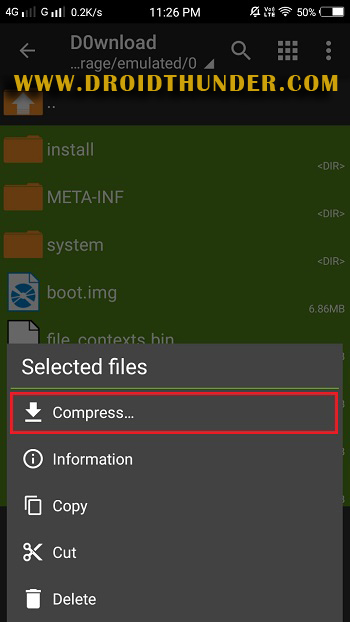
- Then long press on the screen.
- From the popup menu, click on the Compress option.
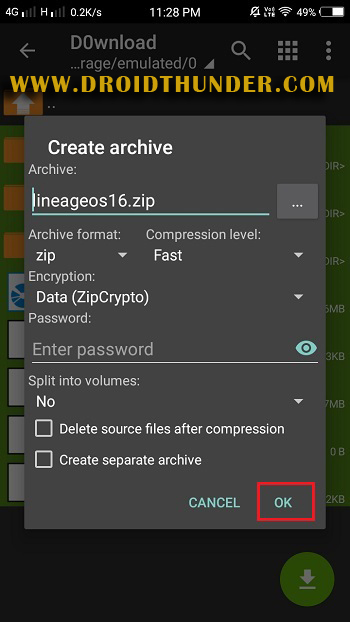
- Rename the file as per your need.
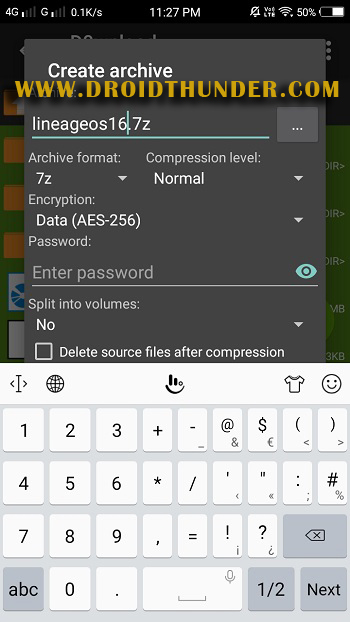
- Click on the Archive format and select the zip option.
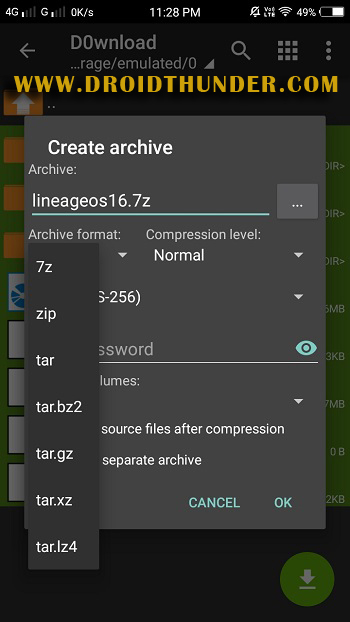
- Click on OK to initiate the compressing process.
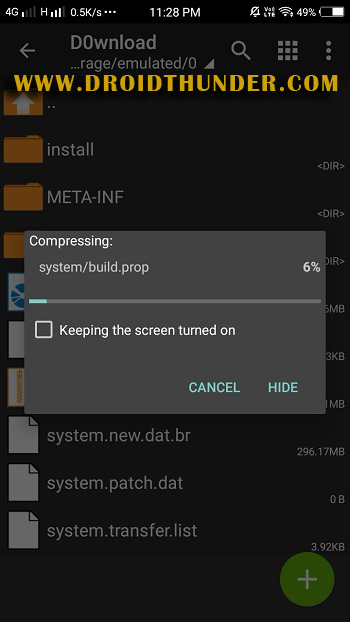
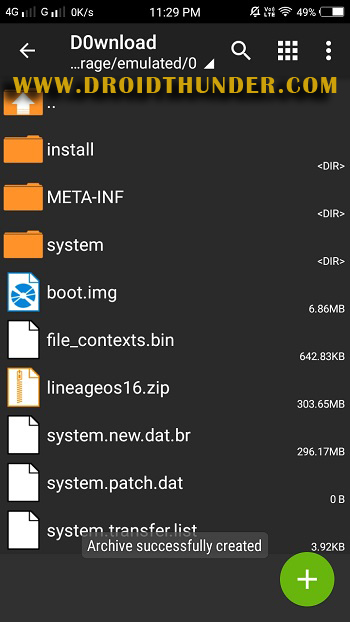
- After the compression completes, you can delete the remaining files and folders.
- That’s it! Now flash this .zip file through any recovery. It will be installed successfully without giving a Status 7 error in TWRP or CWM recovery.
Conclusion
Finally! This is how you can fix the Status 7 Error as well as the status 7 installation aborted error in recovery. Feel free to comment for any issues related to this tutorial.


1 thought on “How To Fix Status 7 Error in Recovery”
U are the best bro it worked.
If u have a what’s app group plz put my no. In +256750544354
It’s the Sam I also use for telegram
Thanks