Root & install TWRP recovery on Moto G 3rd Gen (2015). If you want a phone with a good camera, the latest Android OS, the best protection glass, long-lasting battery life, more internal storage, and the main thing if you want all these specs in a less budget phone then the newly launched Motorola Moto G 3rd Generation is the phone for you. This is the 3rd phone in the famous G series of Motorola.
Some of its more breathtaking features include a 13 MP rear camera, 5 MP front camera with ultra-fast f2.0 lens, dual-LED flash and HDR, long-lasting 2470 mAh battery which can last for an entire day, 1.4 GHz Quad-core Qualcomm Snapdragon 410 processor, 2 GB RAM, 12.7 cm (5) HD display, Corning Gorilla Glass 3, 16 GB internal storage and Android Lollipop v5.1.1 OS.
The well-known and senior XDA developer squid2 has recently developed the famous TWRP custom recovery for Moto G 3rd Gen smartphone. In this article, we’ll see a detailed step-by-step procedure on how to Root & install TWRP recovery on Moto G 3rd Gen (2015). I recommend using every single step given below at your own risk.
Disclaimer:
If by mistake any damage happens to your Moto G 3rd Gen (2015) then neither I nor the developers will be responsible for that. Although the chances that your Moto G 3rd Gen will get damaged by following this article are at least still you must attempt every step correctly.
Caution:
Note that this guide is only for Moto G 3rd Gen (2015). Applying this on any other device or other variants may damage your device. Hence, confirm that you are using the same phone as mentioned.
Requirements:
- This procedure will void your device warranty.
- Charge your Moto G 3rd Gen at least up to 60%.
- Back up your contacts, messages, notes, call logs, apps, etc. for safety.
- Make sure your computer has Motorola mobile-specific USB drivers installed in it.
- Unlock the bootloader of your phone before going further.
- Enable the USB Debugging mode on your device.
- Also, enable the OEM Unlock mode on your phone.
Downloads:
Steps to Install TWRP on Moto G 3rd Gen (2015):
- Download and install the ADB and Fastboot setup on your computer.
- Also, download the TWRP.img file. Copy this file to the location C:\Program Files\Minimal ADB and Fastboot folder (where you’ve installed the ADB and fastboot).
- So you’ll have these files in the Minimal ADB and Fastboot folder:

- Connect your Moto G 3 to the computer using a micro USB cable.
- Now go to the C:\Program Files\Minimal ADB and Fastboot folder, hold the Shift button, and right mouse click on a space. You’ll see a list of options from which to select the Open command window here option. This will launch the command prompt window on your computer.

- Now to ensure that your Moto G 3rd Gen is properly connected to your computer or not, type the following commands in the command window and press enter:
adb devices
- As soon as you press the enter key, you’ll see a message saying ‘List of devices attached’ along with random numbers. This will confirm that your phone has been properly connected to the computer.

- If such a thing doesn’t happen, then re-install device drivers (link given in pre-requisites), enable USB debugging mode and try again.
- Now you need to boot your phone in fastboot mode. For that type the following command in the command window and press enter:
adb reboot bootloader

- As soon as you press the enter key, your Moto G 3rd Gen will boot into fastboot mode as shown below:

- You can check whether fastboot is functional or not by typing the following command in the command window and press enter:
fastboot devices
- Some random numbers along with a ‘List of devices attached’ message will prove that fastboot is functional.

- Now let’s flash the TWRP custom recovery. For that type the following command and press the enter key:
fastboot flash recovery twrp.img
- As you press enter, the TWRP recovery will get flashed. It will hardly take a few seconds to flash. Refer to the screenshot:

- After flashing, your phone will automatically boot into TWRP recovery.
- Finally! You’ve successfully flashed the TWRP custom recovery on the Moto G 3rd Gen (2015) smartphone. You can use this recovery to flash custom ROMs, root your phone, flash kernel, mods, take Nandroid backup and much more.
Steps to Root Moto G 3rd Gen (2015):
- Download and copy the Updated Super SU zip file on your phone’s internal storage. Remember not to extract this zip file.
- Now you need to boot your phone into Fastboot mode. For that firstly switch off your phone. Then press and hold the Volume down key + Power button simultaneously until you land into Fastboot mode. As shown above, you can even use the command window for booting into Fastboot mode.
- As you enter the TWRP recovery you’ll be asked to modify the system partitions or not. So just swipe to the right side to allow modifications.
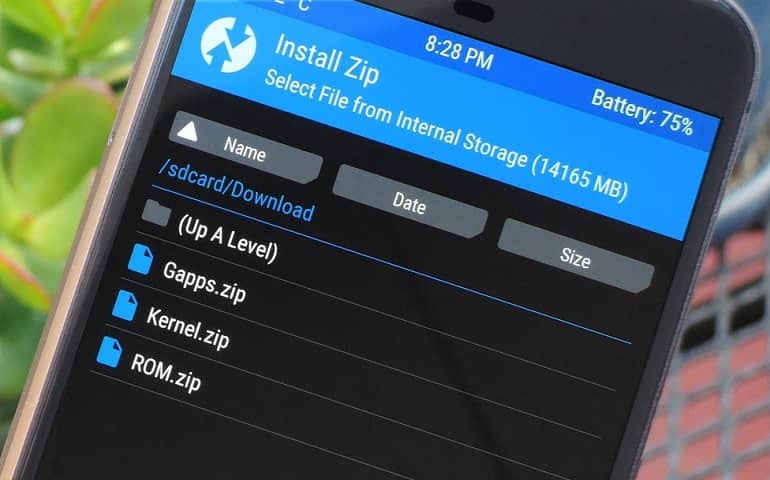
- Now you need to flash the Updated Super SU zip file which we’ve copied earlier. So press on the Install option.
- As you click on it, you’ll see all the files and folders located on the phone’s internal storage. Just navigate to the Update Super SU zip file and select it.
- On the next screen just swipe to start the actual Rooting process. Wait and be patient until it completes successfully.
- After completion, you’ll see the successful message on the screen.
- After completing everything as mentioned above, restart your device by selecting the Reboot option present on the recovery mode itself. It will take more time to start than usual.
- Finally! You’ve successfully rooted your Moto G 3rd Gen (2015) smartphone. You may use the Root Checker app to confirm the same. An app named Superuser installed on your phone will confirm that your device is properly rooted. This Superuser app supervises every app that requires root access.
Related: Install Android 8.0 Oreo LineageOS 15 ROM on Moto G3 2015
Conclusion:
Finally! You’ve successfully rooted and flashed TWRP custom recovery on your Moto G 3rd Gen (2015) smartphone. Now you can easily flash Custom ROMs and custom kernels, take backups, wipe data, and much more on your device. If you have any trouble while going through the process or have any problem regarding the content then don’t hesitate to inform me through the comment section below.