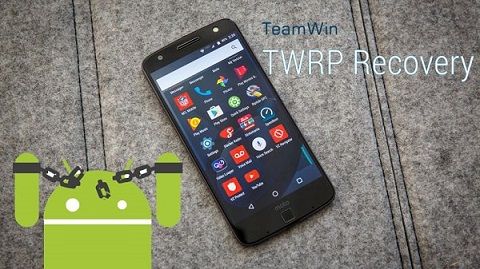
Root Moto Z (griffin) smartphone and install TWRP v3.1.1-0 custom recovery. Launched in June 2016, Motorola Moto Z is an incredibly thin Android phone with some noteworthy specs and features. But however amazing an android device is, if it isn’t rooted, you’ll never experience its maximum potential.
A rooted phone allows you to access or modify everything present on the phone. It gives a complete privilege to fully control your phones entire system. From being able to remove bloatware to flashing a custom ROM, you can get to do all these when you root your device. Here, we’ll Root Moto Z (griffin) smartphone and install TWRP v3.1.1-0 custom recovery.
All thanks to the Teamwin and Chainfire for the root and TWRP files. Flashing a custom recovery like CWM (Clockworkmod) or TWRP (Team win recovery project) gives various beneficial opportunities to implement on your phone like installing a custom firmware, custom kernel, doing a Nandroid backup or restore, flashing mods, removing bloatware, increasing internal memory, doing a factory reset and much more.
If you wish to root and install TWRP v3.1.1-0 custom recovery on Moto Z (griffin) smartphone, then the guide below is all you need.
How to Root Moto Z and Install TWRP Recovery
In this tutorial, we’ll use ADB and Fastboot commands to flash TWRP on Moto Z. Also, we’ll flash SuperSU to gain root access.
Disclaimer
This guide is intended for advanced users. If you brick your Moto Z by implementing the steps given this tutorial, whole responsibility will be yours. We’ll not be liable for any damage. Although the chances are very low.
Compatibility
This tutorial is strictly intended for Motorola Moto Z (griffin) / Moto Z Droid. Using this process on any other device or variant may damage your device permanently.
Pre-Requisites
- Charge your Moto Z to a minimum of 60%.
- Backup your contacts, apps, messages, notes, call logs, etc. for safety.
- Install Motorola USB drivers on your PC.
- Unlock the Bootloader of your mobile before moving further.
- Enable USB Debugging mode from your phone settings.
- Also, enable the OEM Unlock mode from the Developer options.
Downloads
Steps to Install TWRP recovery on Moto Z
- Download and install the ADB and Fastboot setup on your computer.
- Also, download the TWRP.img file on your computer.
- Copy this twrp.img file to the location C:\Program Files\Minimal ADB and Fastboot folder.
- So you’ll have these files in the Minimal ADB and Fastboot folder:
- Using the USB cable connect your mobile to the computer.
- Now go to the C:\Program Files\Minimal ADB and Fastboot folder, hold the Shift button and right mouse click on a space.
- You’ll see a list of options from which select Open command window here option.
- This will launch the command prompt window on your computer. Refer screenshot.
- Type the following commands in the command window and press enter key:
adb devices
- As soon as you press enter key, you’ll see a message saying ‘List of devices attached’ along with some random numbers.
- This will confirm that your Moto Z has properly connected to your computer.
- If such a thing doesn’t happen, then re-install device drivers.
- Now you need to boot your phone into fastboot mode.
- For that, enter the following command:
adb reboot bootloader
- As soon as you press the enter key, your device will boot into fastboot mode.
- To confirm whether fastboot is functional or not, enter the below command:
fastboot devices
- Some random numbers along with the ‘List of devices attached’ message will prove that fastboot is functional.
- Now let’s flash the latest TWRP recovery.
- So type the following command and press enter key:
fastboot flash recovery twrp.img
- As you hit enter, the TWRP recovery will be installed on your phone.
- Finally, this is how you can install TWRP on Moto Z.
Steps to Root Moto Z
- Keeping the mobile in TWRP recovery mode, connect it to your PC via USB cable.
- Then copy the downloaded Super SU zip file on your phone’s storage.
- Do not extract this zip file.
- After copying the Super SU file, safely disconnect your phone from the computer.
- Now to flash the Update Super SU zip file click on the Install option present on the TWRP recovery itself.
- On the next screen, you’ll see all the files and folders located on the phone.
- Just select the Update Super SU zip file to install.
- On the next screen just swipe right to start the actual Rooting process.
- Be patient and wait until the process completes successfully.
- As soon as the process completes, you’ll see a successful message on the screen.
- This will confirm that you have successfully rooted your smartphone.
- Just click on the Reboot System option to restart your phone.
Conclusion
Finally! This is how you can root and install TWRP recovery on your Motorola Moto Z (griffin) XT1650 smartphone. If you come across any difficulty, then do comment below.




1 thought on “How to Root and install TWRP on Moto Z”
Thanks for structured step by step process. Love you