Nowadays, Ads are everywhere. You load a website, open an app or watch the video, and Ads won’t stop showing. After a particular time, it becomes annoying, and then you start looking for a way to block Ads. Indeed, there are many ways to block Ads on Android but believe me, the one we have mentioned below is the easiest option of all. So, without wasting much time, let’s understand how you can block ads on your Android phone or tablet. But first, we’ll see how the thing works to make this happen.
What is DNS, and How can it help Blocking Ads on Android?
DNS stands for ‘Domain Name System.’ It’s not as difficult to understand the working of DNS as it may sound. Let me elaborate more on DNS by taking the phone dictionary. In the early days, there were no mobile phones. Instead, we had landlines. To call any person, we either need to know their phone number or refer to the phone dictionary. The phone directory contained the landline number of each person in alphabetical order. So, it was easy to find anyone’s number in a few minutes, going by the order.
DNS Server Example
Now imagine browsing the internet and hitting Google.com in the address bar. What would happen? Google’s homepage would appear on your screen. But have you ever wondered how did that happen exactly? Well, let me tell you the process. Whenever you type any URL in the browser, you enter the domain name. Every domain name on the internet has an IP address allocated to it. So, when you hit the domain name, you are accessing the index page stored on the associated IP address. Still confused? No problem! Let me elaborate further. The IP address of Google is 142.250.77.46. Now copy this IP, paste it into your browser’s address bar, and hit that Enter key. What came up on the screen? Is it the same page that you got by entering Google.com? It has to be. But wait! Who told the browser that the IP of Google.com is 142.250.77.46? Ah, now you see it, right? It’s the DNS server that communicates with the browser and returns the IP address of Google.
You might be interested: How to Fix Chrome DNS Probe Finished Error.
DNS server sits remotely and lets your browser know the IP address of any website that you are trying to access. It’s kind of a dictionary that your browser gets data from. Your internet service provider (ISP) handles the DNS server part by default. But if you wish to change it to any custom DNS server, you can.
How Changing DNS helps block Ads on Android?
Now that you have a fair idea of how the DNS server functions, I’ll explain to you how changing the default DNS server helps block the Ads.
The default DNS server serves all the requests that your browser demands. It can be any IP. When the Ads are loaded, they are fetched from a remote server. The server from which Ads are being served also has its IP address. So, when your browser checks the Ad URL while loading the page, it fetches the IP addresses from the DNS server. In short, the DNS server has all the data mapped for requested domain names, be it an Ad server or a regular web server. So, what if we change this IP address to domain name mapping in the DNS server? Well, that would do the trick.
Related: How to Flush DNS Cache on Android?
The mapping in the Ad blocking DNS server is done in a way when it gets the request to server IP of Ad URL, it returns a fake or dummy IP, and thus, you don’t see any Ad.
- Gets rid of the Ads by returning dummy IP address to the browser.
- Stops annoying Ad popups from loading.
- Block YouTube Ads.
- Hampers the website revenue, which could the only earning source for it.
- May slow down the page loading speed, depending on the DNS server you choose.
Steps to Block Ads on Android Phone or Tablet
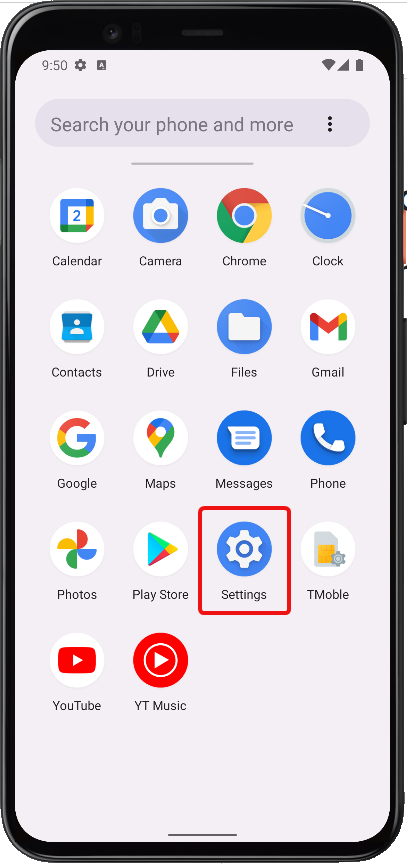
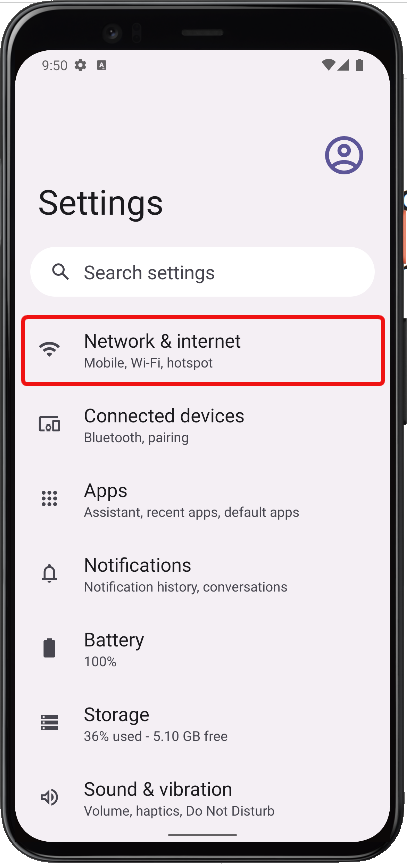
- Open the App launcher on your Android phone or tablet and select the ‘Settings‘ icon.
- Select the first option viz, Network & Internet.
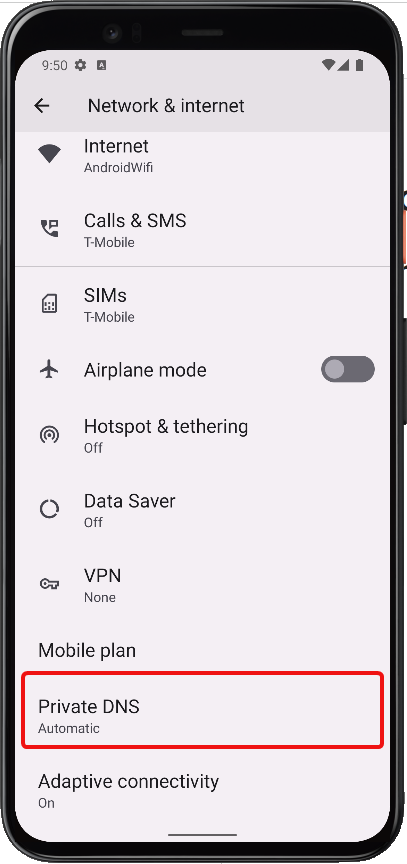
- Scroll down the list and select ‘Private DNS’ option.
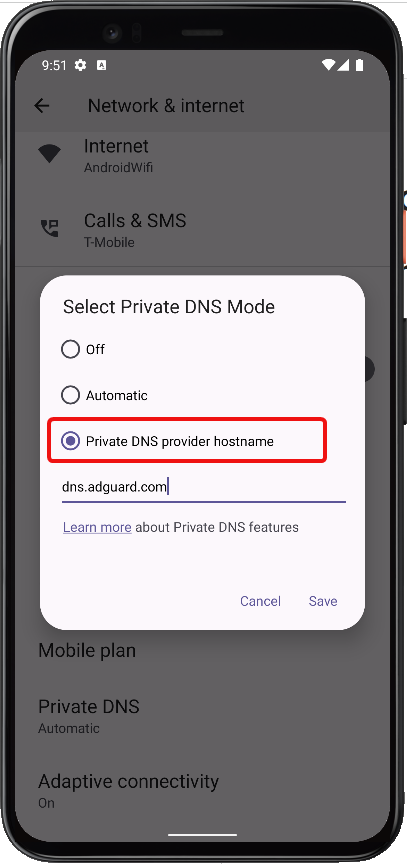
- Change the Private DNS Mode from Automatic to ‘Private DNS provider hostname’. In the DNS field, enter the following DNS address and press save.
dns.adguard.com
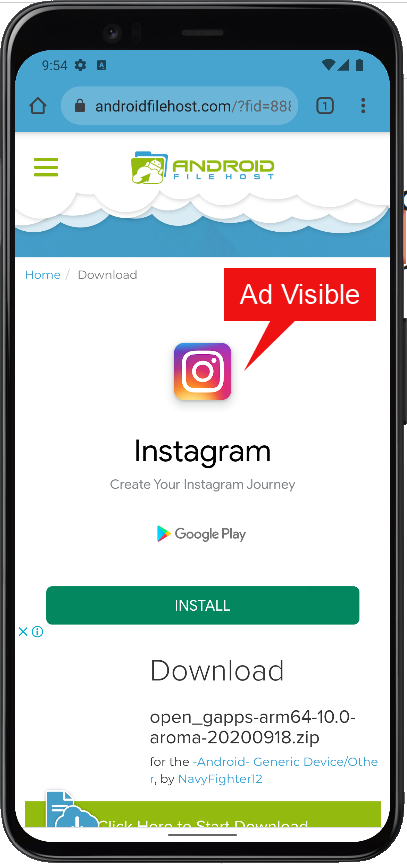
- After applyling the private DNS, it’s time to check its working. Open Google Chrome browser or any browser for that matter. Navigate to your favourite website who used to show the ads. Check if the ads are still there. If you don’t see any Ad, that means changing DNS has done the trick.
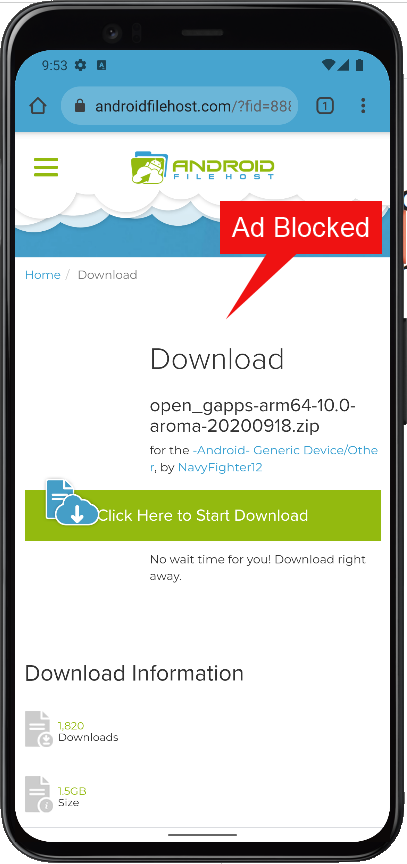
In the images below, I have opened androidfilehost.com for the test. The left image is before changing DNS and right image is applying the DNS. You can clearly see that the Ad was visible in the first image, whereas, the Ads are blocked in the second image.
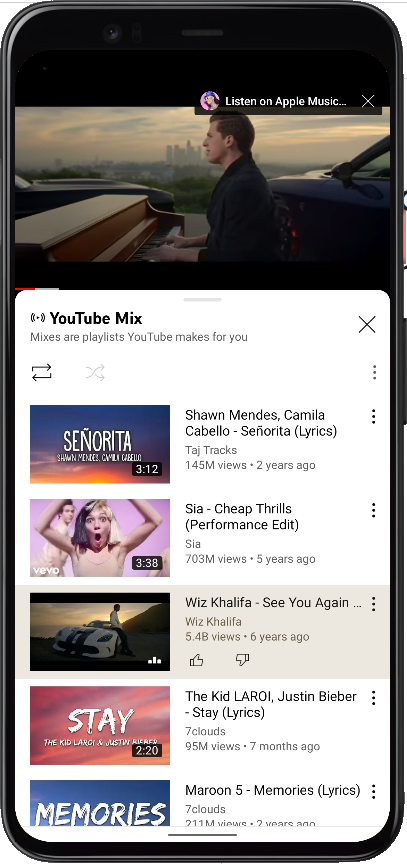
- You can also check the Ad blocking in YouTube Android app. Once you’ll change the DNS to AdGuard, you will no longer see any ads anywhere.

Have a Clean Browsing Experience!
So, that’s how you can block ads from loading. But remember! While it is fair to prevent ads from loading, it’s equally hurtful for the publishers, content creators, and writers who work hard to keep you updated and deliver the content you need. If you like to support them, then please allow ads from serving as it could be their only income source.
I hope you found this article helpful. Let me know your thoughts on Ad blocking in the comments below.