
There are various ways to install custom ROM on any Android smartphone or tablet. However, most of the users prefer TWRP custom recovery for the flashing process. Follow this guide to flash custom ROM with ADB sideload command.
This easy-step guide will sideload the custom ROM zip package file by implementing commands in the CMD window. But you might be thinking, why use sideload when you can flash the custom ROM using TWRP recovery?
The answer is quite simple. If you accidentally format or factory reset your Android device with internal memory only (no external SD card), then it is pretty tricky to restore the default settings.
At such times you can either flash official stock firmware or use ADB sideload to install custom ROM directly from a PC. Hence, ADB sideload can be a lifesaver for those who have bricked their handset and there is no possible way to load the ROM.
What is Android Debug Bridge?
ADB is a command-line tool included in the Android SDK development kit. It is used to communicate with any device that runs the Android operating system. You can use the ADB commands to perform various operations on your Android device.
With the help of the Android Debug bridge, you can install custom ROMs, mods, GApps, backup Android, flash official stock firmware, and install Android apps. Besides, you can also use ADB to uninstall bloatware without Root, downgrade an app, etc.
What is ADB Sideload?
ADB sideload is a command that transfers and installs a zip file on an Android device from the PC. This command is handy for a custom ROM developer to push and install any installation zip file directly on a device.
The sideload feature was introduced with the Android Jelly Bean recovery. Most importantly, this sideload mode requires a TWRP recovery version 2.3 or higher. Besides, it is also essential to install the latest ADB binaries on your PC.
How to Flash Custom ROM using ADB and Fastboot
Are you ready to use ADB and Fastboot for flashing custom firmware on your Android phone? Then let’s get started.
Disclaimer
Installing a custom ROM can void your device warranty. Additionally, you will no longer receive the official firmware update. Note that this is a risky process, and your phone might get stuck into a boot loop. We at Droid Thunder will not be liable for any damage. Proceed at your own risk.
Warning
Ensure to install the right custom ROM on your Android phone. Do NOT proceed if the firmware is incompatible with your phone model number.
Requirements
- A Windows PC and a standard USB cable.
- Charge your device to a minimum of 50%.
- Install mobile USB drivers on your computer.
- Enable USB Debugging mode from your device settings.
- Also, enable the OEM unlocking and Advance reboot mode.
- Moreover, unlock your device bootloader.
- Install TWRP 2.3 or higher on your Android device.
- (Optional) Temporarily disable the antivirus and firewall on your PC.
Steps to Install Custom ROM using ADB Sideload
Follow these step-by-step instructions to sideload the zip file on your Android phone.
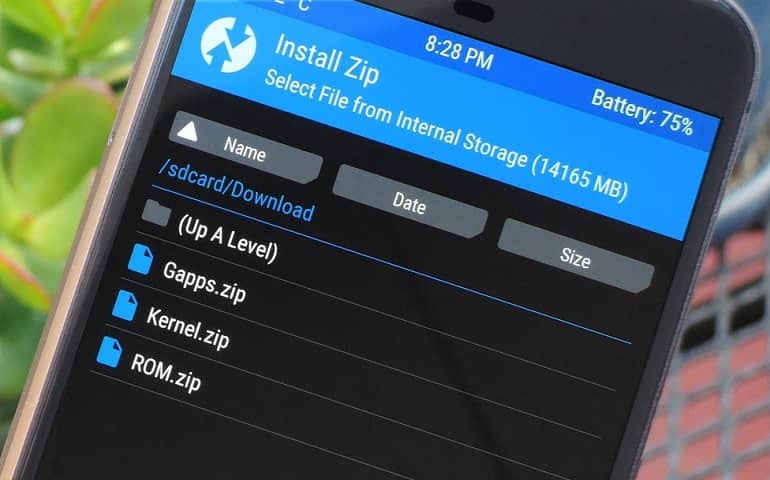
1. Download Custom ROM
- First, download the mobile-specific Android custom ROM on your PC.
- Ensure that the ROM file is in zip format.
- Also, download the correct firmware that is compatible with your device’s model number.
2. Install ADB and Fastboot drivers
- Download and install the latest ADB drivers on your computer.
- Make sure that the ADB version is 1.0.29 or higher.
3. Transfer Custom ROM to ADB folder
- Copy the downloaded custom ROM and paste it into the ADB folder.
- The folder default location will be C:\Program Files\Minimal ADB and Fastboot.
4. Boot Android phone into Recovery mode
- Switch off your Android phone.
- Now, restart it into recovery mode.
- Every device has different methods to boot into recovery.
- You can either Google it or use the Recovery reboot app from the Play Store.
5. Set the device into ADB sideload mode
- As soon as you enter the recovery mode, click on the Advanced button.
- On the next screen, click on the ADB sideload option.
6. Connect Android phone to PC
- Now, connect your Android device to the computer using a USB cable.
- Keep the device as it is in sideload mode.
- After a successful connection, tick the Wipe Davik Cache and Wipe Cache options.
- Then, swipe right on your device to start sideload.
7. Launch CMD window
- Open the ADB folder, hold your keyboard’s Shift button, and right-click.
- From the list of options, tap on the Open command window here option.
- This will open the command prompt window on your PC.
8. Confirm the ADB connection
- Furthermore, type the below command in the cmd window and press the enter key:
adb devices
- You’ll see some random numbers with a ‘List of devices attached’ message.
- This will confirm that your Android device is successfully connected to the PC.
9. Flash Custom ROM with ADB sideload command
- To flash the custom ROM zip package file, enter the below command in the CMD:
adb sideload LineageOS18.zip
- Make sure to type the exact name of the custom ROM file.
- Also, don’t forget to add the zip extension at the end.
- Here, I’m flashing LineageOS18 custom ROM.
- Finally, hit the enter key to begin the ROM flashing process.
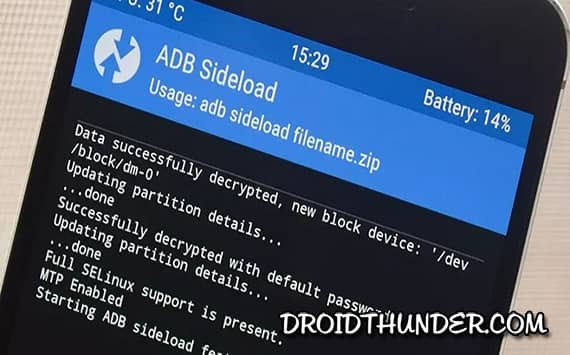
10. Reboot Android phone
- On the installation finishes, your device will show a message saying, ‘ADB sideload complete.’
- Tap on the Reboot System option to restart your device.
Conclusion
We hope this guide will help you install custom ROMs on any Android phone using the ADB sideload command. If you like this article, then please share it on your social media platforms. Finally, if you face any difficulty, then please drop a comment below.


14 thoughts on “How to Flash Custom ROM using ADB sideload”
Thank you for this very detailed tutorial. However, I would like to know if it is possible to sideload a custom ROM with .img extension. Is there any other way to install a custom ROM besides fastboot?
You can install custom ROM using TWRP, OrangeFox recovery, and Odin (Samsung).
Thanks for your post
i have a bijjus tablet i want o flash it don’t know how to do I cant do anything from device cause its locked
Good article, helped me a lot
phone is encrypted can’t update through adb sideload?
Yes, this is I really needed. My recovery is getting encrypted because no custom recovery currently supporting android 12 rom. My phone was stuck into boot loop and I dont have any way to install rom because internal storage was encrypted. So I used this method to flash custom rom and my phone got booted otherwise I have to format data to remove encryption but again when I boot to recovery it will get encrypted again. So till no custom recovery supports decryption, I can use this method. Thank you. 🙂
enter your lockscreen password
Hi, I have LG G3 (D855), with TWRP v2.8.6.1.
When doing
adb sideload .\lineage-18.1-20211002-nightly-d855-signed.zip
I just get
Total xfer: 0.00x
and on the cellphone, on top
ADB Sideload Complete
Failed
and on the text output:
E:unknown commad [log]
E:Error executing updater binary in zip ‘/sideload/pacakage.zip’
Starting ADB sideload feature….
Installing ‘/sideload/pacakge.zip’….
Any hints why this error and how I can resolve it?
Refer this guide to fix the error.
yep I really thought i broke my phone because i couldnt do anything but this saved me
hi, i am getting update from external storage is disabled. installation aborted error. can you help
Great tutorial, but dont forget to wipe dsk/dalvik cache
Thanks bro..very detailed instructions