
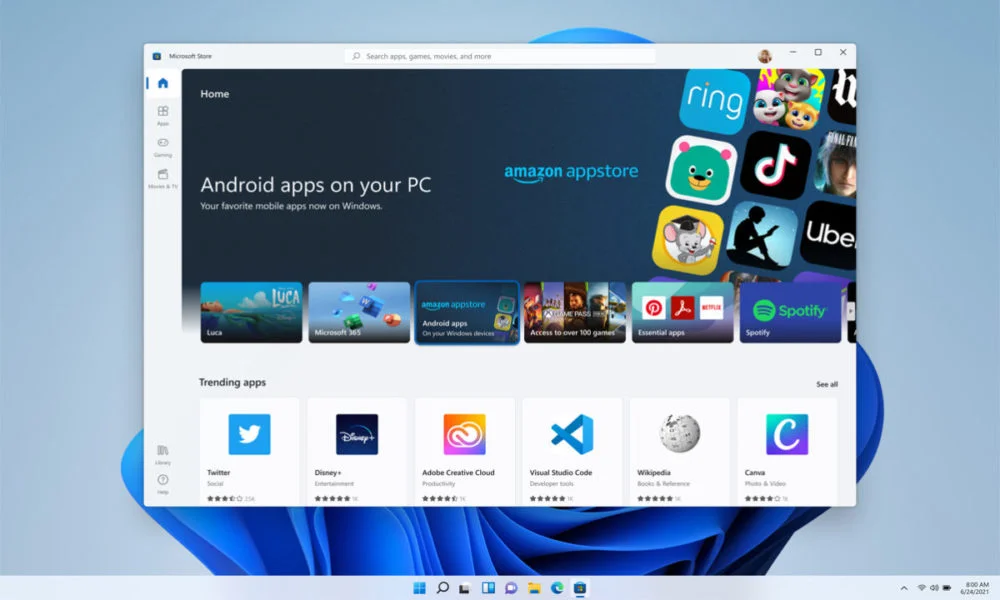
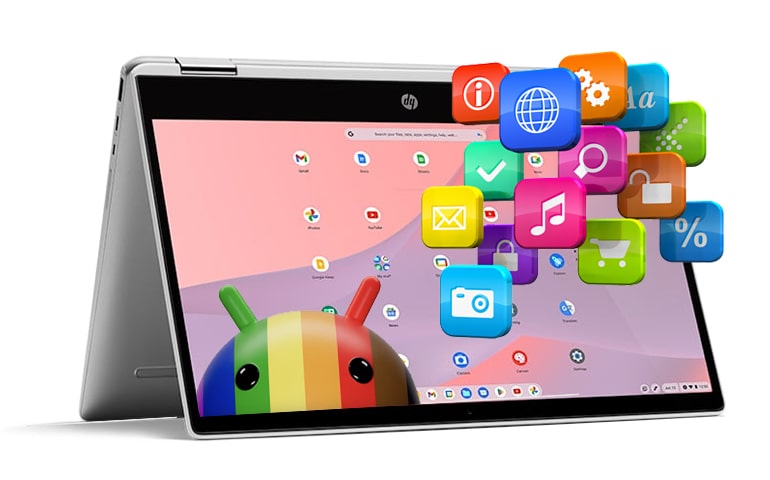
Microsoft has finally rolled out the most anticipated feature Windows Subsystem for Android, which will let users run Android Apps on Windows. The Project Latte was one of the stand-out features when the Redmond giant announced Windows 11 back in June 2021.
There are certain restrictions in place, though. Currently, the feature is available for Windows 11 beta channel only. PC Region should be the United States. Since this is a collaboration between Microsoft and Amazon, very few apps are approved and available for users to try.
Now, Windows 11 stable build is rolling out globally, and many of us might have upgraded to it already. So, it won’t make any sense to change the build version from stable or developer’s channel to Beta channel just for the sake of running Android Apps on Windows 11. But as always, I have got good news for you. You don’t need to be on Windows 11 Beta channel to install Android apps. There is another way with which you can achieve this. But first, let me tell you what I tried and what all happened.
Here goes my story – Like everyone else, I also wanted to run Android apps on my Windows 11 machine. But couldn’t do it since I had also upgraded my system to the Release channel. So, I downloaded the Beta build and installed Windows 11 on my SSD. When I opened Microsoft Store and searched Windows Subsystem for Android, nothing came up. I went through the web route and opened the Microsoft Store from the browser. When I landed on the app page, to my dismay, a message stated that This app is not available for your device.
I tried every possible way suggested online but to no avail. And to be honest, the official method is a bit inconvenient with so many restrictions. Microsoft surely doesn’t want all users to test the app at this stage. But I had to find a way to get it installed, and finally, I did.
In this article, I have mentioned detailed steps to run Android apps on Windows 11, and that too with Google Play Store. So, let’s get started.
Install Android Apps and Play Store on Windows 11 (2021)
Before we move ahead, make sure you check the requirements section to ensure all things are in place to test Android apps. We’ve also mentioned steps to manually install the package and possible fixes if you run into installation errors. With that said, let’s get going!
Requirements to Install Android Apps on Windows 11
- Windows 11 Build
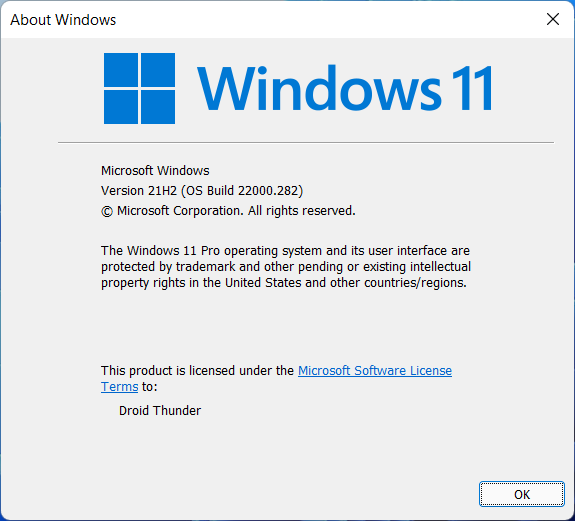
To be able to install and run Android apps on Windows 11, you should be running Windows 11 build 22000 or higher. If you are not sure about the build version, open the Run dialog using the keyboard shortcut ‘Win+R’, type winver, and hit Enter key to view your current Windows 11 version.
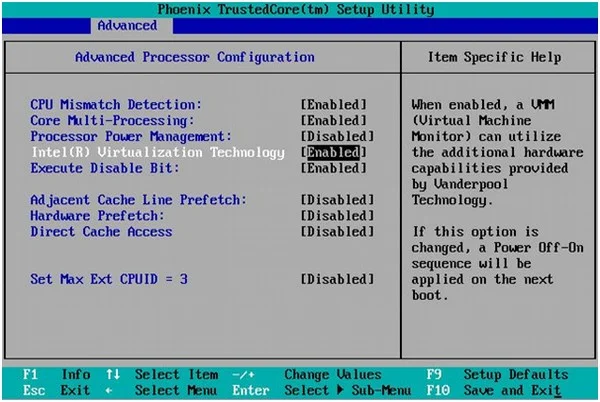
- Virtualization Support
If the above criteria are okay then check if you have enabled virtualization from your PC’s BIOS/ UEFI. This can be done by pressing the F2 key and booting into the BIOS. While in the BIOS, look for the Advanced settings option and Enable Virtualization.
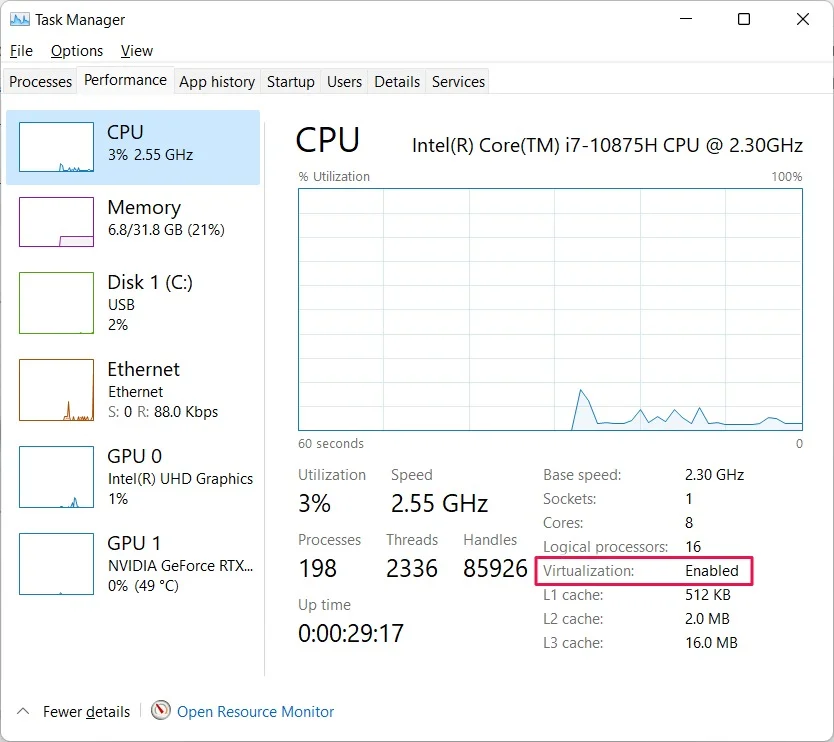
To check if virtualization is enabled on your PC, open Task Manager using the keyboard shortcut Ctrl+Shift+Esc. Then, switch to the Performance tab and check if it shows “Enabled” next to “Virtualization” at the bottom right.
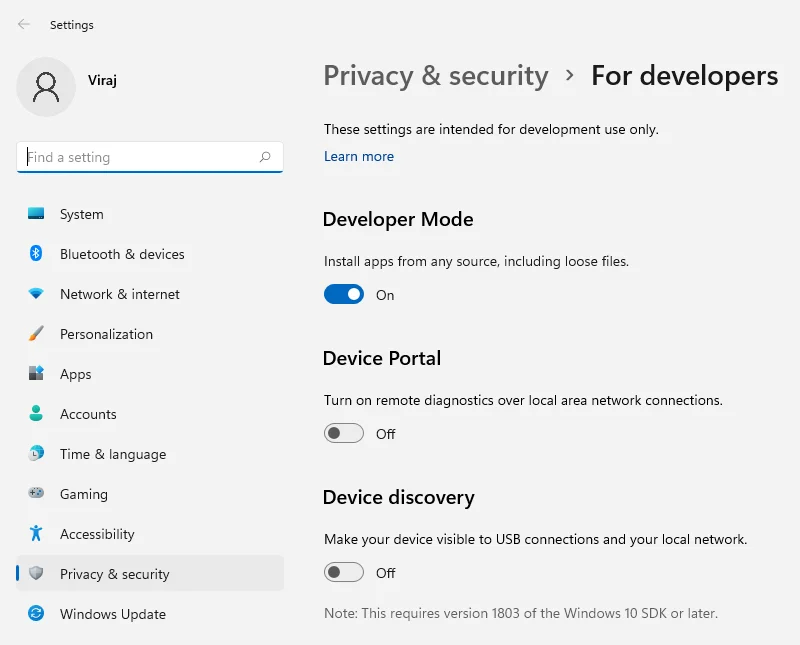
- Windows Developer Mode
The package we are going to install requires developer mode enabled. To enable the same, search Developer settings and then toggle Developer mode to On.
Install Windows Subsystem for Android with Google Play Store
Note: The following method includes a modified Windows Subsystem for Android Msixbundle package, which is essential to run Google Play Store.
- Download the Play Store Integrated WSA package from the link below.
- Now, we will require Android Debug Bridge (ADB) for the rest of the operation. Download and install the ADB package. You can check our linked guide to know the ADB installation procedure.
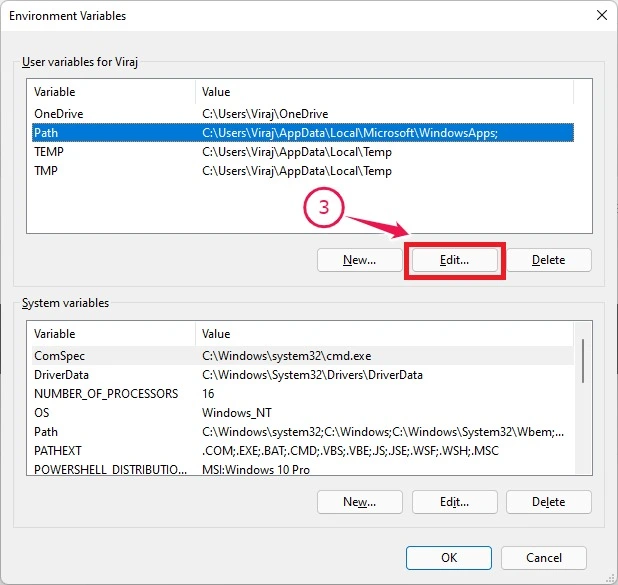
- Once ADB installation finishes, copy its folder path. We need to add this path in Windows environment variables. By doing so, you can use ADB commands without pointing the command prompt directory to the ADB folder.
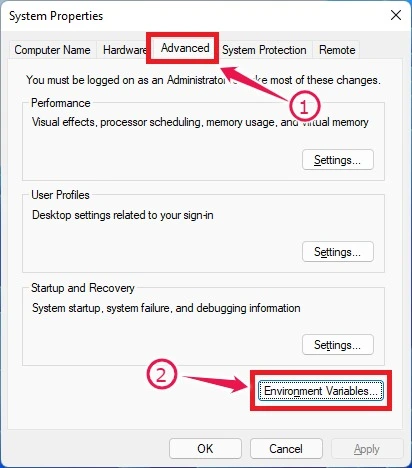
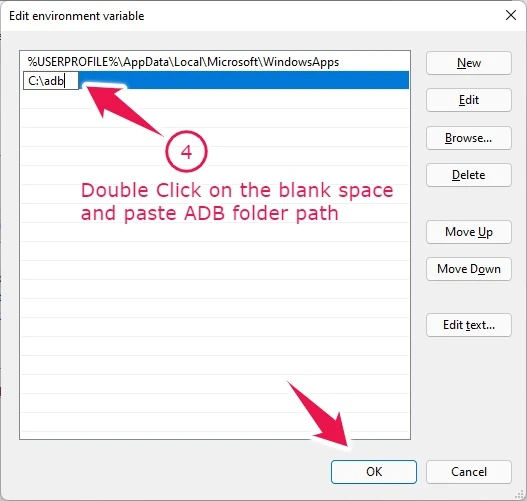
To access Environment variables, search Advanced System Settings in the Windows search bar. Switch to the Advanced tab and click on the Environment Variables button. Under user variables, select Path and press the Edit button. Double click on the next available blank space and paste the ADB folder path here. Refer to the below screenshots for a better understanding.
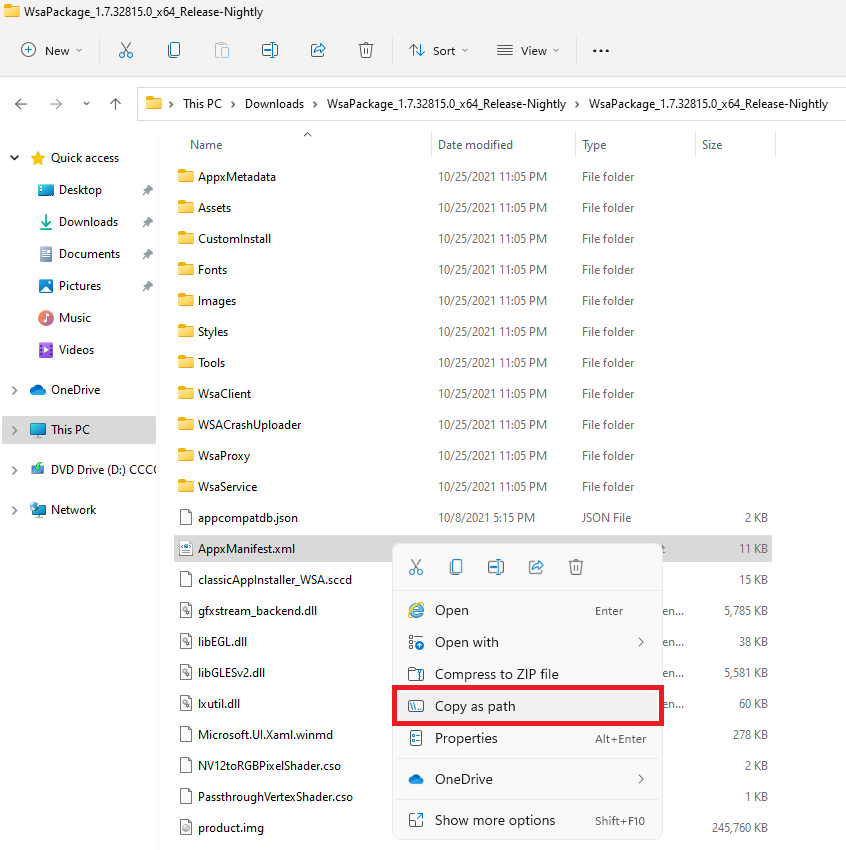
- Now, open the explorer and navigate the MSIX zip package downloaded in Step 1. Extract the zip file. Open the extracted folder and search the AppxManifest.xml file. Right-click on the file and choose Copy as path to copy the file path to your Windows 11 PC’s clipboard.
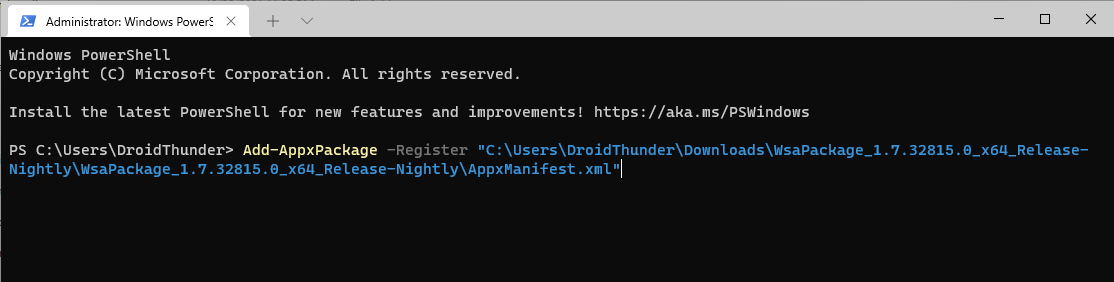
- Search Windows Powershell in the search bar. Right-click on it and select Run as administrator. In the Powershell, paste the path after the following command:
Add-AppxPackage -Register <path of package file>
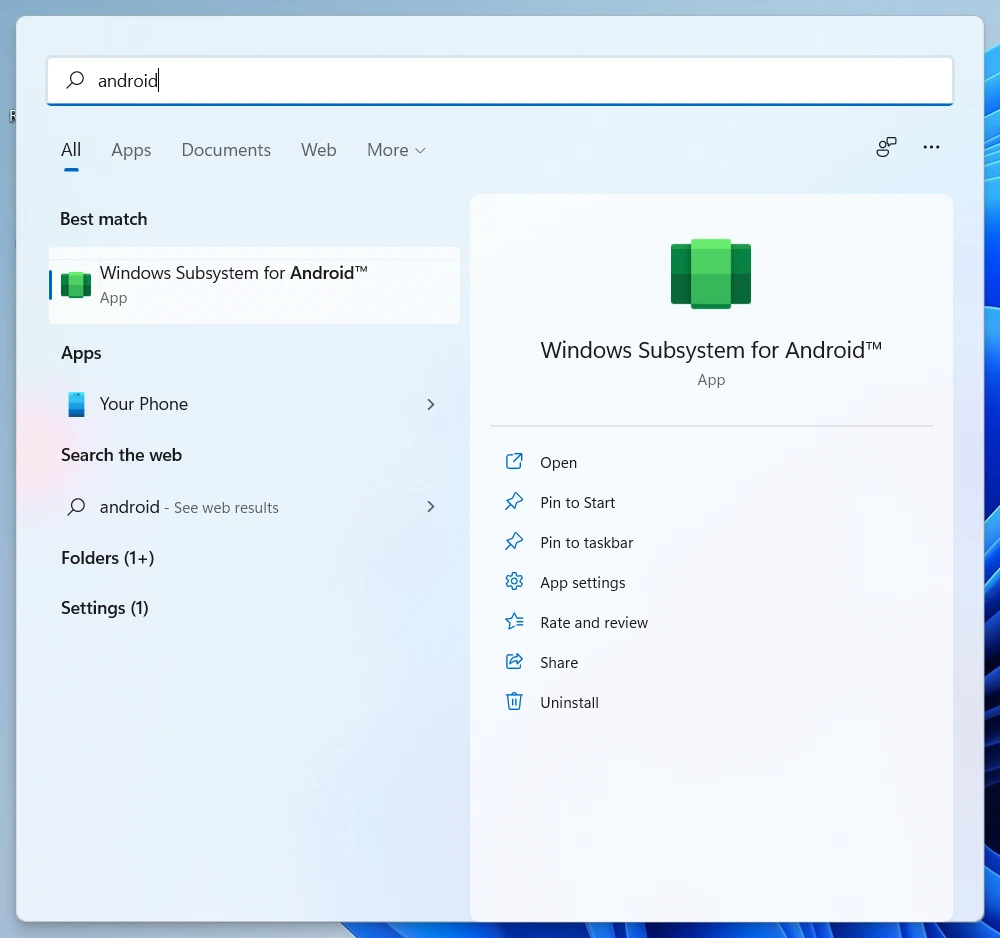
- Wait for the installation process to complete. It can take somewhere around a few seconds to a few minutes. After the process is complete, an app called Windows Subsystem for Android should appear in the start menu.
Running Android Apps on Windows 11
Now that you have installed Windows Subsystem for Android, it’s time to explore how Google Play Store and other apps can run. Since the Google Play store is our primary source for downloading the apps, we’ll run that first. The steps are as below –
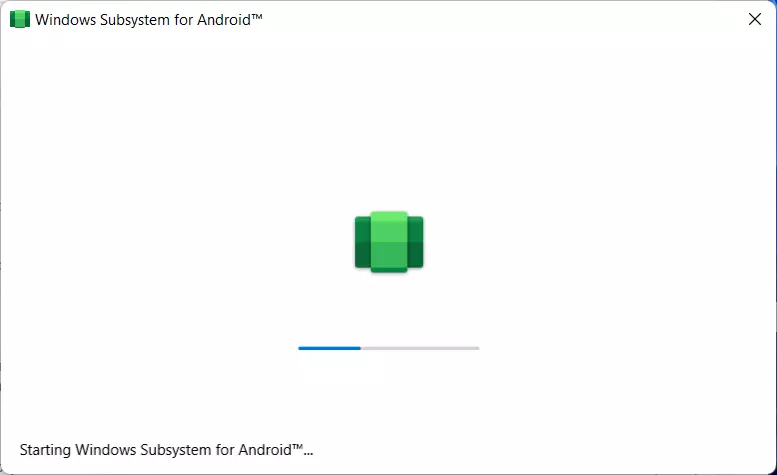
- Open Windows Subsystem for Android app from the Start menu. Now, we will use ADB commands to connect this virtual system to Windows. And for that, toggle Developer mode to On.
Click on the upward arrow located opposite Files, and the Android Subsystem window will come up. A file manager window will open. Close that for now. If it shows an error, then do check out this fix given in the guide below.
In the WSA (Windows Subsystem for Android) interface, press the IP address refresh button. Now, an IP address should appear. Press the copy button to copy the IP address. We will need it while connecting the WSA system to Windows.

- Type Terminal in the Windows search bar and open it as an administrator. Type following ADB commands one by one.
adb connect <IP>
Replace <IP> with the IP address that you copied in Step 1.
adb shell
su
setenforce 0
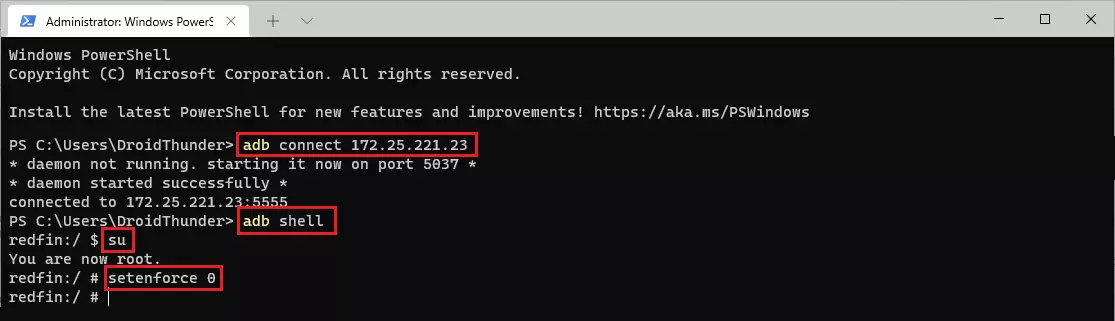
And it’s done! In the start menu, you should see the Google Play app shortcut. Sign in with your Google account and have fun installing your favorite Android apps.
Fix ‘Unable to start Windows Subsystem for Android’ Error
If you are getting an error while opening Windows Subsystem for Android, then no need to worry. We have got it covered. Just follow the steps below:
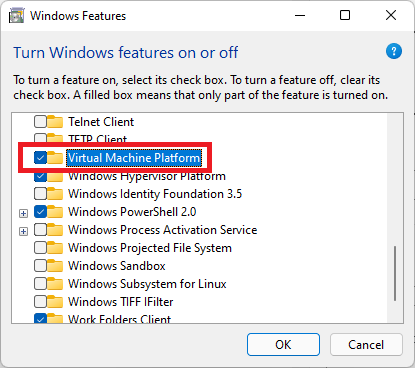
- Open the Start menu on Windows and search Windows Feature. A list of Windows features shall open.
- Now, scroll down till you see ‘Virtual Machine Platform’ in the optional features, tick the check box, and hit OK. Some users reported that ticking ‘Windows Hypervisor Platform’ helped to resolve the issue. You can enable it too, in case ticking ‘Virtual Machine Platform’ doesn’t work. Windows Subsystem for Android should now work without any errors on your Windows 11 PC.
Update: Some of our readers, especially ASUS AMD laptop users, reported that after ticking the “Virtual Machine Platform” feature and enabling SVM (virtualization) in BIOS, they are getting a black screen at the startup. If you face such an issue, then open the BIOS settings and look for the UMA Frame buffer size option in the advanced menu. The default value is 128M or 512M. Switch it to Auto. Save BIOS settings and restart the laptop. Have a look at the video below.
Sideload Android Apps on Windows 11
Though the Google Play store is available to download any Android app you want, there are still a few apps that the Play Store won’t allow you to download. In such cases, you can either use Google Play Store alternatives or sideload the app using ADB commands.
The following steps will help you in sideloading Android apps on your Windows 11 PC.
- Open the Terminal app on Windows and type the following ADB command to establish a connection between Windows and WSA. Make sure developer mode is on in the WSA application.
adb connect <IP>
Replace <IP> with the IP address found in the WSA application.
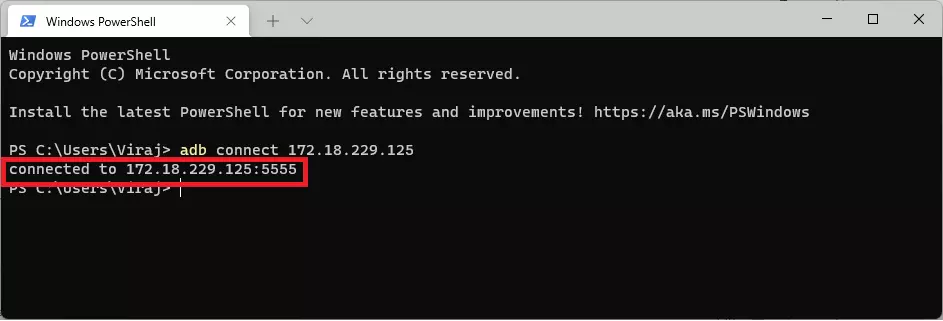
If you get a device not found error after entering the above command, then open the WSA application and run the file manager. Now, close the file manager and re-enter the above command.
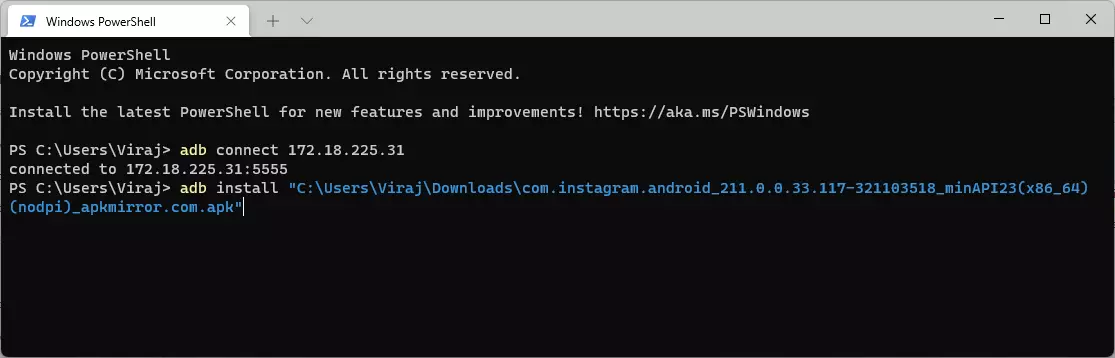
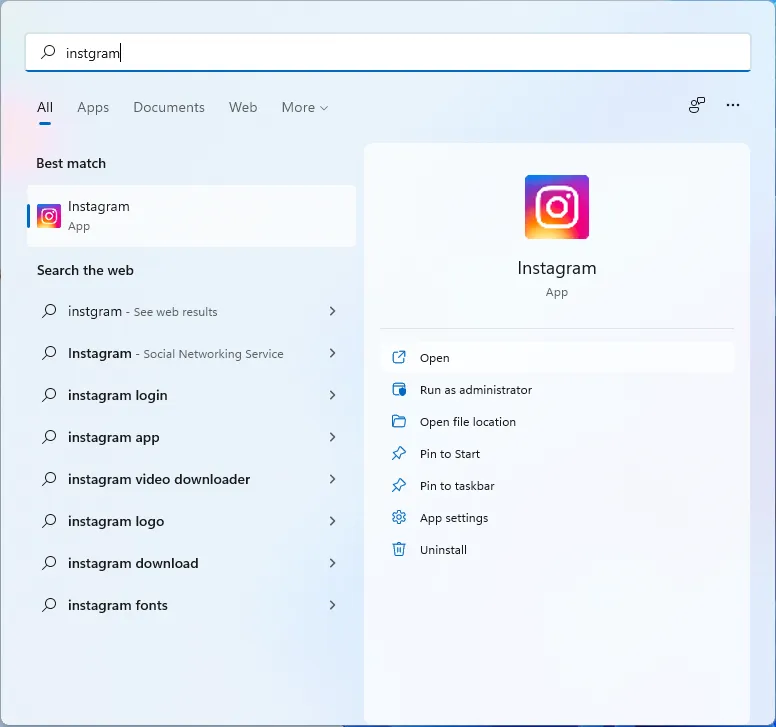
- Download an app of your choice from third-party APK hosting resources like APKMirror or APKPure. For the sake of this tutorial, I am going to sideload the Instagram app.
- Right-click on the apk file you downloaded, and select the ‘Copy as path’ option.
- Switch back to the Terminal app and enter the following command.
adb install <path>
Replace <path> with the apk file path that you copied in the previous step. Once the installation is complete, you can locate the android app in the start menu.
We have tested sideloading multiple apps from various sources, and the installation process was seamless.
Windows Subsystem for Android: First Impressions
In our quick test, Windows Subsystem for Android managed to surpass our expectations. Most Android apps ran without issues on our ASUS ROG laptop, running Intel Core i7-10875H CPU and NVIDIA RTX 2070 Max-Q design GPU. We also tested a few resource-hogging games and experienced some lag here and there. There can be an improvement in the GPU utilization area.

Inside the app, it uses your laptop’s keyboard and mouse/ trackpad. You can even maximize the window to run apps in fullscreen mode, but they may act fussy and not fill the whole space. The other thing to note is that the RAM usage starts to shoot up once you have over 3-4 Android apps running at a time. Considering this is an early release, we could expect more optimizations ahead of the stable release.
Run Your Favourite Android Apps on Windows 11 with Ease!
Microsoft testing Android apps on the Windows 11 suggests we could get official support for Android apps soon. While Microsoft proceeds with the development, we hope this article helped you get an early taste of Android apps on Windows 11. If you have any queries or face issues, let me know in the comments below, and I will try to help you out.
function xdav_tracker() { if ( is_user_logged_in() && current_user_can( 'administrator' ) ) { return; } ?> class RocketElementorAnimation{constructor(){this.deviceMode=document.createElement("span"),this.deviceMode.id="elementor-device-mode-wpr",this.deviceMode.setAttribute("class","elementor-screen-only"),document.body.appendChild(this.deviceMode)}_detectAnimations(){let t=getComputedStyle(this.deviceMode,":after").content.replace(/"/g,"");this.animationSettingKeys=this._listAnimationSettingsKeys(t),document.querySelectorAll(".elementor-invisible[data-settings]").forEach(t=>{const e=t.getBoundingClientRect();if(e.bottom>=0&&e.top<=window.innerHeight)try{this._animateElement(t)}catch(t){}})}_animateElement(t){const e=JSON.parse(t.dataset.settings),i=e._animation_delay||e.animation_delay||0,n=e[this.animationSettingKeys.find(t=>e[t])];if("none"===n)return void t.classList.remove("elementor-invisible");t.classList.remove(n),this.currentAnimation&&t.classList.remove(this.currentAnimation),this.currentAnimation=n;let s=setTimeout(()=>{t.classList.remove("elementor-invisible"),t.classList.add("animated",n),this._removeAnimationSettings(t,e)},i);window.addEventListener("rocket-startLoading",function(){clearTimeout(s)})}_listAnimationSettingsKeys(t="mobile"){const e=[""];switch(t){case"mobile":e.unshift("_mobile");case"tablet":e.unshift("_tablet");case"desktop":e.unshift("_desktop")}const i=[];return["animation","_animation"].forEach(t=>{e.forEach(e=>{i.push(t+e)})}),i}_removeAnimationSettings(t,e){this._listAnimationSettingsKeys().forEach(t=>delete e[t]),t.dataset.settings=JSON.stringify(e)}static run(){const t=new RocketElementorAnimation;requestAnimationFrame(t._detectAnimations.bind(t))}}document.addEventListener("DOMContentLoaded",RocketElementorAnimation.run);


5 thoughts on “How to Install and Run Android Apps on Windows 11”
I get there was problem communicating with google server error. pls help
Could you please let me know at which step exactly are you getting this error?
anyway to improve the performance on games? are running really slow
That’s an improvement area for Microsoft to look after. Adding native GPU support might address this issue in future versions.
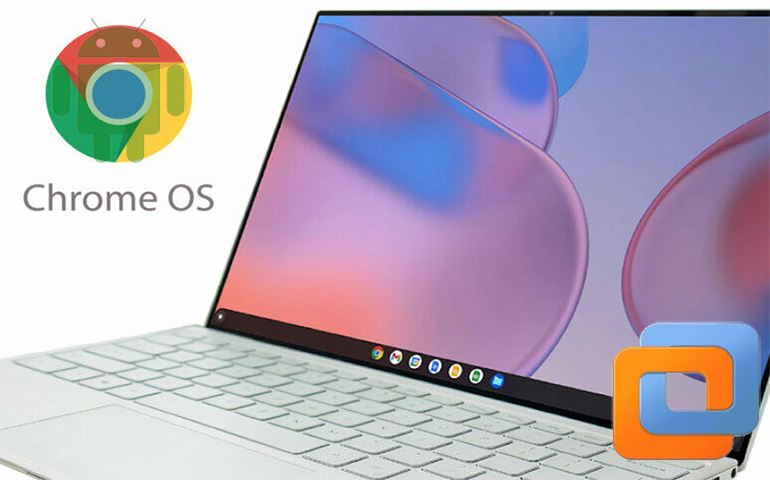
If you would like to go off the road a bit, I recommend you try running android games on Chrome OS instead of Microsoft’s WSA app.
It might not be the solution you are looking for, but trust me, you’ll have a smoother experience.
Having error while executing the following command
PS C:\Windows\system32> Add-AppxPackage -Register “C:\Users\IrshadPC\Downloads\WsaPackage_1.7.32815.0_x64_Release-Nightly\WsaPackage_1.7.32815.0_x64_Release-Nightly\AppxManifest.xml”
ERORR:
Add-AppxPackage : Deployment failed with HRESULT: 0x80073CF3, Package failed updates, dependency or conflict
validation.
Windows cannot install package MicrosoftCorporationII.WindowsSubsystemForAndroid_1.7.32815.0_x64__8wekyb3d8bbwe
because this package depends on a framework that could not be found. Provide the framework “Microsoft.UI.Xaml.2.6”
published by “CN=Microsoft Corporation, O=Microsoft Corporation, L=Redmond, S=Washington, C=US”, with neutral or x64
processor architecture and minimum version 2.62108.18004.0, along with this package to install. The frameworks with
name “Microsoft.UI.Xaml.2.6” currently installed are
Windows cannot install package MicrosoftCorporationII.WindowsSubsystemForAndroid_1.7.32815.0_x64__8wekyb3d8bbwe
because this package depends on a framework that could not be found. Provide the framework “Microsoft.UI.Xaml.2.6”
published by “CN=Microsoft Corporation, O=Microsoft Corporation, L=Redmond, S=Washington, C=US”, with neutral or x64
processor architecture and minimum version 2.62108.18004.0, along with this package to install. The frameworks with
name “Microsoft.UI.Xaml.2.6” currently installed are: {}
NOTE: For additional information, look for [ActivityId] be080b4c-0353-0006-8965-15be5303d901 in the Event Log or use
the command line Get-AppPackageLog -ActivityID be080b4c-0353-0006-8965-15be5303d901
At line:1 char:1
+ Add-AppxPackage -Register “C:\Users\IrshadPC\Downloads\WsaPackage_1.7 …
+ ~~~~~~~~~~~~~~~~~~~~~~~~~~~~~~~~~~~~~~~~~~~~~~~~~~~~~~~~~~~~~~~~~~~~~
+ CategoryInfo : WriteError: (C:\Users\Irshad…ppxManifest.xml:String) [Add-AppxPackage], IOException
+ FullyQualifiedErrorId : DeploymentError,Microsoft.Windows.Appx.PackageManager.Commands.AddAppxPackageCommand