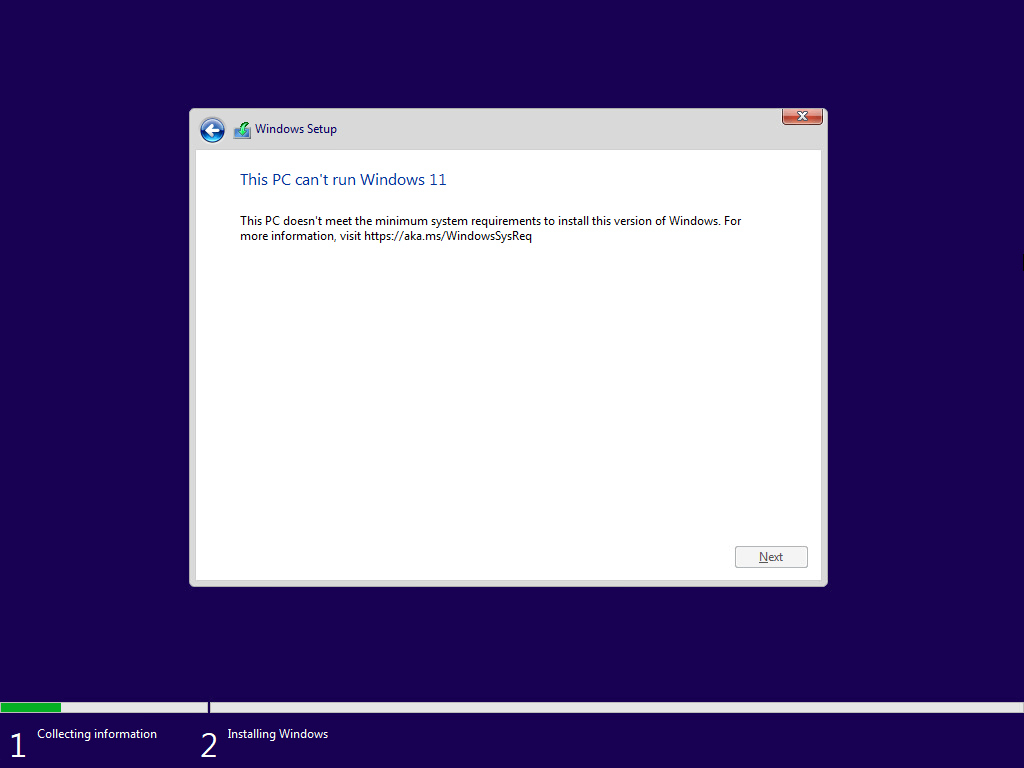
With Windows 11, Microsoft has set the system requirements to bar high. During Windows 11 installation or updating from Windows 10 to Windows 11, the OS checks for the availability of TPM 2.0 (Trusted Platform Module). It is a hardware chip embedded in your system’s motherboard. If the scan doesn’t find TPM 2.0 on your PC, it won’t let you proceed. If you try to install Windows 11 on an unsupported PC or laptop, the following message appears.
TPM 2.0 is not the only thing Windows 11 checks before the installation. It also verifies CPU and RAM. If your PC doesn’t have the latest generation CPU or possesses less than 4GB of RAM, you will get the above message for that as well.
With these restrictions in place, it is hard to run Windows 11 even on a physical system having a bit old hardware, let alone the virtual machine. This guide will help you install Windows 11 on a virtual machine.
Install Windows 11 on Virtual Machine
We have divided the article into two major sections. In the first section, you’ll learn about the configuration needed to run Windows 11 on a VMWare virtual machine. The other section discusses bypassing the ‘This PC can’t run Windows 11’ error while installing Windows on VM.
Necessary Downloads
- Download Windows 11 ISO (File Size: ~5GB).
If you intend to try new Windows features, you should download developer or beta builds. Otherwise, choose release build for the stable experience. - Download VMWare Player (File Size: ~550MB).
It is available for both Windows and Linux systems. You can also use a licensed VMWare workstation if you have that.
Install VMWare Workstation Player on your Windows or Linux PC.
Create Windows 11 Virtual Machine in VMWare Player
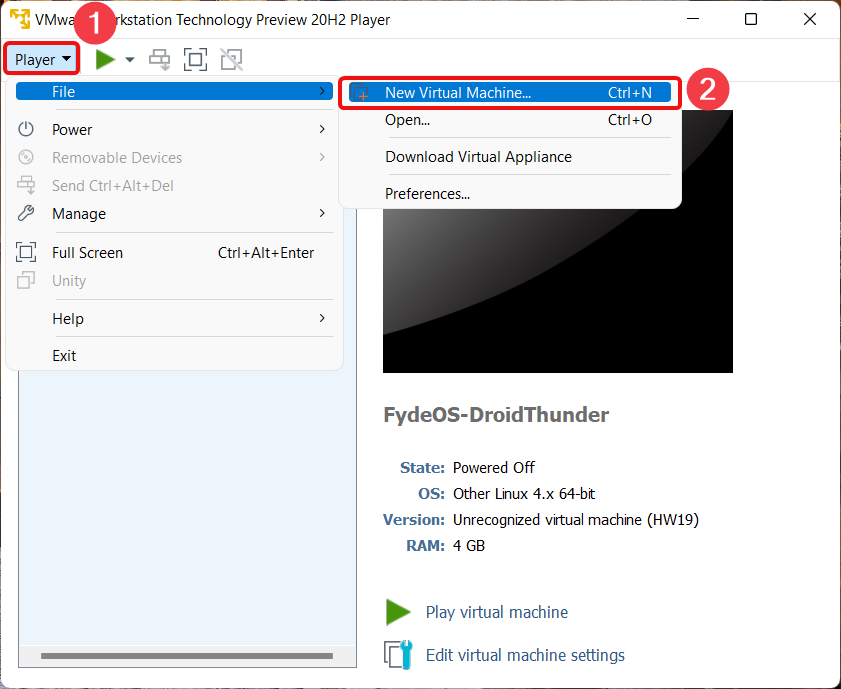
- Launch VMWare Workstation Player. On the top left, click on Player -> File -> New Virtual Machine.
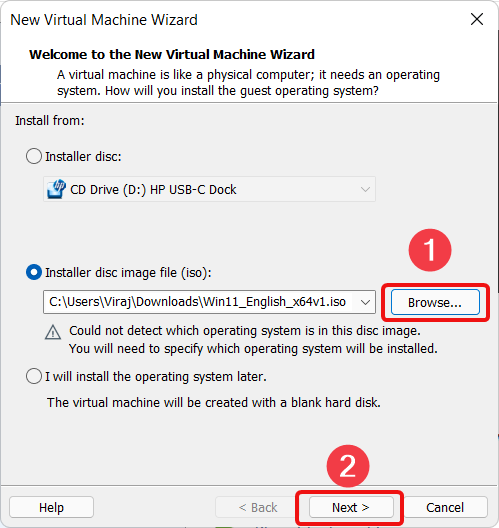
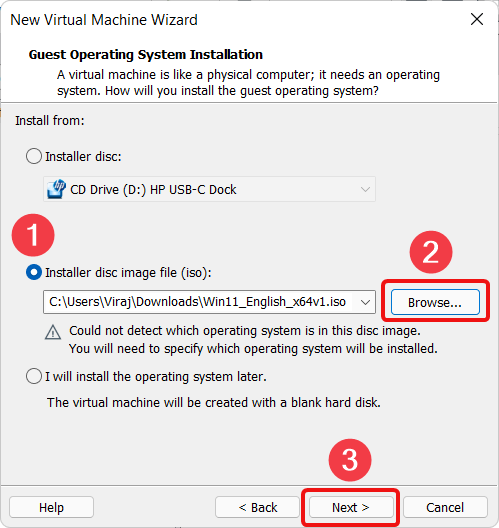
- Now, select the ‘Installer disc image file (iso)’ option and browse for the Windows 11 ISO file that you downloaded. Click Next.
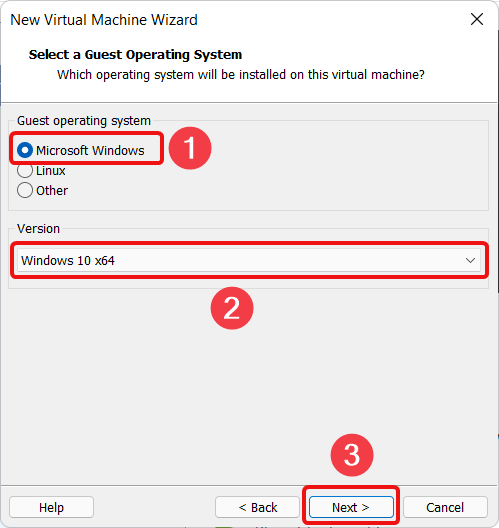
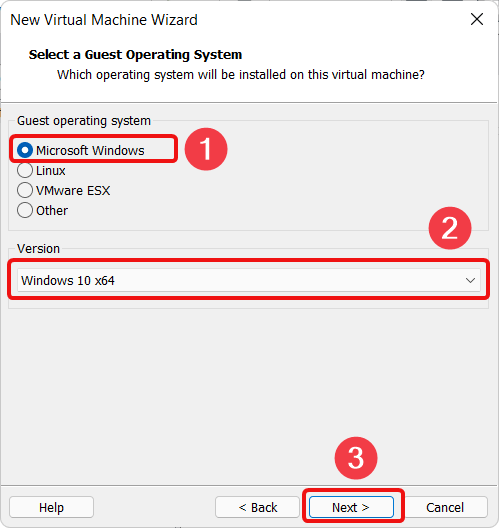
- Keep the Guest operating system Microsoft Windows and Version Windows 10 x64. Click on the Next button to proceed.
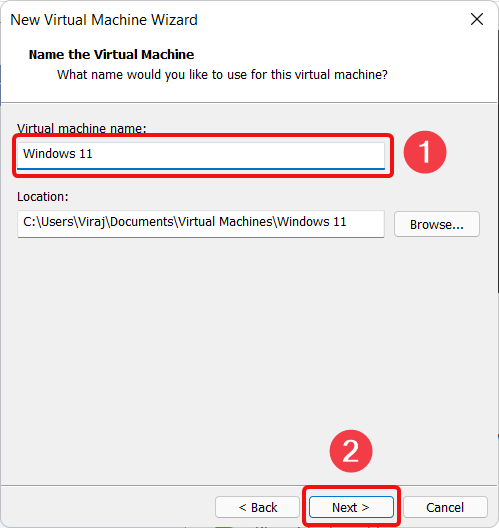
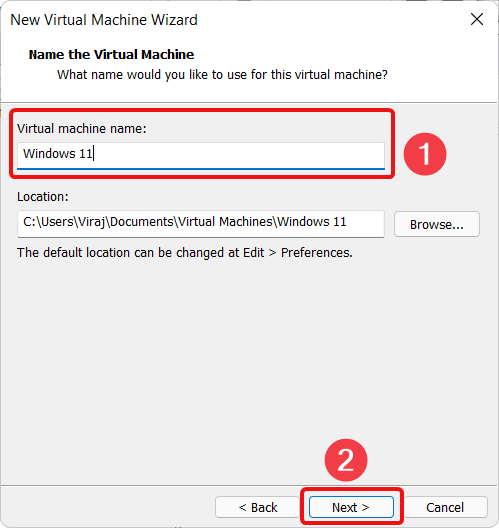
- Enter ‘Windows 11’ in the ‘Virtual machine name’ field. You can put any name you want. For the location, you can either keep it to default or select the one you want using the Browse button. Once done, click on Next.
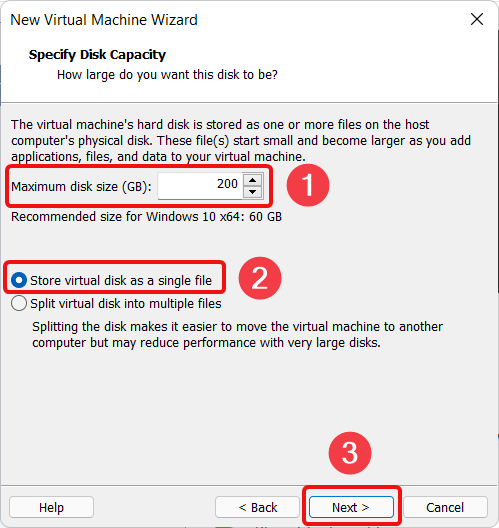
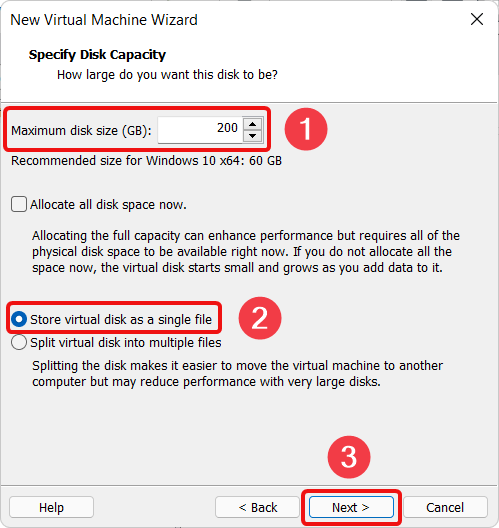
- Next, change Maximum disk size (GB) value from 60 to 200. This is a virtual disk amount, so you don’t need to worry about having the specified space in your physical hard drive. You can also keep the default value and change it later using the Windows disk management utility.
No matter how much amount you set in disk capacity, Windows 11 virtual machine will consume only the required amount it needs for the installation.
Secondly, select the ‘Store virtual disk as a single file’ option so that all the Virtual machine-related processing will be done on a single file and thus increasing the overall VM performance. Click ‘Next.’
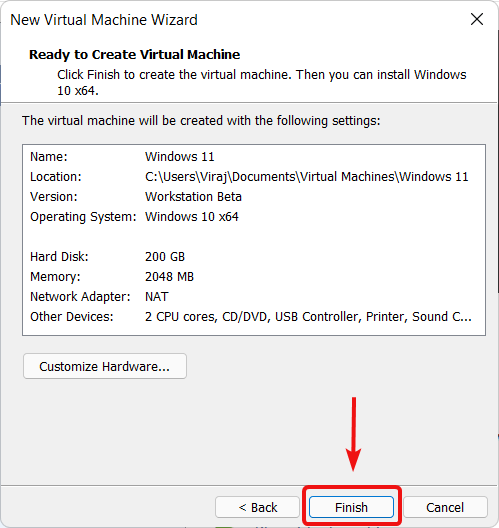
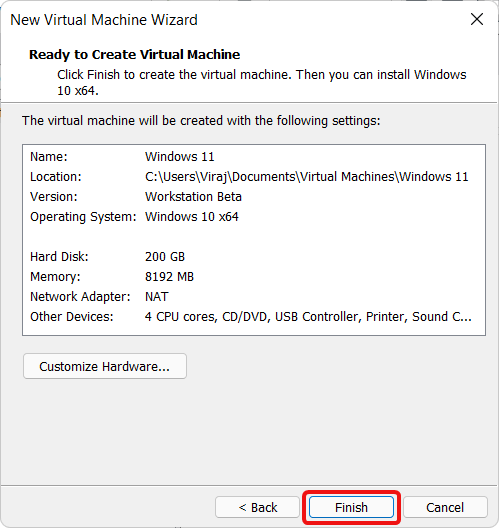
- Finally, review all the settings. If everything looks good, click ‘Finish.’
Create Windows 11 Virtual Machine in VMWare Workstation Pro
VMWare Player will work fine if you want to create a Windows 11 virtual machine with the downloaded build and don’t care about the future builds. But if you’re going to keep your Windows 11 updated with the latest build, you definitely need VMWare Workstation. VMWare Workstation provides advanced features such as VM encryption, TPM 2.0 module, etc. These features are required by Windows 11 for updation.
If you don’t activate TPM 2.0 for a Windows 11 Virtual Machine, the OS won’t let you upgrade to the latest builds, and you can’t test or enjoy the features the updated build has to offer.
Another thing to note here is that VMWare Workstation Pro is a licensed product. If you want to try it, you can avail a free trial from VMWare.
The complete comparison between VMWare Workstation Pro and Workstation Player is given here.
Windows 11 Virtual Machine Creation and Configuration
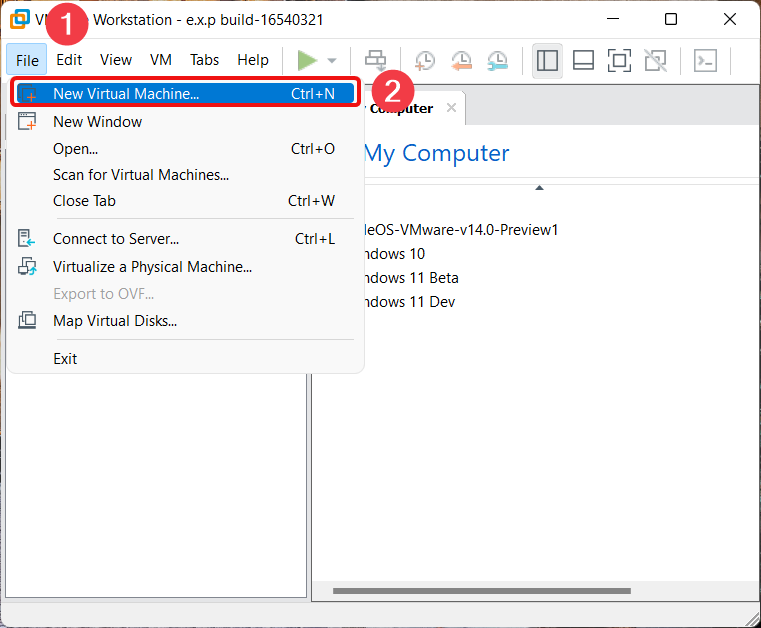
- Launch VMWare Workstation Pro on your Windows or Linux PC. From the top menu, click on ‘File -> New Virtual Machine.’
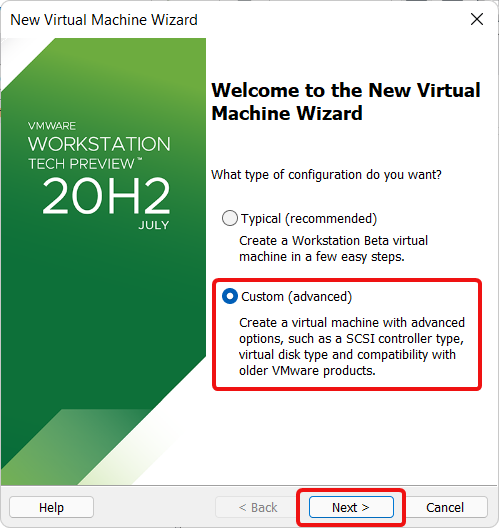
- Select ‘Custom (advanced)‘ configuration and press the next button.
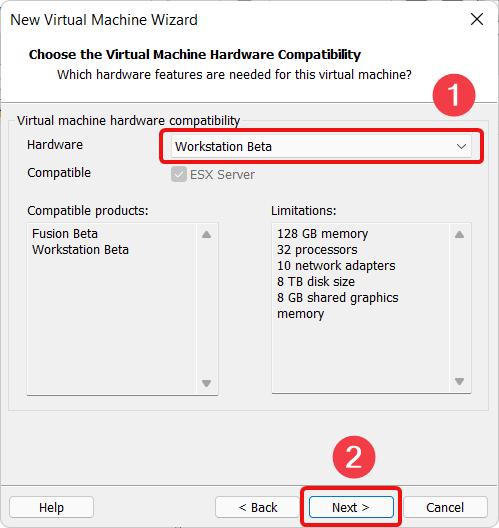
- Select Hardware as ‘Workstation Beta’ or whichever option is present in first place on the list. Click Next to move forward.
- Now, select the second option, ‘Installer disc image file (iso),’ and browse for the Windows 11 ISO.
- Next, select the Guest operating system as Microsoft Windows. For Version, if you see Windows 11 option in the dropdown list, select that; otherwise, you can select ‘Windows 10 x64‘.
- Name the Virtual machine as ‘Windows 11‘ or any name of your choice. Keep location path as default. You can change it later from ‘Edit -> Preferences.’
- Select Firmware Type as UEFI. You can tick or un-tick the Secure Boot option.

Windows 11 Virtual Machine CPU and RAM Allocation
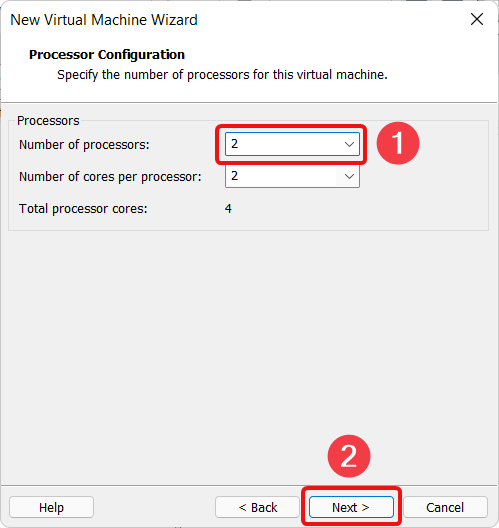
- By default, the number of processors is set to 1. Change it to 2 for better performance. Also, keep the number of cores per processor to 2.
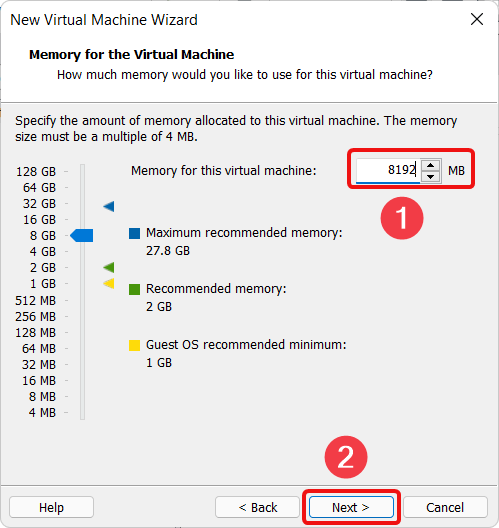
- Next, assign the RAM for the virtual machine. It is recommended that you set more than 4GB RAM for a virtual machine to perform faster. Whatever memory value you put here will be allocated from your system’s physical memory. Since we are creating a Windows 11 Virtual machine, I will assign 8GB of RAM.
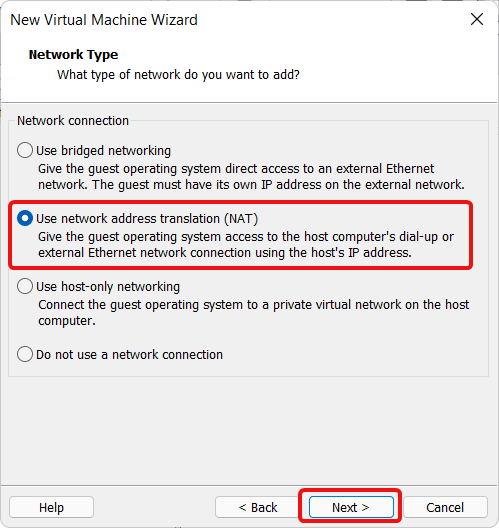
- You can use bridged networking or network address translation (NAT) for Network Type. I recommend using NAT so that the VM will use an internet connection directly from the host system, and you won’t have to do anything to browse the internet on the virtual machine.
Virtual Machine Disk Type Selection
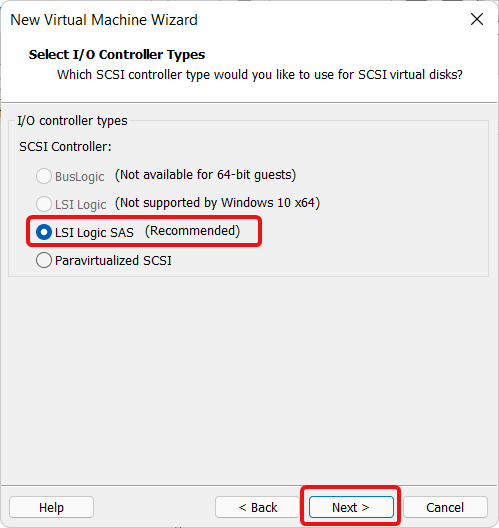
- Select I/O Controller type as LSI Logic SAS and click Next.
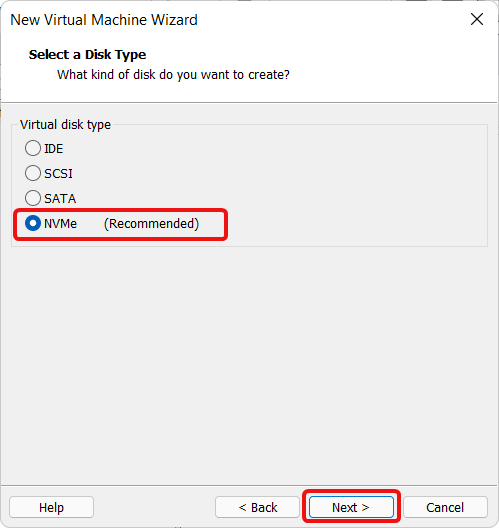
- Next, select disk type as NVMe.
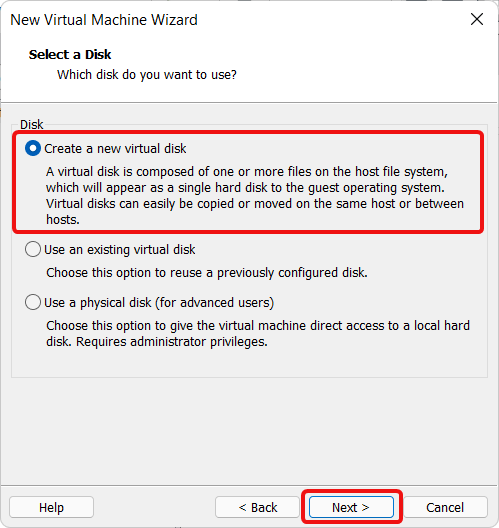
- Select ‘Create a new virtual disk‘ while choosing disk since we are creating a new Windows 11 virtual machine.
- Here, assign as much disk space as you want because it is a virtual disk space and doesn’t interfere with the physical hard drive. This is true unless you tick the ‘Allocate all disk space now’ option. I am assigning the Maximum disk size as 200GB. You can keep to default 60GB and extend it later from the virtual machine.
Finalizing Virtual Machine Configuration
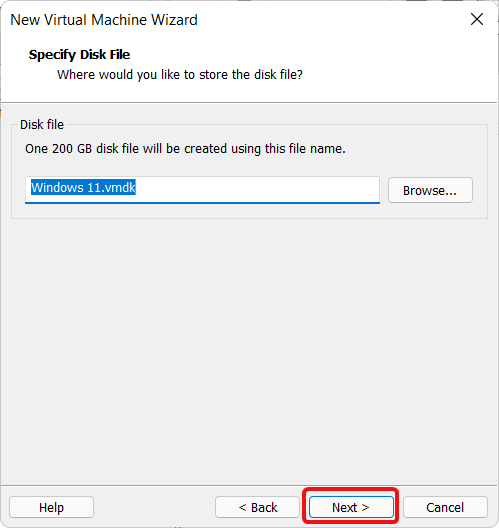
- Now, if you want, you can rename the virtual machine file (the portion before .vmdk). I’ll keep the same name that I assigned in the earlier section of this tutorial.
- Finally, review all the configurations and click Finish to create Windows 11 Virtual machine.
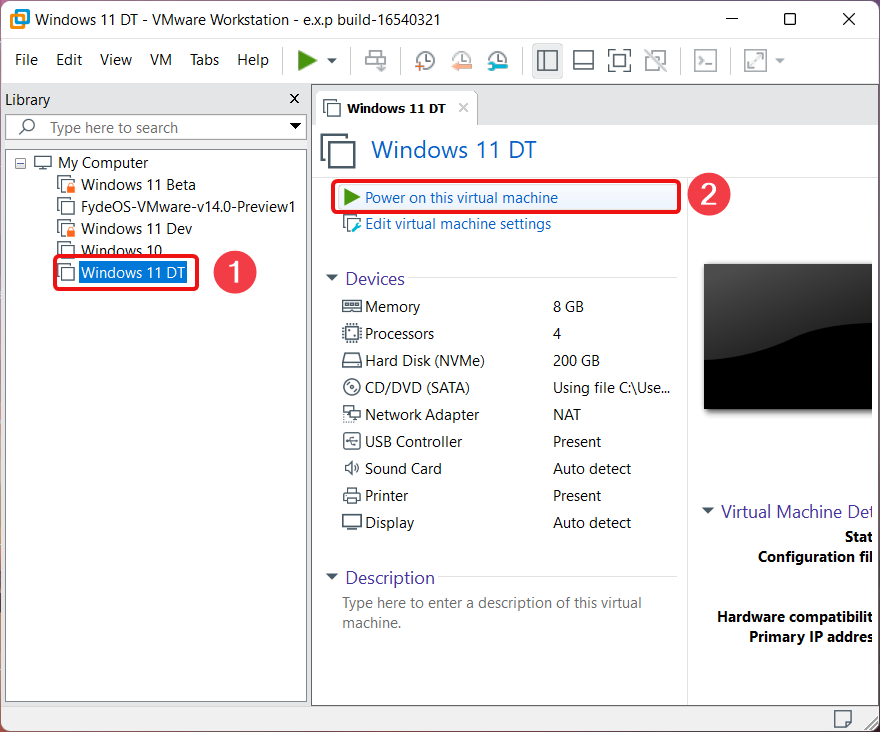
Start Windows 11 Virtual Machine
Now that we have created Windows 11 virtual environment let’s boot it and initiate the Windows 11 installation process.
- Click on the newly created virtual machine from the left panel. Start it by clicking on ‘Power on this virtual machine.’
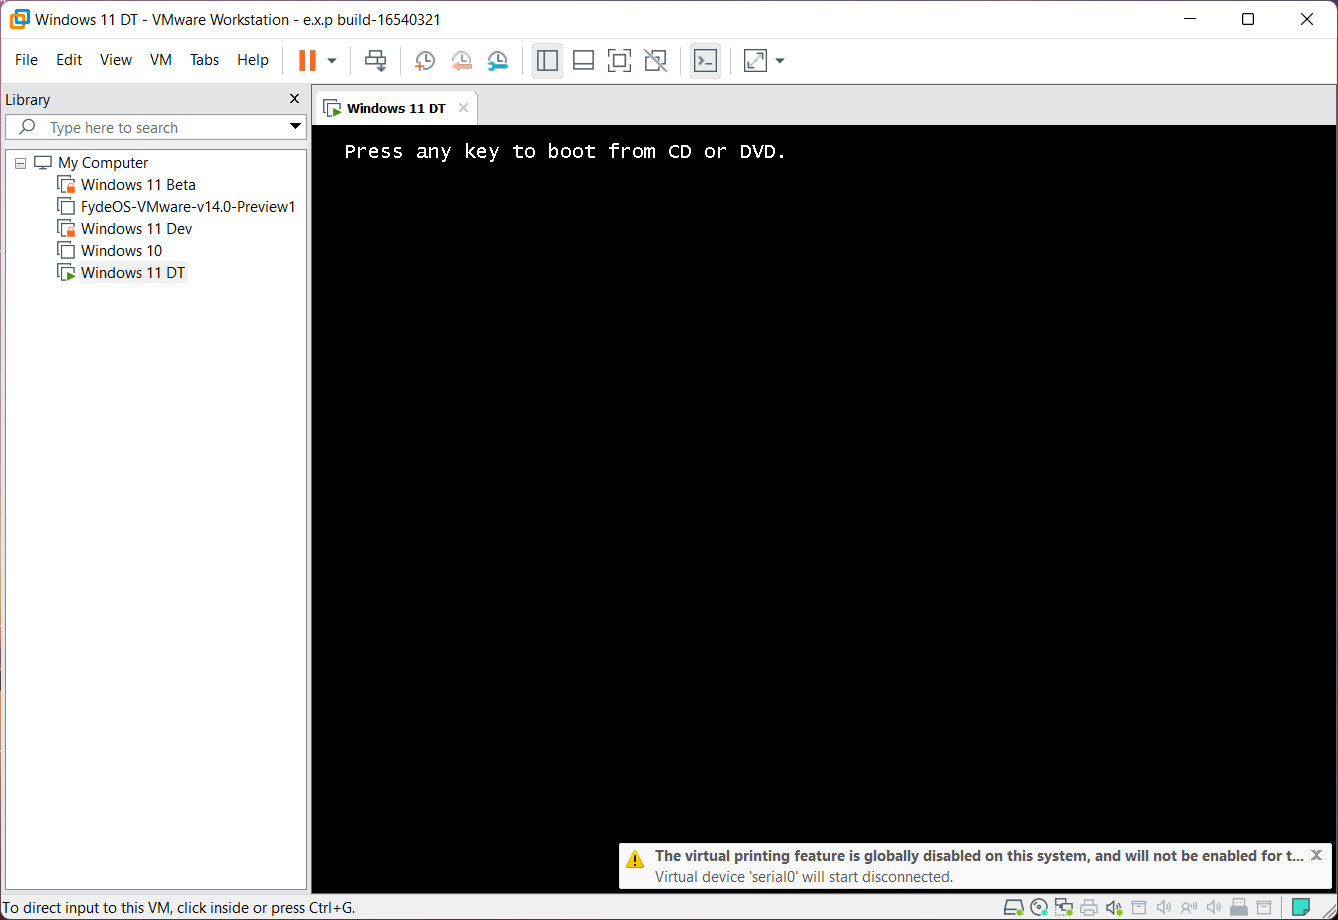
- Once you start the VM, VMWare BIOS will fire up, asking you to press any key to boot the Windows ISO. You need to click on the black portion and quickly press any key on the keyboard; otherwise, you’ll get the ‘EFI timed-out message. You need to power off the VM and re-launch it if that happens. Oh, and by ‘Press any key on the keyboard,’ I didn’t mean the power key. There! I warned you. 😉
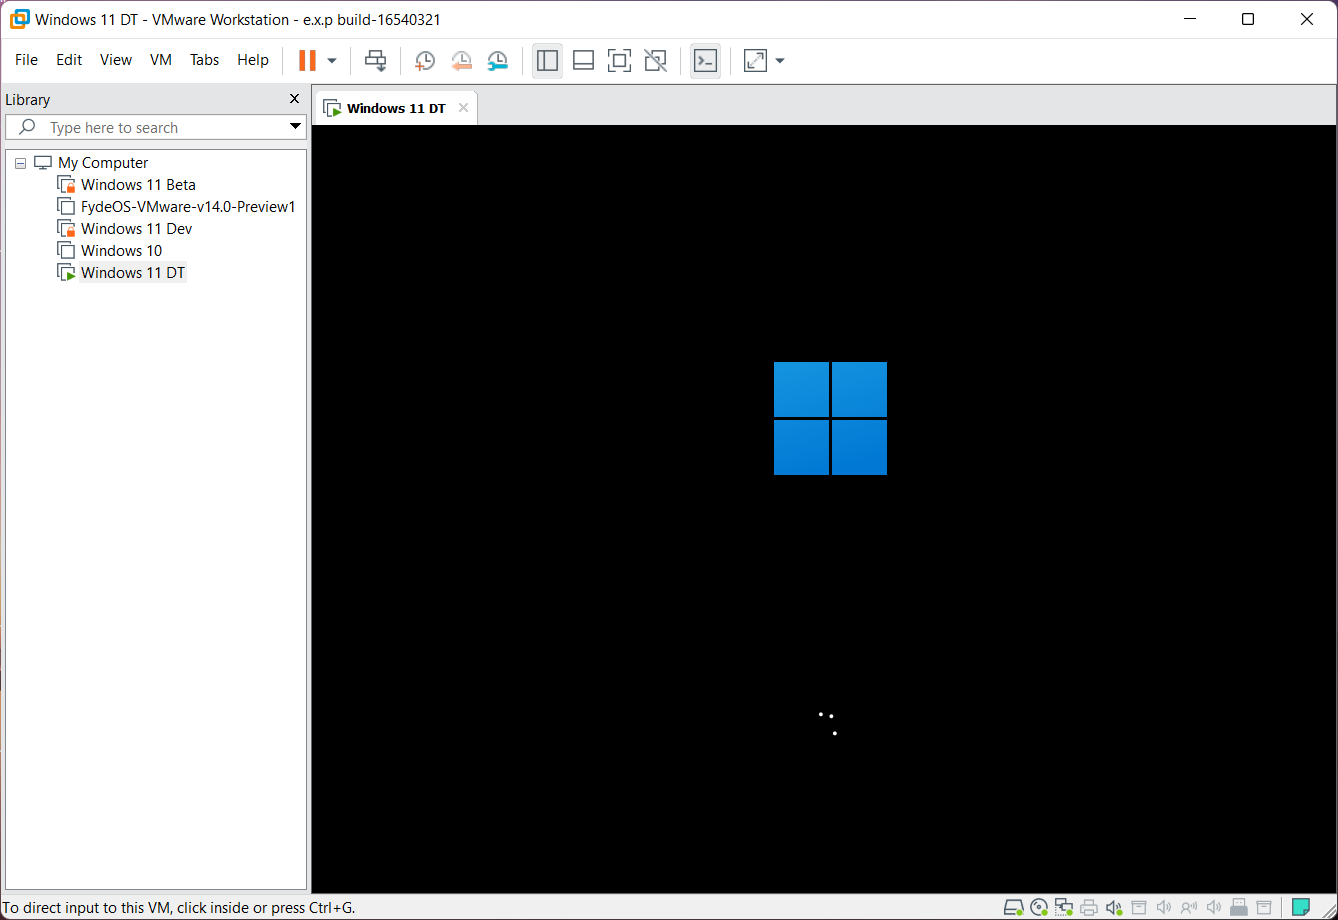
- If Windows boots successfully, you’ll see the Windows 11 logo and spinning circles below.
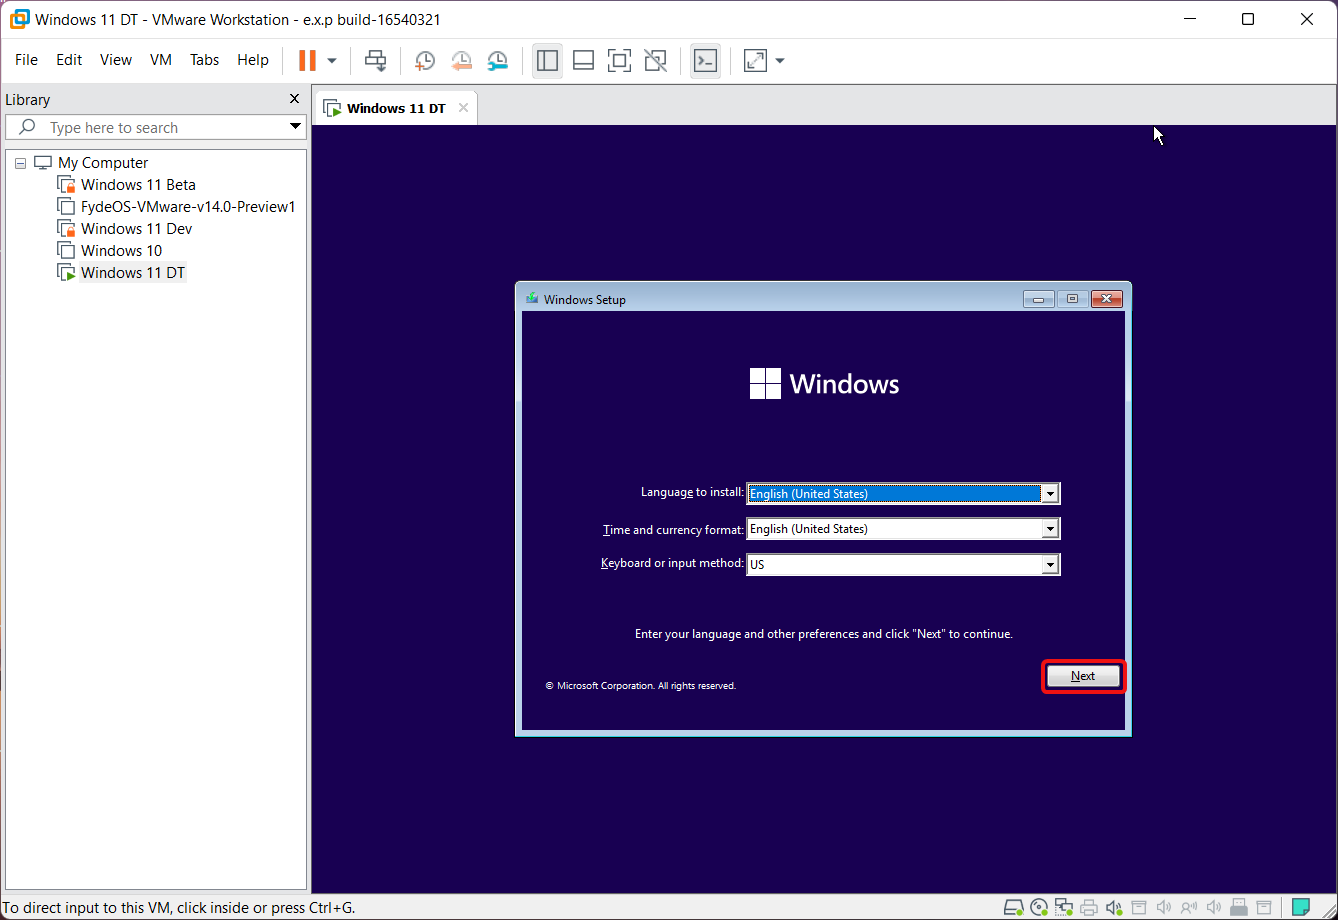
Windows 11 Installation in Virtual Machine Environment
- Once Windows 11 ISO boots up, you’ll see a language selection screen. Select your preferred language and click on the Next button.
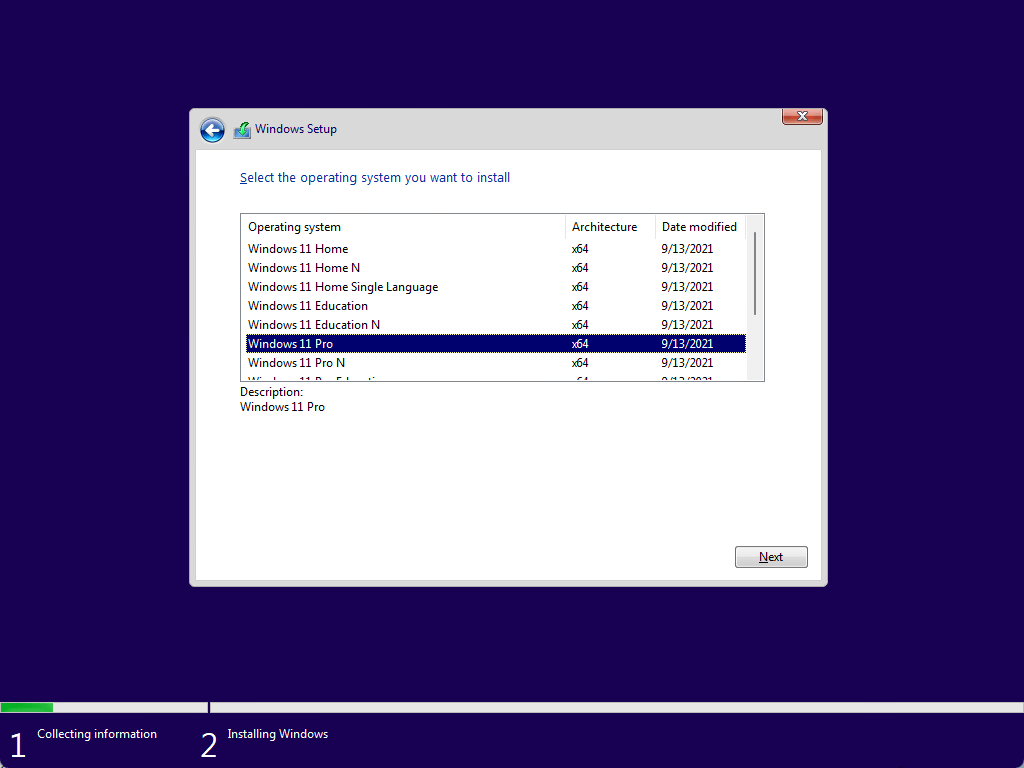
- Click on ‘Install Now‘ to proceed further. On the next screen, choose the Windows version you want to install.

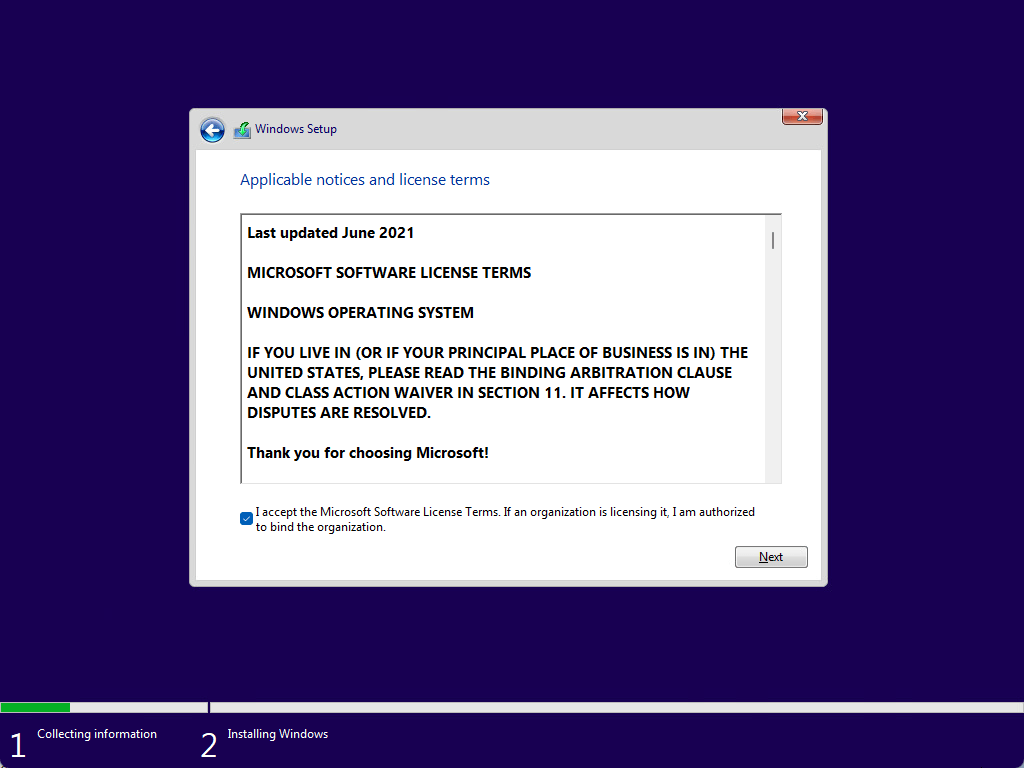
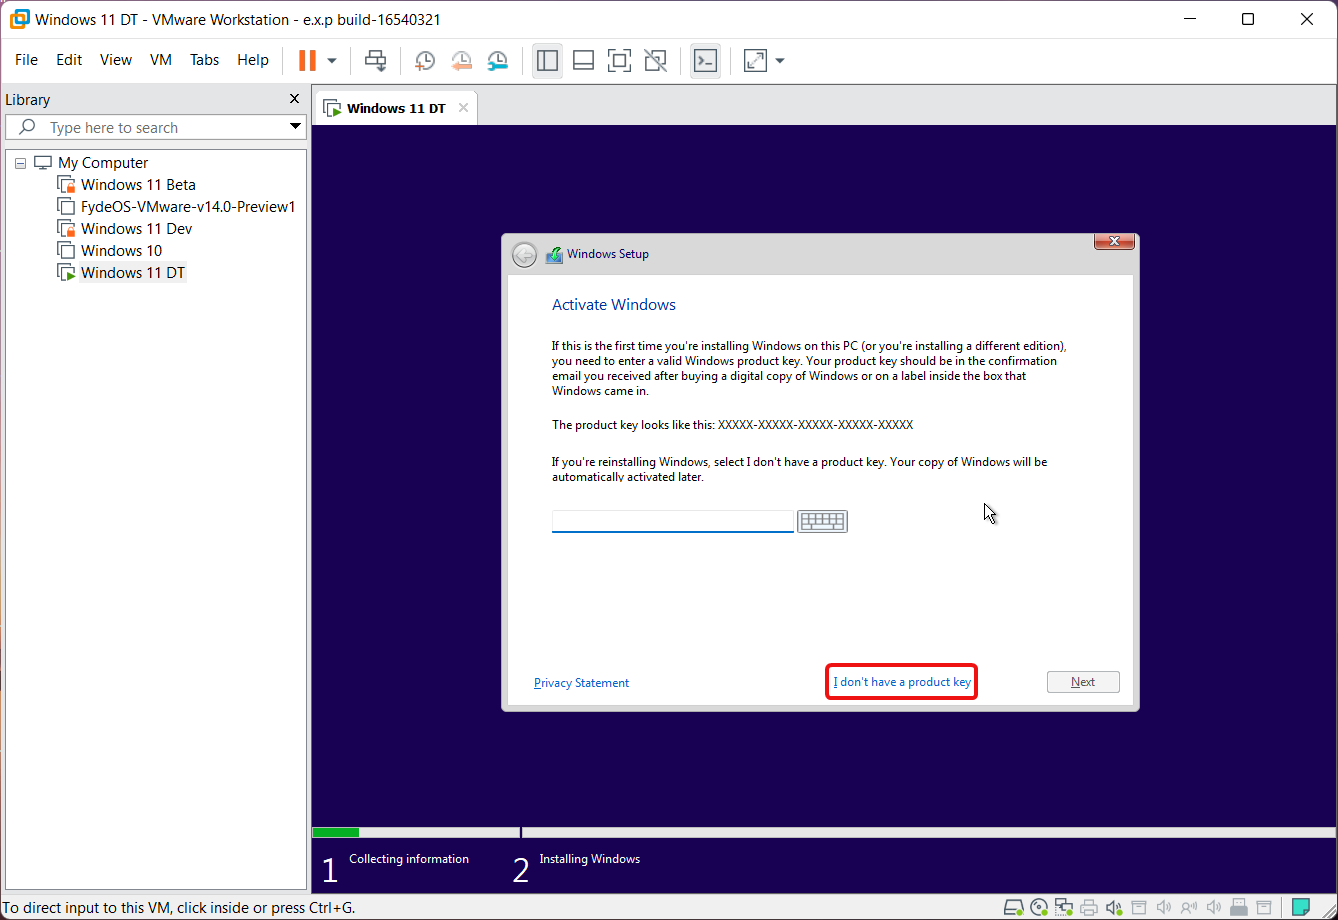
- Press ‘I don’t have a product key‘ on the Activate Windows screen.
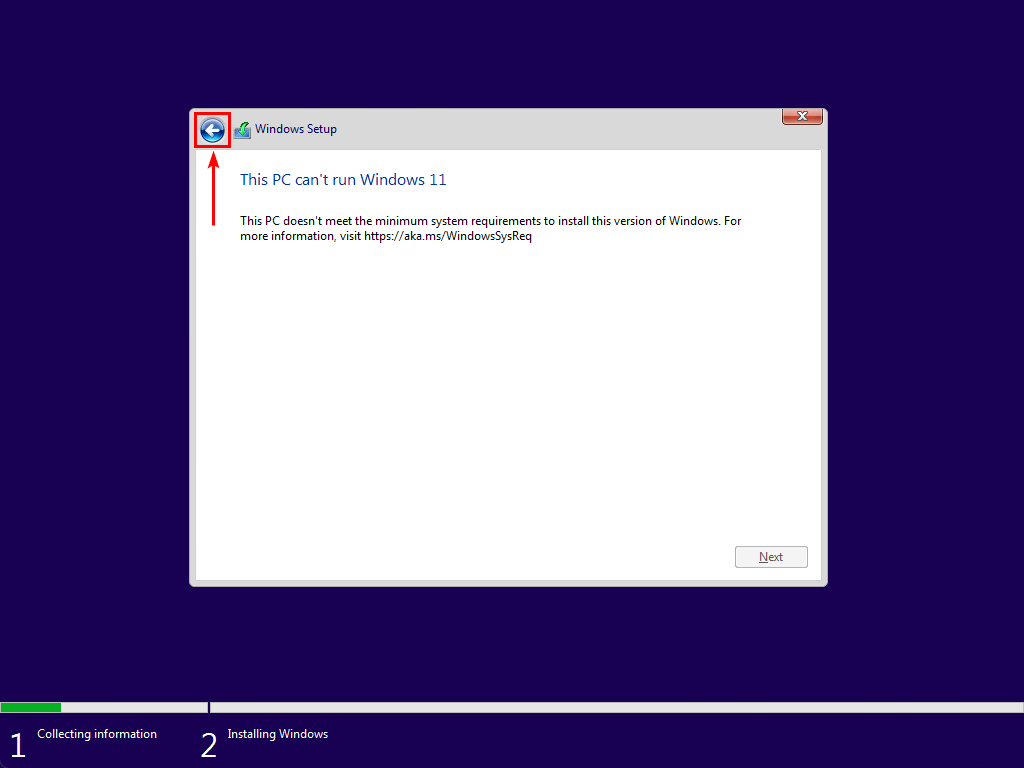
- Whoa! What just happened? We did all this hassle, and in the end, it didn’t even matter? Okay, that was a lousy LP joke. But on a serious note, the message doesn’t look good. It clearly says, ‘This PC can’t run Windows 11’. Now what?
No need to worry. There is a way with which you can bypass Windows 11 system requirements.
For now, click on the back button at the top and follow further steps to install Windows 11 without getting the ‘This PC can’t run Windows 11’ error.
Use Registry to Bypass Windows 11 System Requirements
In our previous articles, we have seen that Windows Registry works like magic when bypassing or tweaking things in Windows itself. Bypassing the ‘This PC can’t run Windows 11’ error is also no exception.
Over the years, the Windows development community has grown strong, and there is almost nothing that they can’t bypass or solve. In this case, the community has already found a solution to bypass Windows 11 system requirements such as TPM 2.0, CPU, and RAM. So, no matter what system you are running, be it a physical PC or a Hyper-V/VMWare virtual machine, you can easily bypass these requirements using the Windows Registry method. All you need to add is three registry keys, and your job is done.
With a continuation of the previous section, follow the steps given below.
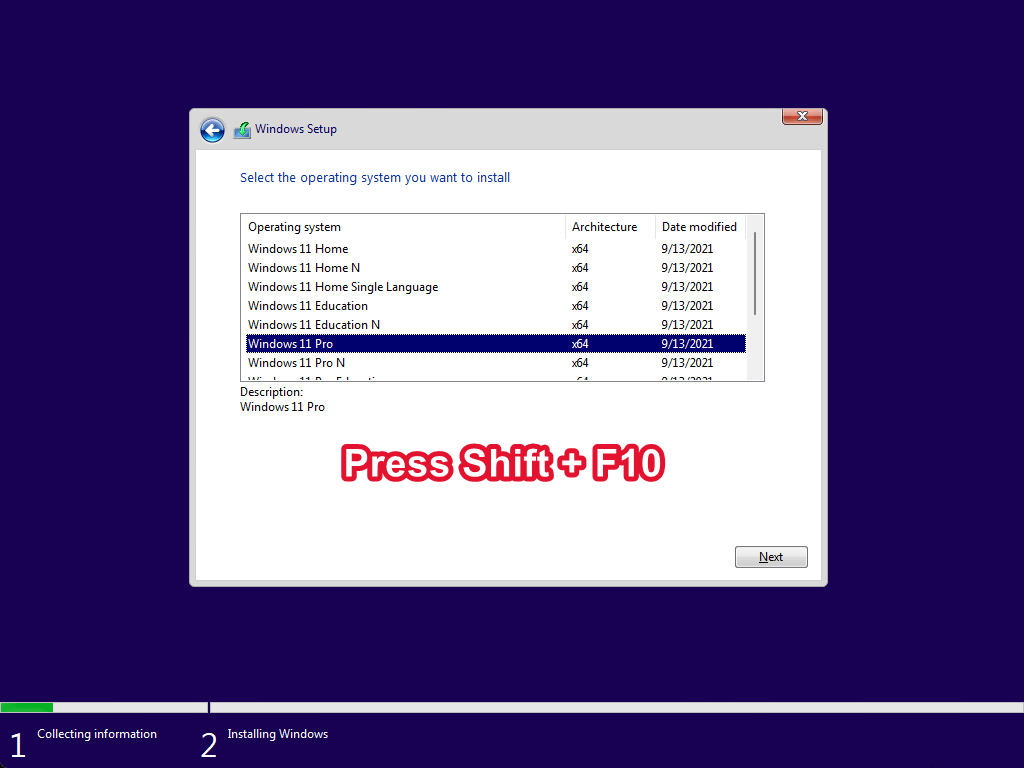
- When you hit the back key on the error message, you’ll land back on the Windows version selection screen. Here, press the Shift + F10 keys to open the command prompt.
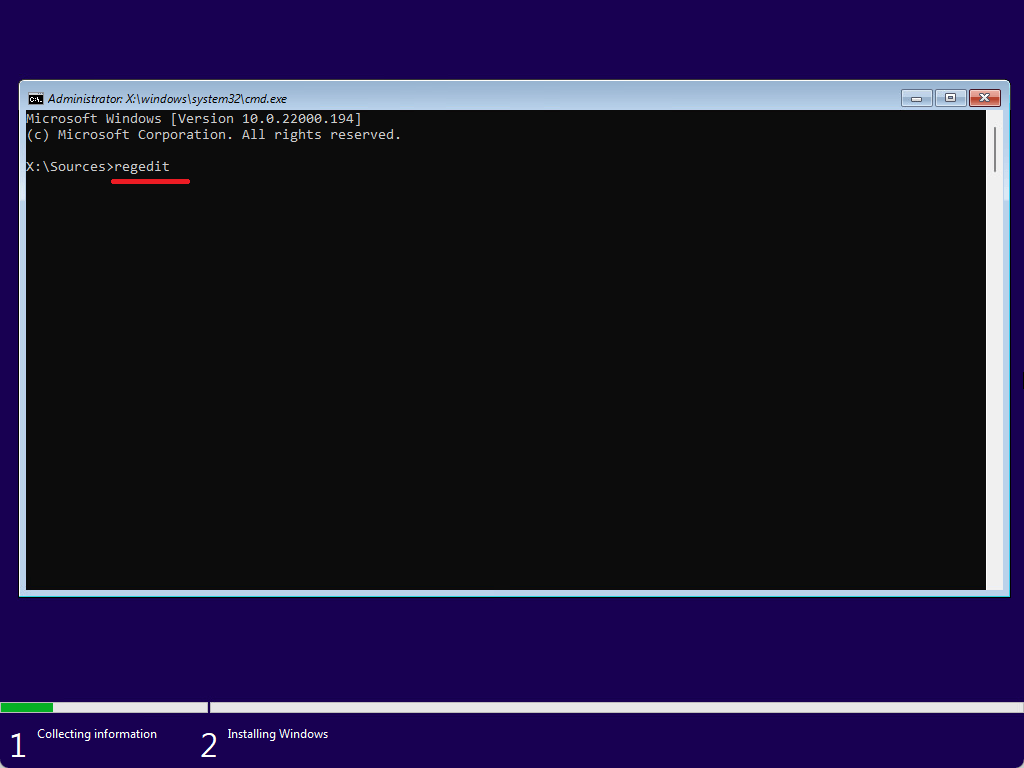
- In the command prompt, type regedit and hit enter to open the Windows Registry editor.
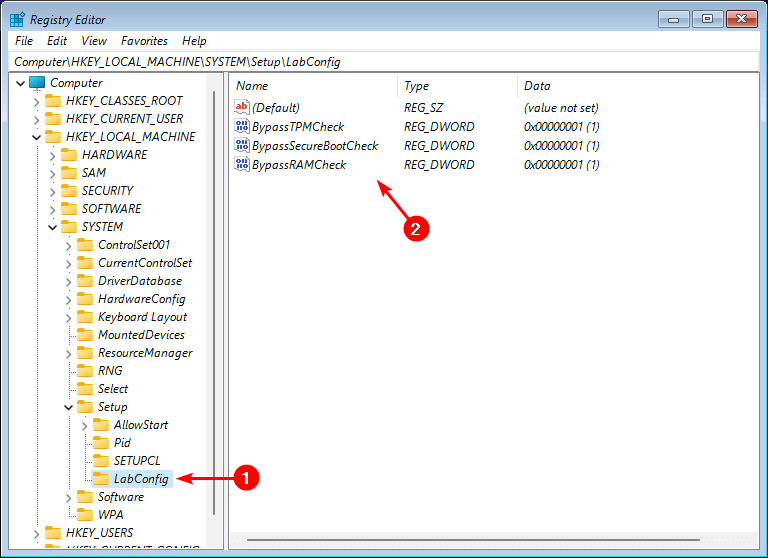
- Navigate to the following registry path:
Computer\HKEY_LOCAL_MACHINE\SYSTEM\Setup\LabConfig
- Right-click on the LabConfig key and select New -> DWORD. You need to create three such keys and name them as follows.
- BypassTPMCheck
- BypassSecureBootCheck
- BypassRAMCheck
- Once you create all the keys, open them one by one and put the value as ‘1’. Your registry keys should look like the following screenshot.
- Close the Windows Registry window and select the Windows version you like to install.
- Voila! The error is now gone. You can follow the on-screen instructions and seamlessly install Windows 11 on your VMWare Virtual Machine.