Windows 11 is a major OS update over Windows 10 and focuses mainly on UI changes. Some users did embrace the UI overhauling, while some are not happy because of the various glitches present in Windows 11. One such annoying issue seems to be the Windows 11 Right Click menu aka, the Context menu. Unlike its predecessors, Windows 11 comes with a laggy context menu, which feels unpleasant when you use the right-click function.
I felt great installing Windows 11 when Microsoft started pushing out the preview builds. The only reason I switched back to Windows 10 was because of the context menu lag. Thankfully, I had installed Windows on an external SSD, so switching OS wasn’t much of a trouble.
Well, I got to agree that Windows 11 does offer some attractive features as well. For instance, you could install and run Android apps natively on Windows 11. So, as soon as I found a fix for the Windows 11 right-click issue, I immediately changed the OS back to Windows 11, and now there is no going back to Windows 10.
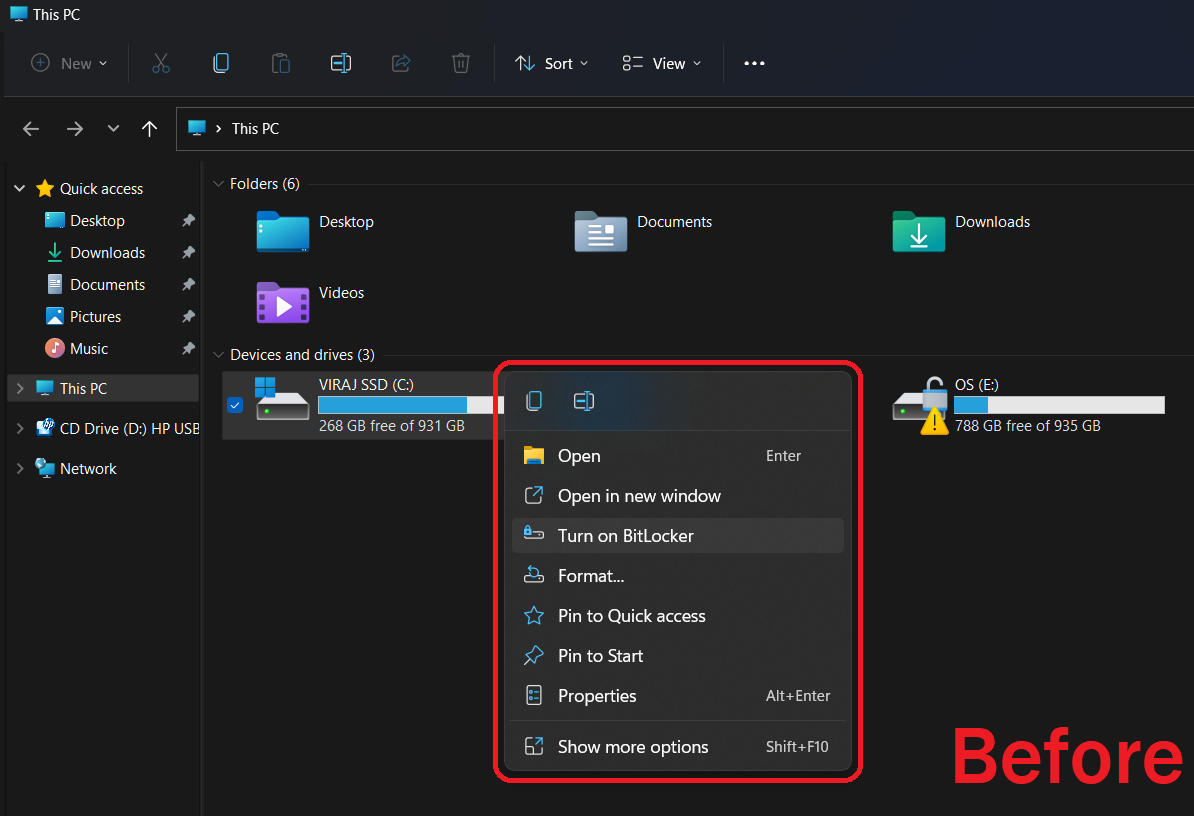
This is how the Windows 11 context menu looks like before applying the fix.
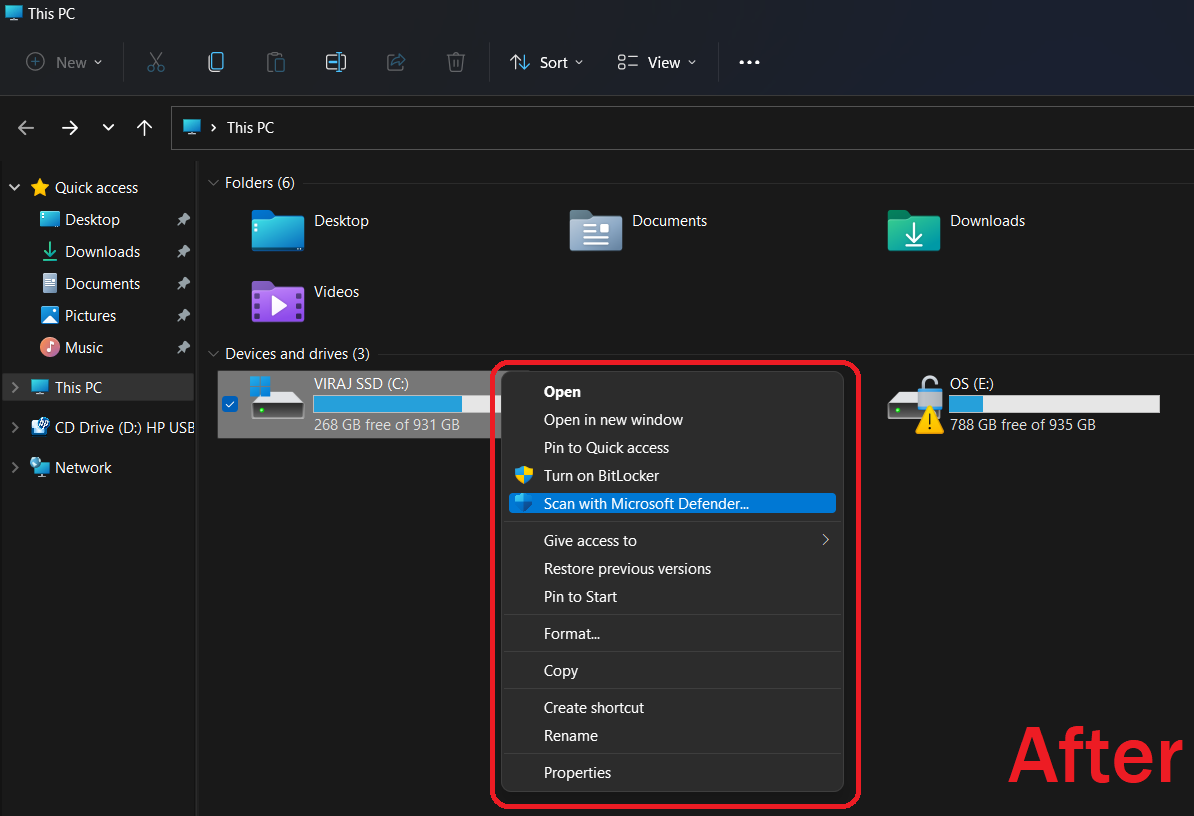
And there goes the old Windows 10 like context menu (right-click menu) for Windows 11:
Interested in knowing how to change Windows 11 right-click context menu and bring back the old one? I know it’s a yes! Okay, so, without any delays, let’s proceed to the guide.
Fix to Get Old Right-Click (Context Menu) on Windows 11
There are two methods to achieve this. The first one uses the Windows registry editor, while the second uses the command prompt. I’ll suggest you go through both solutions and follow whichever suits you. Both the fixes are tried and tested on Windows 11 21H2 22000.282 Build. I am hoping that it will continue to work on future builds as well. Let’s get going now.
Registry Editor
In the first method, we will use a Windows registry editor to add a specific registry key. Adding this key would enable an old or ‘Show more options’ like menu whenever you use the right-click button. The steps are as follows.
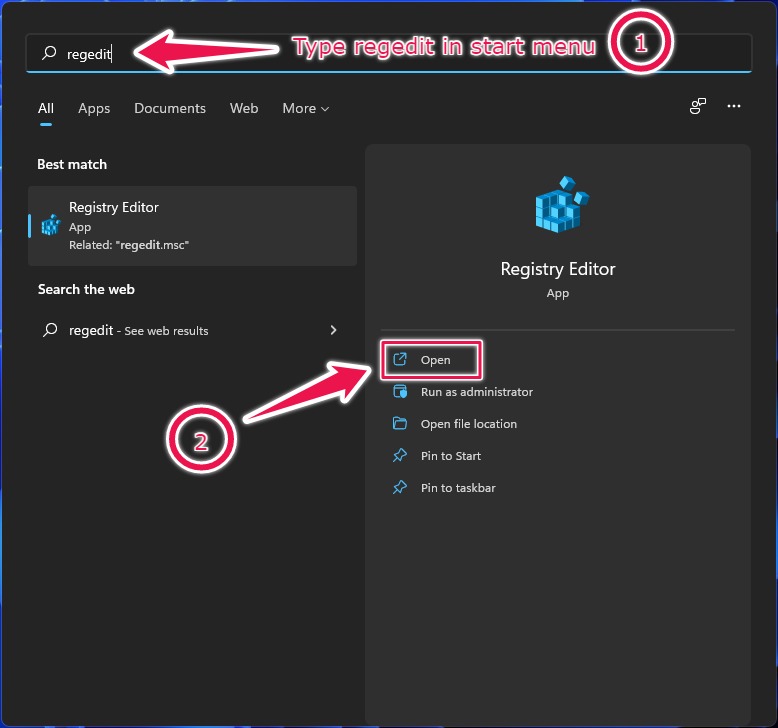
Step 1 – Open the Start menu and type Regedit in the search box. Windows registry editor will show up.
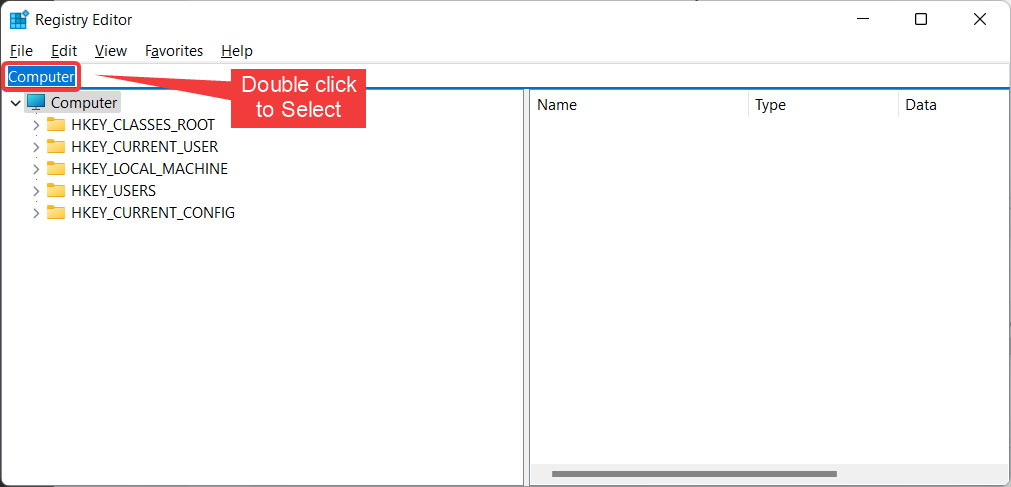
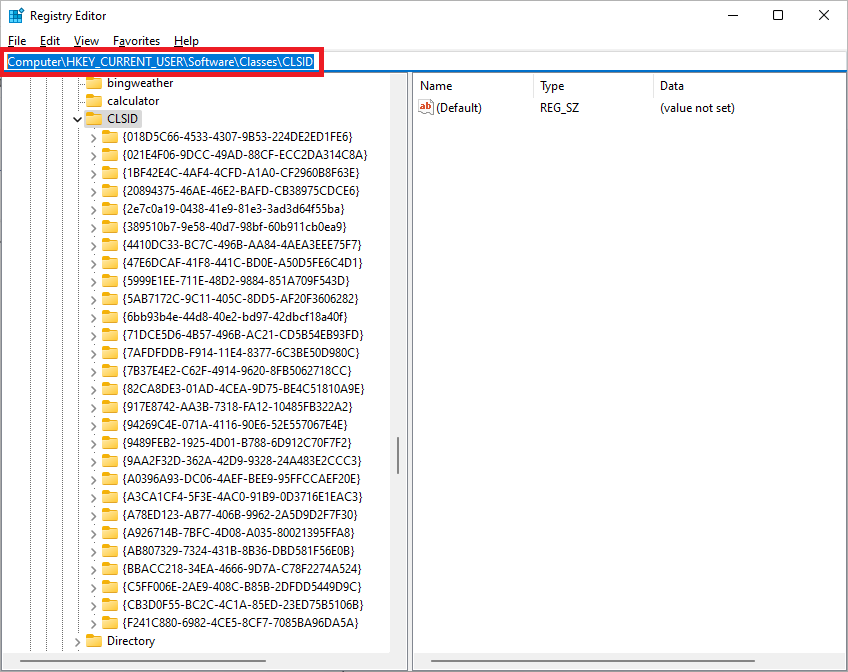
Step 2 – Select the registry path in the command bar and paste the following registry path.
HKCU\Software\Classes\CLSID\
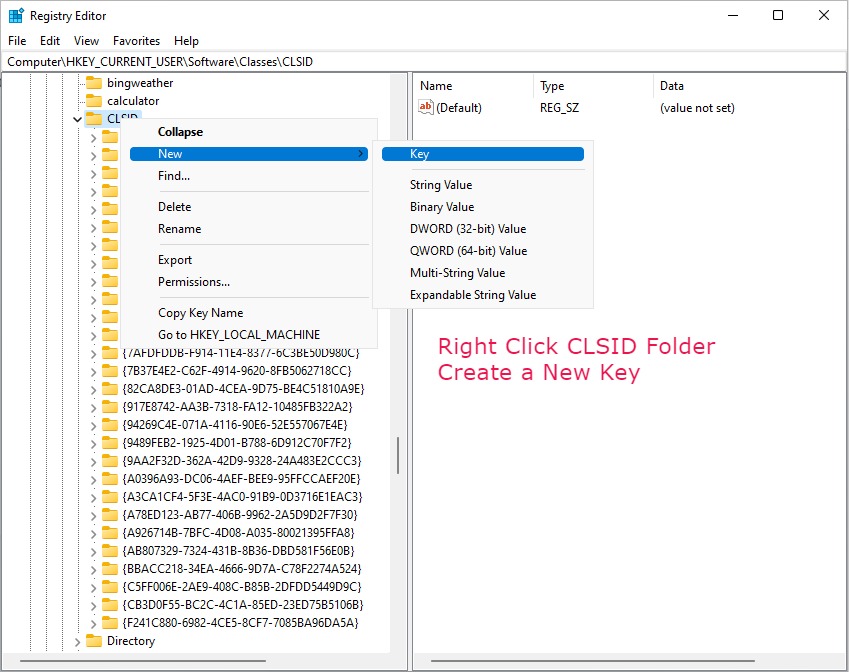
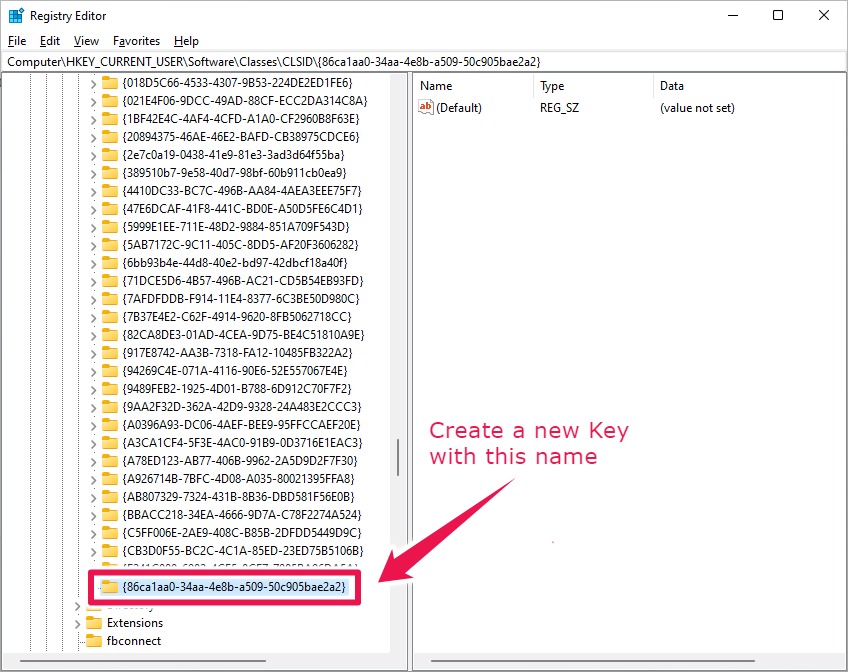
Step 3 – Righ-click on the CLSID folder and create a new key.
Step 4 – Assign the following name to the newly created registry key. Note that you need to copy the key name along with curly brackets.
{86ca1aa0-34aa-4e8b-a509-50c905bae2a2}
Step 5 – Now, create a new key inside our newly created key and name it InprocServer32.

Step 6 – In the InprocServer32 folder, double click on the Default key to open it, and without entering anything, press OK. You should now see that the data column has changed from (value not set) to blank.

Step 7 – Open Windows Task Manager by pressing Ctrl + Shift + Esc keys, and look for the Windows Explorer app. Right-click on it and select Restart. Alternately, you can also restart the PC for changes to take effect.

And the process ends here. Check the context menu once Windows Explorer or your PC restarts, and see the magic in action!
Not to be Missed: How to Set Video/Live Wallpaper on Windows 11
Windows Command Prompt
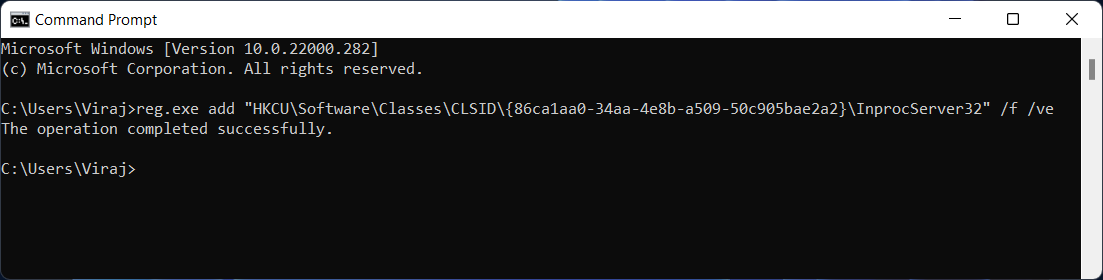
The method is simpler than the one we discussed above. Here, we will run a command to add a specific registry without opening the Windows Registry editor. The steps are as below.
Step 1 – Open the start menu and type cmd in the search bar to open the Windows command prompt.
Step 2 – Copy the command shown below and paste it into the command prompt window to create a new registry key.
reg.exe add "HKCU\Software\Classes\CLSID\{86ca1aa0-34aa-4e8b-a509-50c905bae2a2}\InprocServer32" /f /ve
Step 3 – Now that we have added a registry key to Disable Windows 11 context menu and enable the old right-click menu, we need to restart Windows explorer for changes to take effect.
Step 4 – Restart Windows Explorer using the command given below.
taskkill /F /IM explorer.exe & start explorer
Voila! The old context menu appears now on your Windows 11 PC. That wasn’t difficult, was it? Let us know your reactions in the comments below. We would love to hear from you.
Restore Windows 11 Right Click Menu
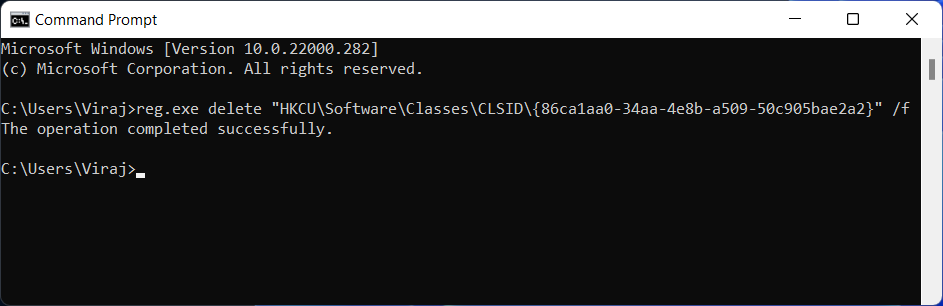
Although you wouldn’t want to switch to the standard Windows 11 context menu, still if you wish to, here’s how you can do it.
Open the Windows command prompt and enter the following command. As soon as you input the command and press enter, Windows will remove the registry key, which we added to get the old context menu.
reg.exe delete "HKCU\Software\Classes\CLSID\{86ca1aa0-34aa-4e8b-a509-50c905bae2a2}" /f
That’s all for this article. Do check out this Reddit post to get more insights about this issue. And don’t forget to drop a comment to let me know how this guide worked out for you.