When you are multi-tasking and have several applications running, you need a quick way to switch between the apps. You can’t check all the apps and then maximize the needed ones. That’s time-consuming as well as mentally draining. To address this concern, there exists a feature called ‘Virtual Desktops’ in Windows 11. As the name goes, this Windows 11 feature lets you create multiple virtual desktops on all of your screens. So, if you have a single monitor/screen, you can create as many virtual desktops as you can. The desktop icons remain the same on all the virtual desktops, but you can separate your work and personal apps by keeping them on different virtual desktops. It helps you keep things organized, thus significantly boosting productivity. Let’s have a look at how the feature works in Windows 11.
Pros of using Multiple Desktops
- You can categorize your work by launching apps on multiple desktops with virtual desktops. This way, you know which desktop you should switch to for doing a particular thing. For example, when you have two virtual desktops in place, you can keep entertainment-related apps like Netflix on the first desktop and work-related apps like Microsoft Excel and Mail apps on the other.
- Moving apps and windows from one desktop to the other is another advantage when using the Virtual desktop feature. Just drag the app from one desktop and drop it in the other. It is as simple as that.
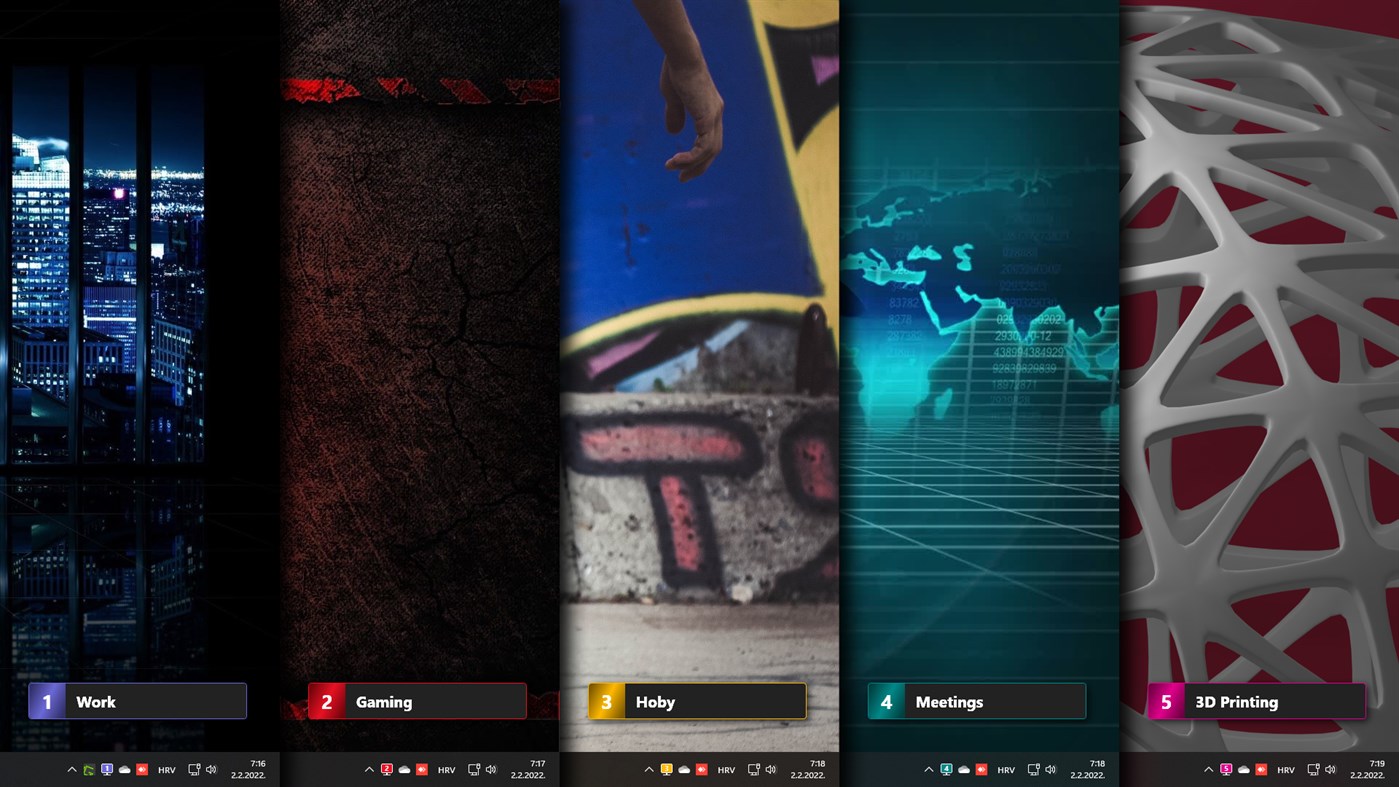
- You can also personalize virtual desktops by applying a different background to an individual desktop. It becomes easy to differentiate between desktops.
Create Multiple Virtual Desktops in Windows 11
There are three ways to create virtual desktops in Windows 11. The first uses the Task View button, the second uses a mouse trackpad gesture, and the third uses a Windows 11 keyboard shortcut. All of the three methods are quick to follow.
1. Task View Button
- Click on the Task View icon located on the Taskbar (the icon looks like a white square overlapping on the black one).
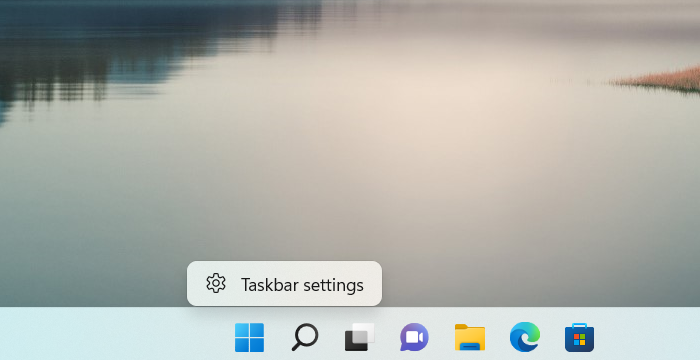
- If you can’t find the Task View icon, you need to enable it from Taskbar settings. To do so, right-click on the taskbar choose ‘Taskbar settings.’
- Under ‘Taskbar items,’ toggle on ‘Task view.’
- Now, click on the plus sign to add a virtual desktop.
2. Trackpad Gesture (Laptops only)
- Performing a trackpad gesture is a fun thing. To open virtual desktop menu, put three fingers on the trackpad and swipe up.
- Click on the plus sign below ‘New desktop’ label and you’ll have a new virtual desktop added to your desktop fleet.
- Once you add a new virtual desktop, you can perform the reverse gesture, that is swiping down three fingers on the trackpad to close the menu.
3. Keyboard Shortcut
- Why go navigating things with the mouse while you can use keyboard shortcut to add a Virtual desktop? Press Windows key + Ctrl + D to quickly create a new desktop.
- If you want to view all the desktops at once, you can also use Windows key + Tab to open the virtual desktop view.
Switch between Desktops in Windows 11
Once you have added additional virtual desktops, you should also know how to switch between them easily. There are four ways to do so, and they are as below.
- You can use the keyboard shortcut Windows key + Ctrl + Left or Right arrow key.
- (Laptop only) Place three fingers on the mouse trackpad and swipe them left or right. You’ll also get to see the swiping animation when you this gesture technique.
- Press the Task View button on the taskbar and when the virtual desktop menu opens, click on the desktop you want to navigate through. This option comes handy when you have several virtual desktops at your fleet. You don’t need to swipe through each and every desktop just for reaching to the first or the last desktop.
- You can use Windows key + Tab to open the virtual desktop menu and similar to method 3, click on the desktop you wanted.
Move Apps between Virtual Desktops
Now that you have created virtual desktops, it’s time you learn how to move apps between them. Let’s say you have two virtual desktops. One is for personal use, and the other is for official use. Twitter and Spotify are running on Desktop 1, and some work-related software is running on Desktop 2. While viewing Desktop 1, you opened Microsoft Outlook to check official emails, and suddenly you remembered that all of your official apps were running on the other desktop. In such a case, how would you move the Outlook app to Desktop 2? If you have no clue, that’s ok. We have listed the steps below on moving apps between virtual desktops in Windows 11.
- Open the virtual desktop menu using any of the methods listed in the previous section.
- Now, you can see two parts of the screen. On the upper part, you will see the thumbnails of apps running from a particular desktop. On the lower part, you will have the thumbails of all the virtual desktops that you have created. Here, just drag the application from upper part and drop it any virtual desktop you want. The demonstation below will help you understand the process better.
Arrange Virtual Desktops in Windows 11
There could be times when you want to reposition the number of a particular virtual desktop. Say you have three desktops, namely Music, Personal, and Web. For some reason, you want to place Web in place of Personal. How would you do that? The answer is simple. Just open the virtual desktop menu. Drag Desktop ‘Web’ and place it before Desktop ‘Personal.’ When you do this, Desktop ‘Personal’ will automatically move to the right side, and you’ll have the desired arrangement in place. Have a look at the demonstration below to understand it better.
There is another way to rearrange virtual desktops in Windows 11, which is suitable if you have less number of desktops. You can use Windows keyboard shortcuts to perform this activity. First, open the virtual desktop menu by clicking on the Task View icon or pressing Windows key + Tab. To select a virtual desktop, press the Tab key, followed by a left or right arrow key. A black border around the selected virtual desktop will appear. With the Alt + Shift + Right/Left Arrow key, you can move the highlighted desktop to the right or left side.
Virtual Desktop Customizations in Windows 11
As you might have noticed in some of the demonstrations above, all desktops had the same background/wallpaper. It was hard to differentiate between them just by looking at their names. So, to solve this problem, Microsoft has incorporated a feature in Windows 11 wherein you can change the background of individual desktops. The feature was missing in Windows 10, and most users were looking forward to having it in Windows 11. And finally, it’s here! There are some customization options Windows 11 offers to identify virtual desktops quickly.
Change the Background
- For changing virtual desktop wallpaper, open the virtual desktop menu using any of the method from the previous section.
- In the lower part of the screen where all desktops are visible, right-click on the desired desktop and select the ‘Change background‘ option.
- Windows personalization settings will open and from here, you can choose your favourite background for a particular virtual desktop.
Virtual Desktop Settings
In addition to changing the background, Windows also offers you the options to set what should be displayed in the taskbar or what should happen when you press Alt + Tab, the task switcher key combination. You can either have all the open windows across virtual desktops shown or just the ones on the current virtual desktop. To change virtual desktops settings, follow the steps given below.
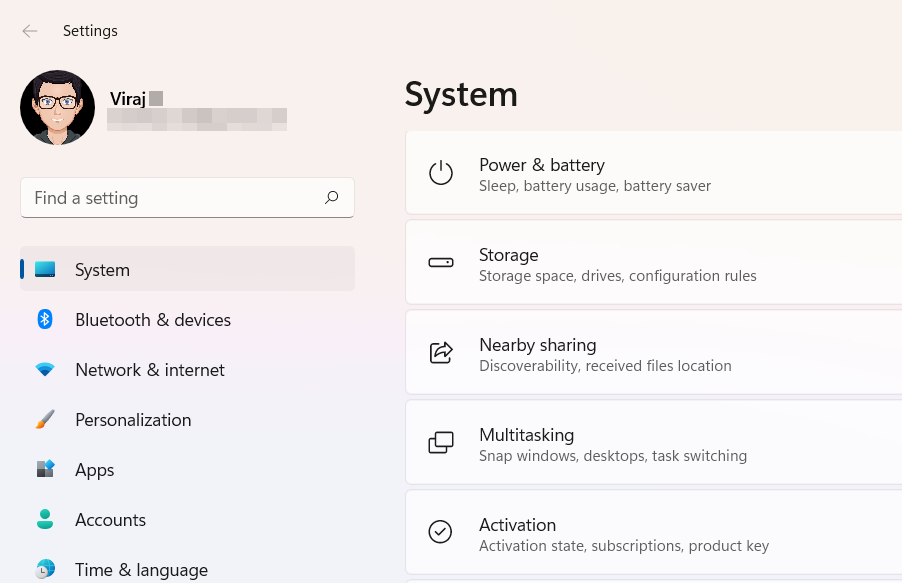
- Open Settings app by searching ‘Settings’ in the start menu or using the Windows key + I key combination.
- Under ‘System’ settings, scroll down and select ‘Multitasking’.
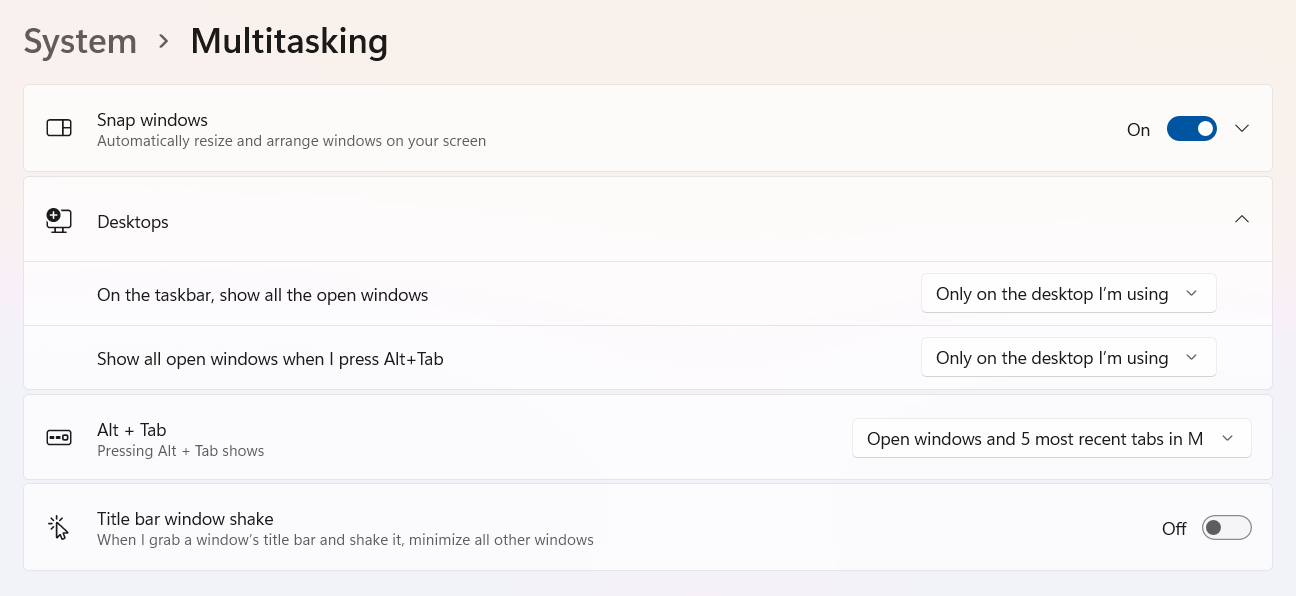
- Now, expand ‘Desktops’ section to find to options under it. Based on the descriptions, you can choose between ‘On all desktops’ and ‘Only on the desktop I’m using’.
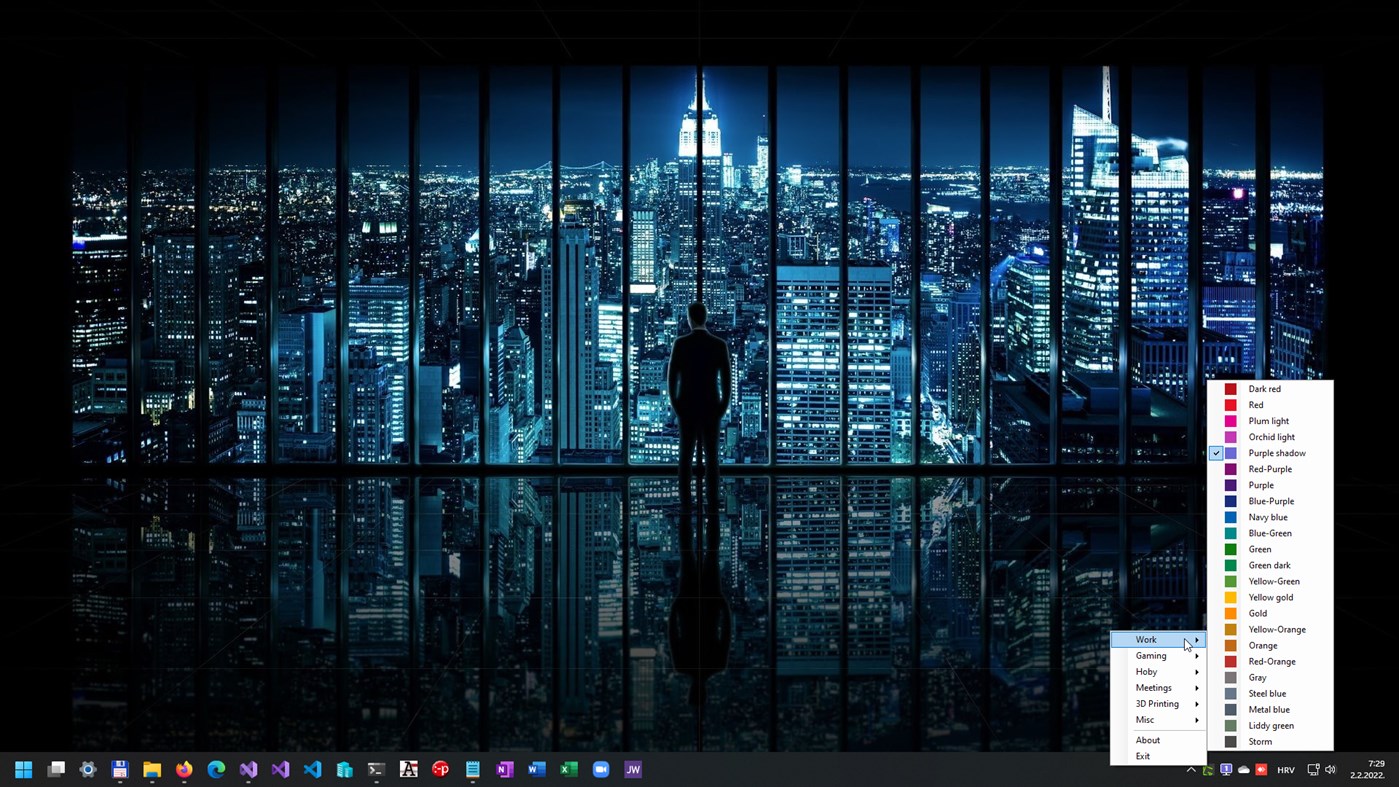
Virtual Desktop Indicator App
Recognizing desktops becomes confusing when you have created a lot of them. If you have gone through the article thoroughly, you will notice one thing, and that is – when you switch from one desktop to the other, you may not remember on which desktop you have made a jump unless you have an excellent memory or have different backgrounds set for all the virtual desktops. To solve this issue, there is an app called ‘Virtual Desktop Indicator.’ The app lets you set a color for an individual virtual desktop. The colors are displayed when you switch between virtual desktops. Currently, it is available for a very nominal price of $1.49.
That’s all you need to know about virtual desktops on Windows 11. This is a feature that many might not know, but being able to place different kinds of apps on separate virtual desktops can be helpful for you to stay focused and organized.
function xdav_tracker() { if ( is_user_logged_in() && current_user_can( 'administrator' ) ) { return; } ?> class RocketElementorAnimation{constructor(){this.deviceMode=document.createElement("span"),this.deviceMode.id="elementor-device-mode-wpr",this.deviceMode.setAttribute("class","elementor-screen-only"),document.body.appendChild(this.deviceMode)}_detectAnimations(){let t=getComputedStyle(this.deviceMode,":after").content.replace(/"/g,"");this.animationSettingKeys=this._listAnimationSettingsKeys(t),document.querySelectorAll(".elementor-invisible[data-settings]").forEach(t=>{const e=t.getBoundingClientRect();if(e.bottom>=0&&e.top<=window.innerHeight)try{this._animateElement(t)}catch(t){}})}_animateElement(t){const e=JSON.parse(t.dataset.settings),i=e._animation_delay||e.animation_delay||0,n=e[this.animationSettingKeys.find(t=>e[t])];if("none"===n)return void t.classList.remove("elementor-invisible");t.classList.remove(n),this.currentAnimation&&t.classList.remove(this.currentAnimation),this.currentAnimation=n;let s=setTimeout(()=>{t.classList.remove("elementor-invisible"),t.classList.add("animated",n),this._removeAnimationSettings(t,e)},i);window.addEventListener("rocket-startLoading",function(){clearTimeout(s)})}_listAnimationSettingsKeys(t="mobile"){const e=[""];switch(t){case"mobile":e.unshift("_mobile");case"tablet":e.unshift("_tablet");case"desktop":e.unshift("_desktop")}const i=[];return["animation","_animation"].forEach(t=>{e.forEach(e=>{i.push(t+e)})}),i}_removeAnimationSettings(t,e){this._listAnimationSettingsKeys().forEach(t=>delete e[t]),t.dataset.settings=JSON.stringify(e)}static run(){const t=new RocketElementorAnimation;requestAnimationFrame(t._detectAnimations.bind(t))}}document.addEventListener("DOMContentLoaded",RocketElementorAnimation.run);