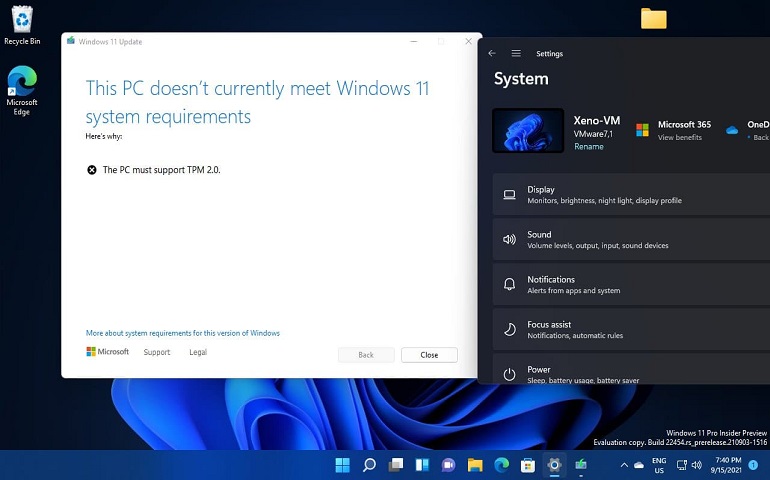
Microsoft has set the system requirements to bar high for running Windows 11. At first, the company enforced TPM 2.0 and CPU requirements to install and run the OS. Now, with the latest update, Windows 11 shows a’ System Requirements Not Met’ watermark for those not fitting with the requirements of Windows 11 or have bypassed them while installing the OS. Some PC manufacturers have provided a list of compatible PCs and Laptops that can run Windows 11.

If you have upgraded to Windows 11 and have the ‘System Requirements Not Met’ watermark on the desktop just because your PC doesn’t possess TPM 2.0, then there is good news for you. You can get rid of the watermark by making a few changes in the Windows registry.
Remove ‘System Requirements Not Met’ Watermark in Windows 11 (2022)
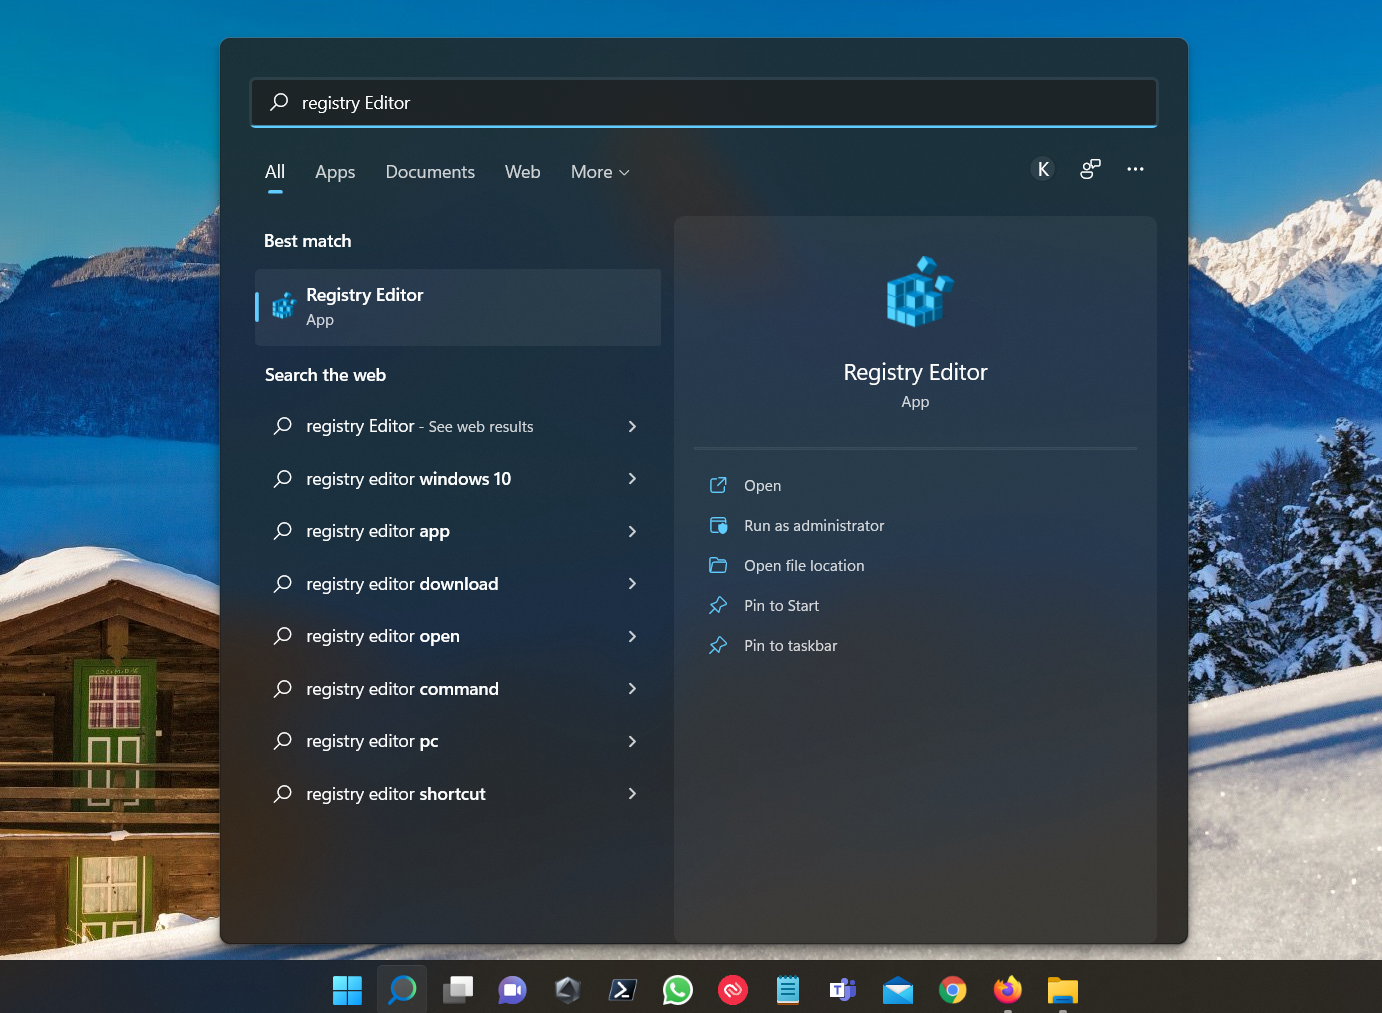
- Press Windows key and type ‘Registry‘. Select the first option to open Windows Registry Editor. Alternately, you can use Windows shortcut to open the regisry editor. Press Win + R to open the run command. Type ‘regedit’ and hit the Enter key.
- When the Registry Editor opens, copy and paste the following path in the address bar. If Windows doesn’t find ‘UnsupportedHardwareNotificationCache key’ in the registry editor, you need to create it manually. Check out our dedicated section below for know-how.
Computer\HKEY_CURRENT_USER\Control Panel\UnsupportedHardwareNotificationCache

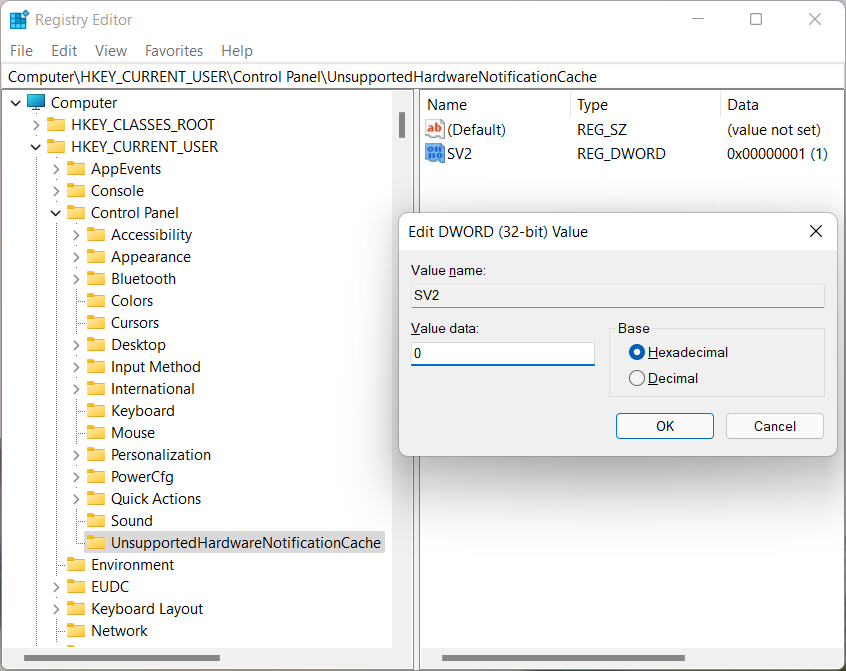
- Under UnsupportedHardwareNotificationCache, you’ll find a key named SV2. Double-click on it and enter ‘0’ in the Value data field. Restart the PC and you won’t see ‘System Requirements Not Met’ watermark Windows 11 anymore.
Note: SV2 (Sun Valley 2 ) applies to Windows Insider Dev build 22557 and newer. For Windows 11 Release or Beta channel having build series 22000.558 and above, you should use SV1 as the DWORD value.
Couldn’t find the UnsupportedHardwareNotificationCache key? Create the Key Registry
There is no need to worry if you can’t find the UnsupportedHardwareNotificationCache key in the Windows Registry while navigating to the path mentioned in the previous section. You need to create the key manually, and with that, you can disable the ‘System Requirements Not Met’ watermark in Windows 11.
- Navigate to the following registry path.
HKEY_CURRENT_USER\Control Panel
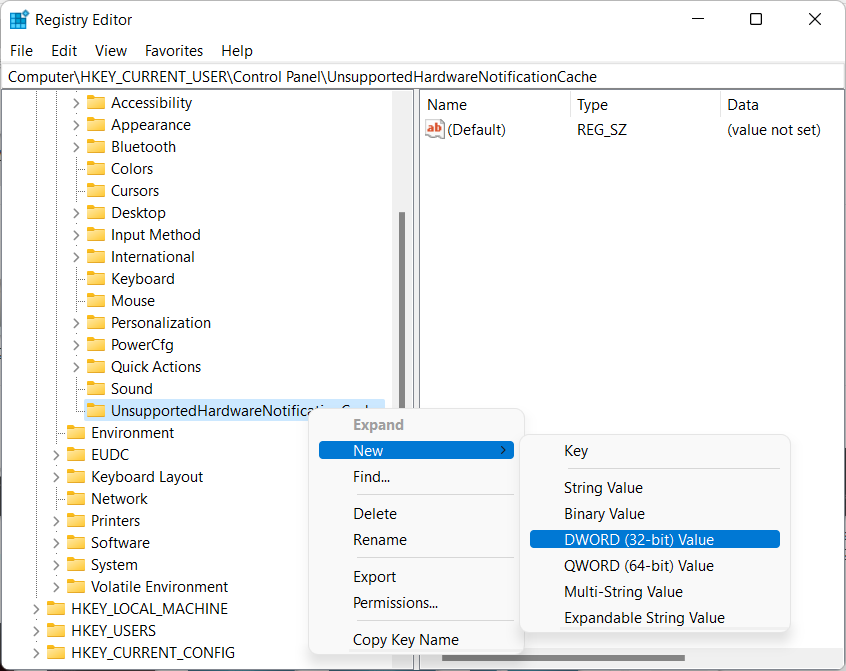
- Right-click on the Control Panel key and Select New -> Key. Name the newly created key as UnsupportedHardwareNotificationCache.

- Now, right-click on the newly created key and select New -> DWORD (32-bit Value) and name it as SV1 or SV2 depending on the Windows build you are using. SV1 is for Stable, Beta, and Release Preview builds while SV2 is for Insider Dev builds.
- Double-click on SV1 or SV2 and change its value to ‘0’. Now, with a system reboot, you’ll find that the Watermark has gone for good.
Get Rid of the Unsupported System Watermark in Windows 11
That is all you need to remove the ‘System requirements not met’ watermark from your Windows 11 PC. It is evident that with Windows Registry, you can always bypass/tweak such restrictions and use your PC the way you want. Another excellent example would be a change of context menu in Windows 11. That’s right! With a simple tweak in the Windows registry, you can get back everyone’s favorite right-click context menu from Windows 10. Another cool thing you can achieve with Windows Registry is allowing Windows 11 to enter username and password on its own.
That’s all from us in this guide. If you have any doubts, let us know in the comments below, and we’ll answer them.