Whenever you turn on your Windows 11 PC, it asks you to select your user account and enter the password on the login screen. But what if I tell you that you can bypass this process and log in to Window automatically.
Enabling auto logon has numerous advantages. Let me tell you an incident when I needed such functionality.
I was facing an issue while using one of the Windows software on my other machine. I raised that issue to the software publisher, on which they assigned me support personnel for resolving the problem remotely. He needed time to debug the case, and while debugging, he asked me to reboot the machine several times. Since we were in different time zones, it was difficult for me to stay awake the whole time. My only job was to enter the login credentials whenever he asked me to restart the PC. And that’s when it hit me! I immediately enabled the auto-login feature on my Windows 11 PC. There was no need for me to enter login credentials anymore.
Want to know how I did it? The following tutorial describes the steps you need to implement the auto-login feature on your Windows PC.
Login to Windows 11 Automatically
Logging automatically into Windows is most beneficial when you have set a long password for your account and don’t want to enter it every time you start the system. On the other side, if you are using a system with multiple users or not secured physically, it is not advisable to enable the auto-login function.
We have enlisted various methods in this article. Go through each of them and follow whichever you find easy to perform. Let’s get started.
1. Use Windows System Settings
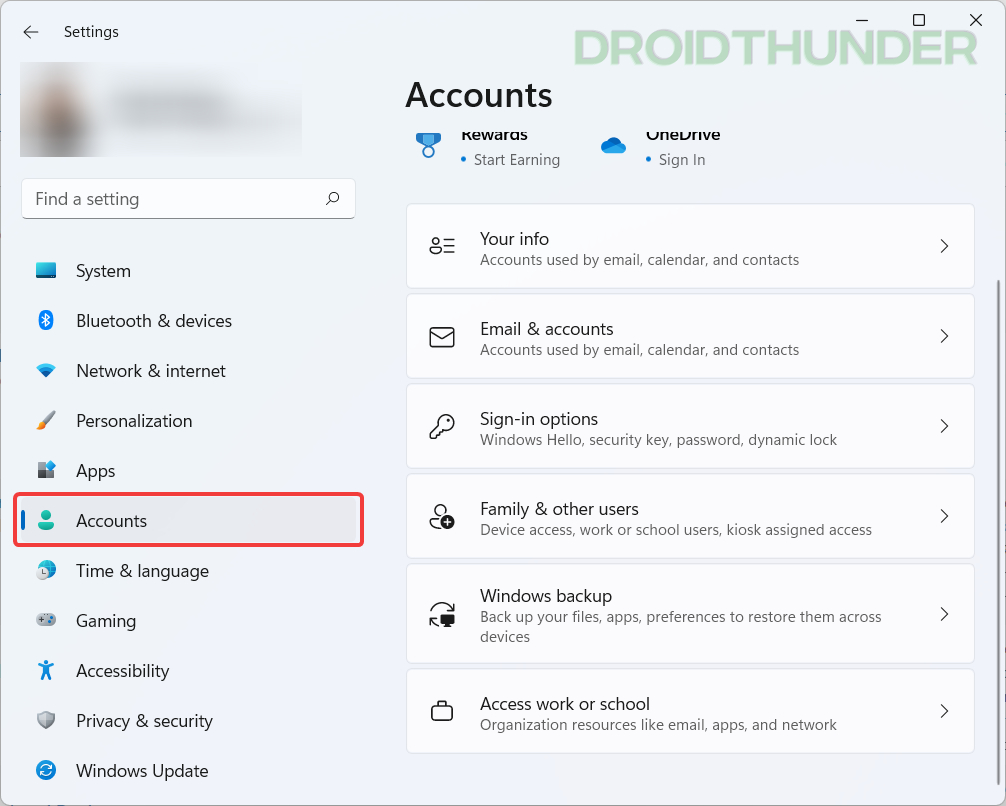
- Open Windows Settings app by pressing Windows + I. Navigate to the Accounts > Sign-in options. Here, make sure that the user account has a password assigned.
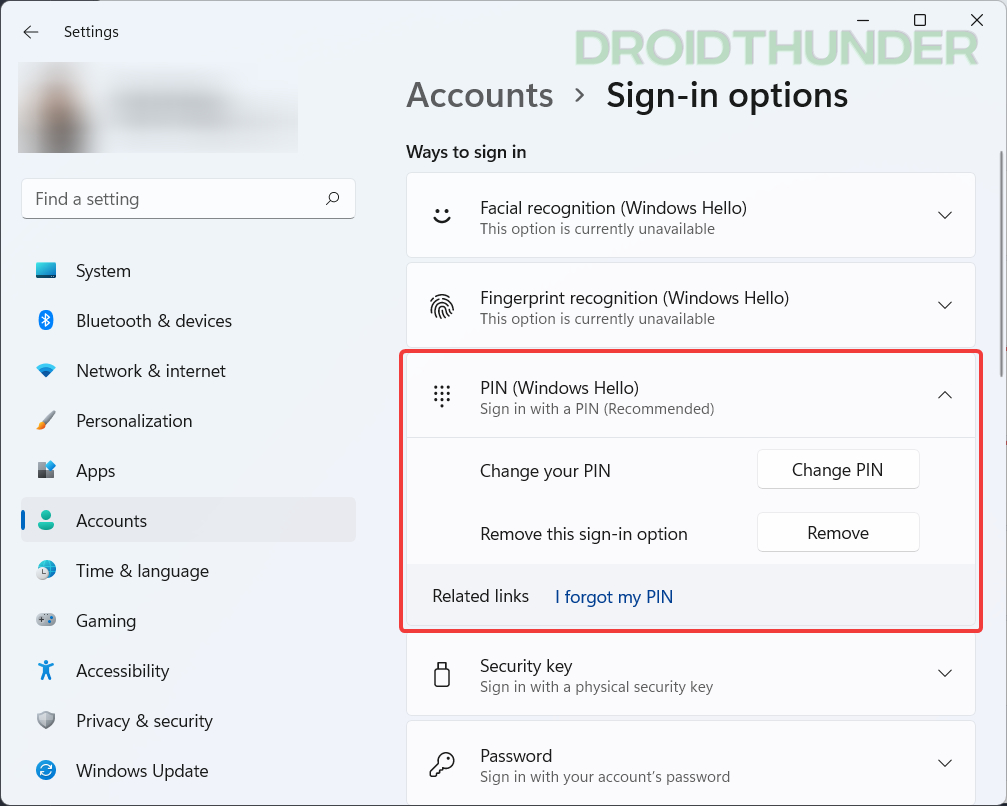
- Now, add Windows Hello PIN, fingerprint, or facial recognition to your user account. It is an optional step, but adding an alternative sign-in method is always better.
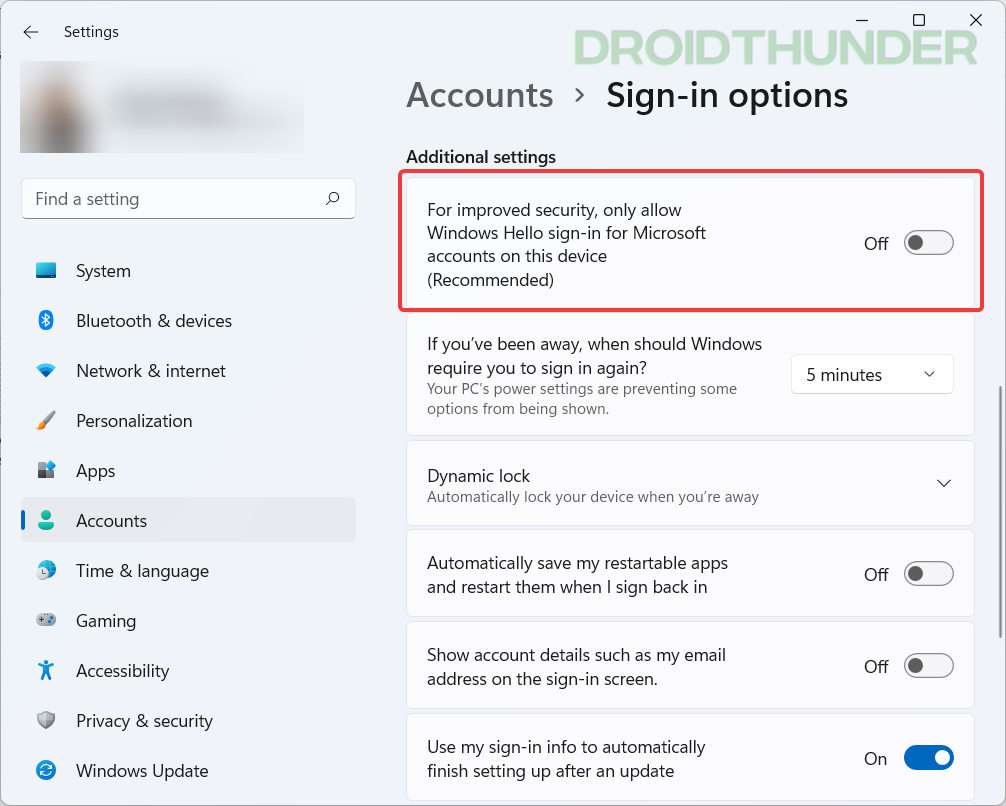
- Next, under the Additional settings section, turn off the “For improved security, only allow Windows Hello sign-in for Microsoft accounts on this device (Recommended)” option. If this option is greyed out, sign out of Windows and sign back in.
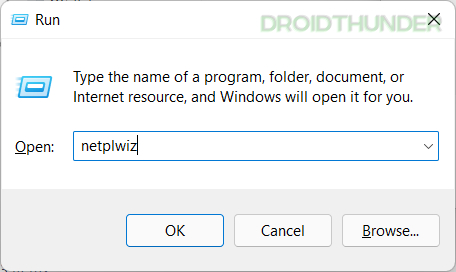
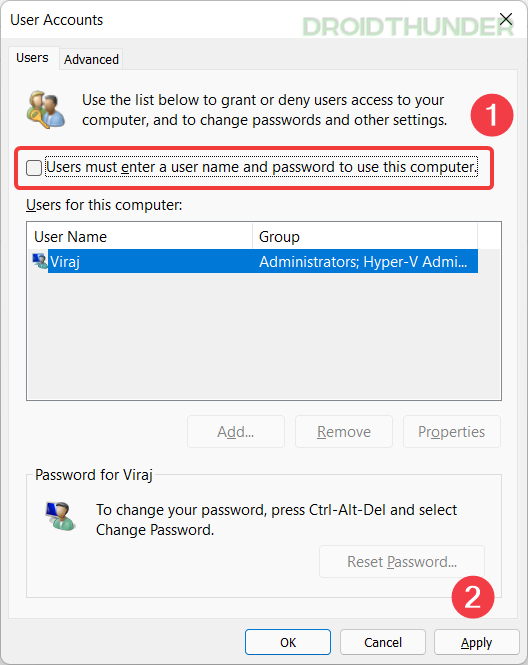
- Open Run command by pressing Windows + R and type
netplwizto open Windows user accounts list.
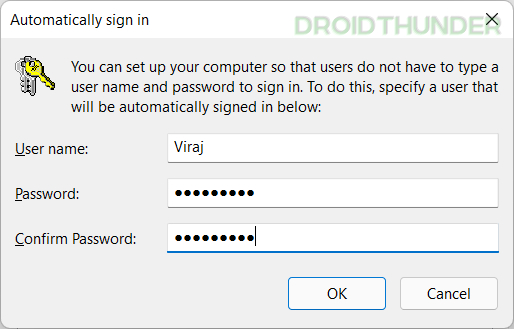
- Untick “Users must enter a user name and password to use this computer option.” Hit the apply button and enter the password for a username you selected. Click on the OK button and restart the computer. That’s it! Next time when you start the PC, Windows won’t ask you to enter the password.
2. Microsoft Autologon Tool
Microsoft has developed their own Auto Login tool, which uses Windows Registry for logging users into Windows automatically. Windows encrypts and stores the credentials you enter with Autologon in the Registry and use them to log in to the specified user automatically.
Note – Although the password is stored in the encrypted form as an LSA secret, a user with administrative rights can easily retrieve and decrypt it.
Below are the steps for you to get familiar with Microsoft’s Auto Login tool.
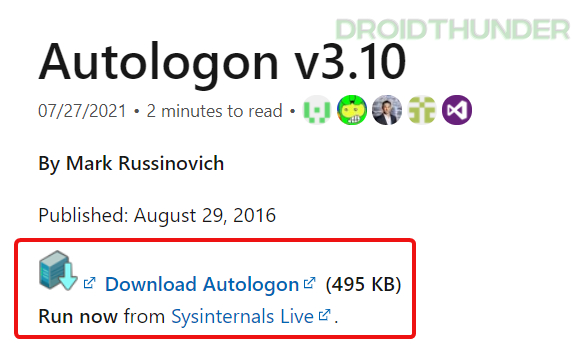
- Get Autologon software from Microsoft’s website. It’s a very lightweight tool, so it shouldn’t take more than a few seconds to download.
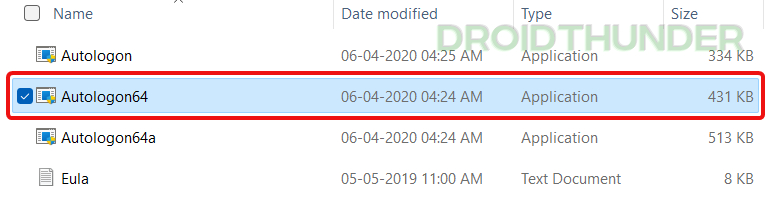
- Extract the Autologon zip file and run “Autologon64” application.
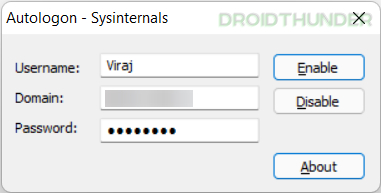
- Enter the Username, domain, and password of the account you want to use for logging automatically into Windows. Press the “Enable” button. The application will now store the user credentials in the Windows registry. Since the password is encrypted, it is hard to use it directly, even if someone finds it.
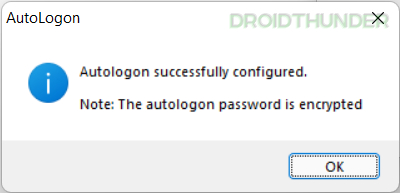
- A popup with a note stating “The autologon password is encrypted” will appear. Press “OK” to close the dialogue box.
Disable Autologon for a Particular Login
Run the “Autologon” application and hit Disable to turn off the auto-login feature. Also, the autologon will be disabled for a particular logon if the shift key is held down before the system performs an autologon.
3. Use Windows Registry
The third and last method for enabling auto-login on Windows 11 is Windows Registry. We will create a few registry keys involving user credentials such as username, domain, and password. Also, by modifying a few registry values, we will activate the auto-login functionality. The steps for enabling Auto login on Windows 11 are as follows.
- Open Run command by pressing Windows + R. Type
regeditand hit OK.

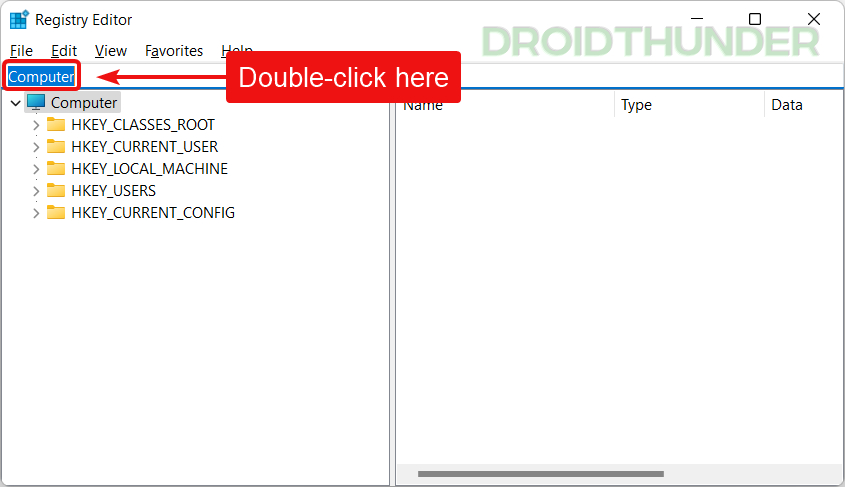
- Click on the address bar and select all texts to highlight the current registry address.
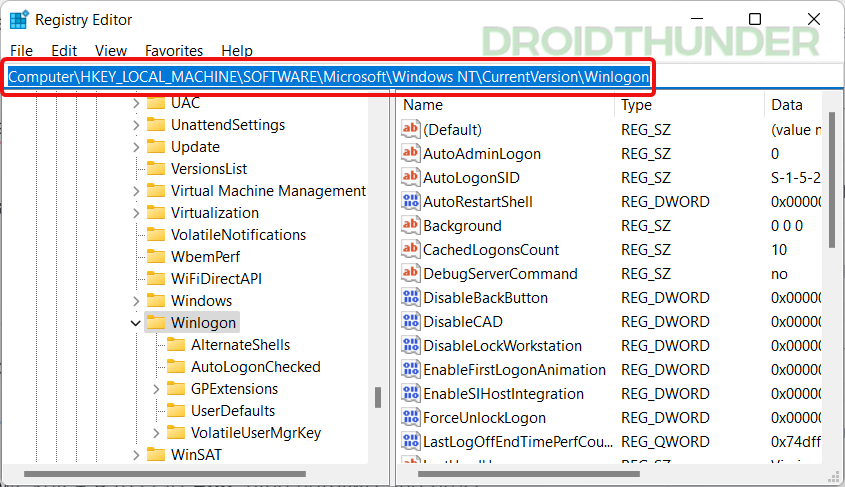
- Copy the following registry address and paste it into the registry editor. You can also navigate to the folder Winlogon folder manually.
Computer\HKEY_CURRENT_USER\SOFTWARE\Microsoft\Windows NT\CurrentVersion\Winlogon
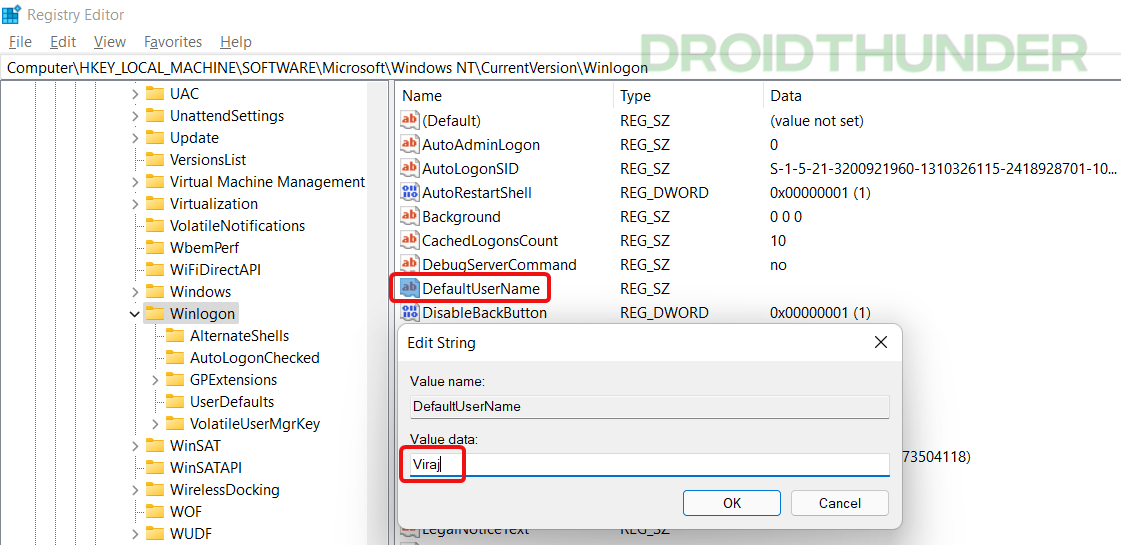
- Right-click on the Winlogon folder within the Registry Editor and create a new key having String Value. Name the key as DefaultUserName.

- Double-click on the DefaultUserName key, and in the Value data field, enter the user account name that you want to auto log in with.
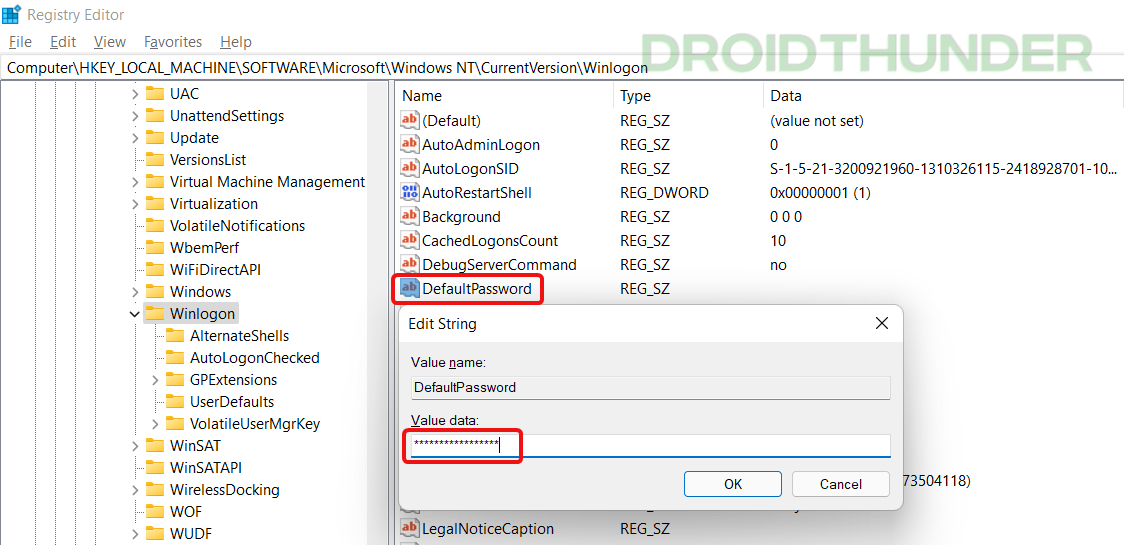
- In the same manner, create one more string key and name it DefaultPassword. Double-click on the DefaultPassword key, and in the Value data, enter the password associated with the user account you used in the last step.
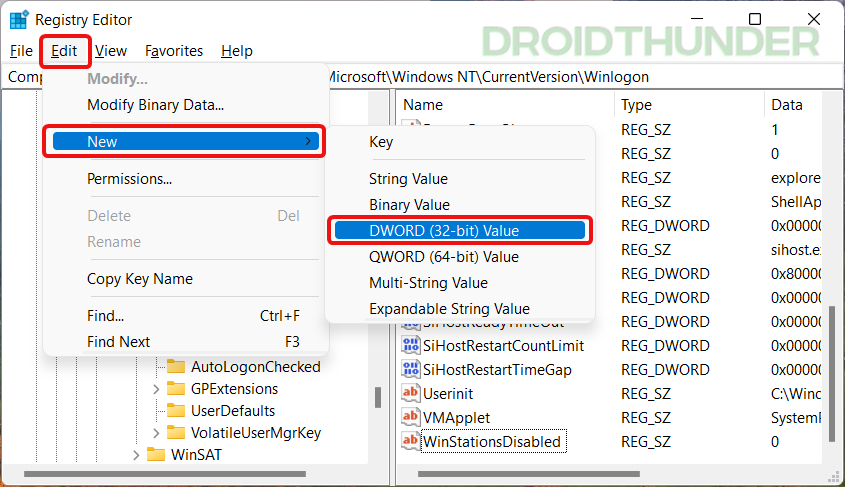
- Now, to enable the auto-login feature in Windows 11, we need to create a DWORD (32-bit) key. Keeping WinLogon folder selected, click on Edit > New > DWORD (32-bit) Value and name it as AutoAdminLogon.
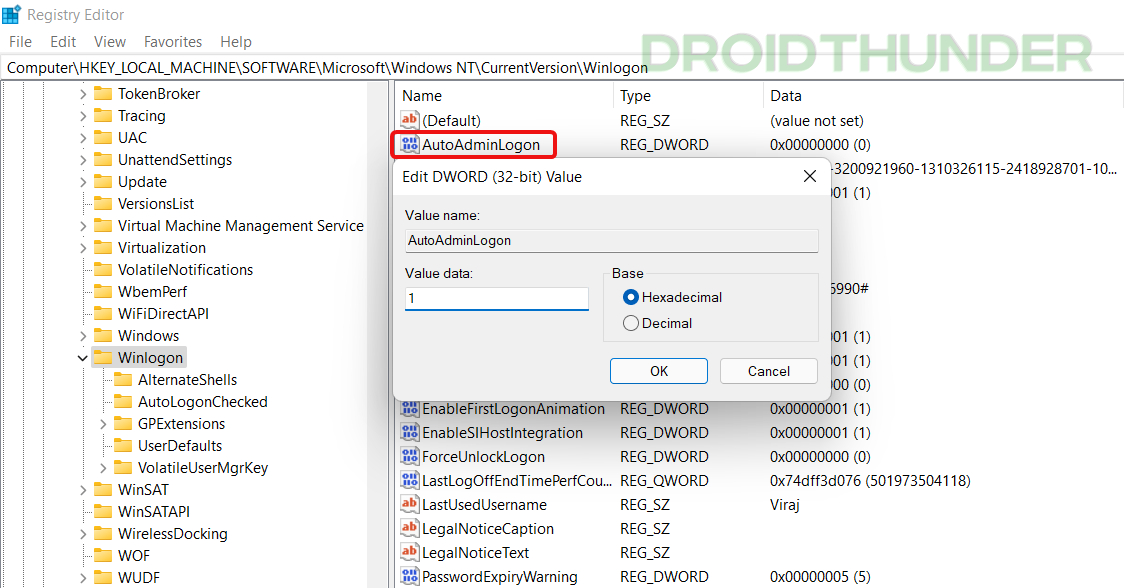
- Double-click on the AutoAdminLogon key. Enter 1 in the Value data field and hit OK.
How to find User Account Name in Windows 11?
Sometimes, one might get confused between the Computer name and the User Account name. So, to avoid confusion and know the exact user account name in Windows 11, you can use the command prompt application. Steps to know the current User Account name in Windows are below.
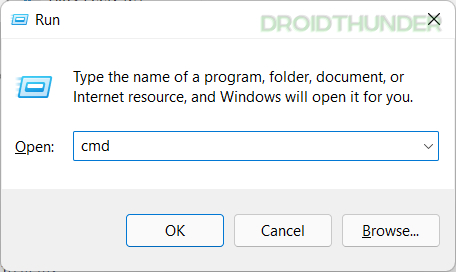
- Open Run command by pressing Windows + R. Type
cmdand hit OK.
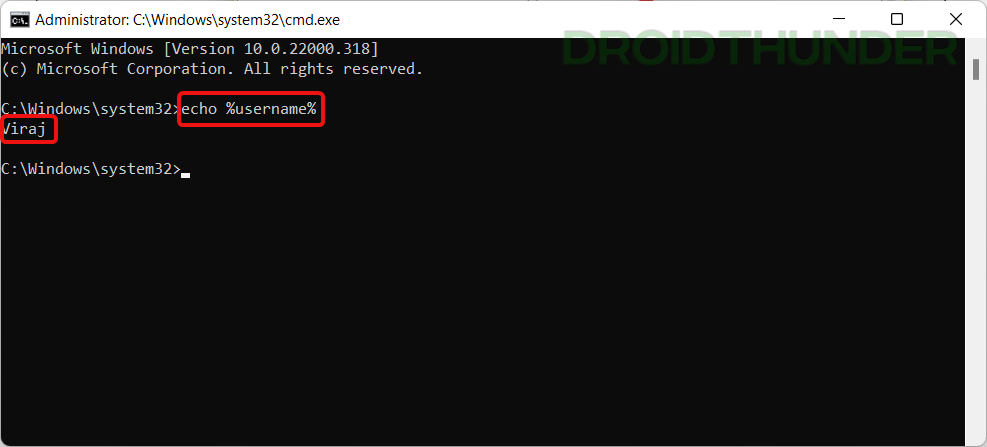
- Type
echo %username%to get the username of the logged-in account.
Enjoy Passwordless Login in Windows 11
Enabling Auto logon on Windows 11 is undoubtedly an easy task and a helpful feature in many ways. But when we consider security, you must secure the system physically and make sure you are the only person using it. If an unauthorized person starts your computer without your knowledge, they can get access to your data quickly. Further, for additional protection, save your confidential data to another drive and encrypt it using BitLocker encryption.
That’s it from us in this guide. If you have any queries regarding the tutorial, you can comment below. We will try our best to resolve the same. Enjoy Passwordless logging on your Windows PC.