- Download Rufus: Get the latest version from the Rufus website.
- Insert USB Drive: Connect an 8 GB or larger USB.
- Select ISO: Choose the Windows 11 ISO file in Rufus.
- Configure Settings: Select ‘GPT’ for UEFI and leave the file system as ‘NTFS.’
- Start Process: Click ‘START’ and wait for Rufus to complete.
In this guide, we will learn 3 methods to create a Windows 11 Bootable USB with Rufus: downloading an ISO, using an existing ISO, and for unsupported hardware. Ever had your computer hang, run slow, or hit you with the blue screen of death? I did. My old Asus laptop, running Windows 10, was driving me crazy. One day, while working, my laptop suddenly froze again. Frustrated, I decided it was time for an upgrade to Windows 11.
A friend suggested creating a Windows 11 bootable USB using Rufus. So, I found an old Pendrive, downloaded Rufus and the Windows 11 ISO file, and followed the steps. To my surprise, it worked perfectly. My laptop felt brand new, with no more sluggish performance or unexpected crashes.
If you’re facing similar issues or want to upgrade to Windows 11, creating a bootable USB with Rufus is your solution. It’s easier than you think and can save you a lot of headaches. If you are all set, then let’s start the step-by-step process of creating a Windows 11 Bootable USB with Rufus.
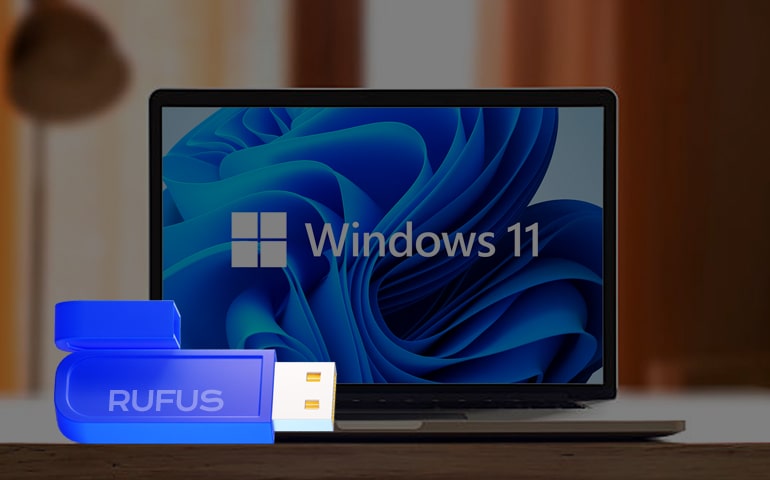
3 Methods to create Win 11 Bootable USB
Why Do You Need a Windows 11 Bootable USB?
- Upgrade to Windows 11: Easily move from Windows 10 to Windows 11.
- Clean Install: Start fresh and improve your computer’s performance.
- Emergency Repair Tool: Fix your PC when it doesn’t boot up.
- System Recovery: Recover lost data and restore your system.
- Install on Multiple PCs: Use one USB to install Windows 11 on different computers.
- Bypass Hardware Requirements: Install Windows 11 on older or unsupported hardware.
- Portable OS Installation: Carry a portable version of Windows 11 for any computer.
Why Use Rufus?
- Free Tool: Rufus is completely free to download and use.
- Fast Process: Rufus creates bootable USBs faster than other tools.
- Easy to Use: Rufus has a simple and user-friendly interface.
- Bypass Requirements: Rufus can bypass Windows 11’s hardware requirements.
- Supports Multiple OS: Rufus supports creating bootable USBs for various operating systems.
“Transforming your PC with Windows 11 is just a few clicks away with Rufus – the simplest, fastest, and most reliable tool for creating a bootable USB.”
Requirements for the Windows 11 Bootable USB Rufus
- A Windows PC.
- USB drive (at least 8 GB).
- Windows 11 ISO file.
- Rufus software.
Method 1: Create Windows 11 bootable USB using Rufus with ISO download
In this method, we will create the Windows 11 bootable USB by downloading the ISO directly through Rufus.
Step 1. Download Rufus
- Go to the Rufus website.
- Under the Download section, click the link to get the latest version of the Rufus exe file.
- Once downloaded, run the executable file to start Rufus Tool. Since it is a portable software, there is no need to install it.
Step 2. Check for Updates
- Click the Settings button at the bottom of the tool.
- Under the Settings section, select the Daily option from the Check for Updates drop-down menu.
- Click the Close button.
- Click the Close button again.
Step 3. Set Drive Properties
- Relaunch Rufus.
- Insert your USB pendrive into your computer.
- Under the drop-down Device option, select the USB flash drive to create the installation media.
- Under the Boot selection option, select the Disk or ISO image option.
- In the right side down-arrow menu, select the Download option.
Step 4. Download Windows 11 ISO from Rufus
- Click the Download button.
- Choose Windows 11 and click Continue.
- In the Release section, select 22H2 for the Windows 11 version and click Continue.
- Furthermore, choose Windows 11 Home/Pro/Edu and click Continue.
- Select your preferred language for Windows 11 and click the Continue button.
- Select the x64 architecture.
- Click the Download button and choose a location to save the Windows 11 ISO file.
Step 5. Create Bootable USB
- Under the Image option setting, select Standard Windows 11 Installation.
- Specify a name for the drive in the Volume label setting, e.g., Windows 11 Setup.
- Click the Start button.
- Clear the option Remove requirement for 4GB+ RAM, Secure Boot, and TPM 2.0.
- Check the Remove requirement for an online Microsoft account if you want to create a local account during setup.
- Check Create a local account with username and specify the account name.
- Adjust regional options and data collection settings as needed.
- Click the OK button.
After completing these steps, your bootable USB drive is ready to install Windows 11 OS.
Method 2: Create Windows 11 bootable USB using Rufus with existing ISO file
In this method, we will show you how to use Rufus to create a Windows 11 bootable USB with an existing ISO file. This way, you can quickly prepare your USB drive for installation.
Step 1. Download Rufus
- Open your browser and go to the Rufus website.
- In the Download section, click the link to download the latest version of Rufus.
Step 2. Launch Rufus
- Locate the downloaded file (rufus.4.xx.exe) and double-click it to launch Rufus.
Step 3. Select Your USB Drive
- Insert your USB drive into your PC.
- Under the drop-down Device section, select your USB flash drive.
Step 4. Choose Boot Selection
- In the Boot selection section, select Disk or ISO image.
- Next, click the Select button and navigate to the location of your Windows 11 ISO file.
- Choose the ISO file (either version 22H2 or 21H2) and click Open.
Step 5. Configure Image and Partition Options
- Under the Image option, choose Standard Windows 11 Installation.
- Furthermore, in the Partition scheme section, select GPT.
- Then, in the Target system section, select UEFI (non-CSM).
Step 6. Name Your USB Drive
- Under the Volume label section, enter a descriptive name for your USB drive, like Win11_Install_USB.
Step 7. Set File System and Cluster Size
- Use the default settings for File system and Cluster size.
Step 8. Optional Settings
- Tick Quick format.
- Next, tick Create extended label and icon files.
- Clear the Remove requirement for 4GB+ RAM, Secure Boot, and TPM 2.0 option.
- Tick the Remove requirement for an online Microsoft account option to create a local account during OOBE.
- Moreover, tick the Create a local account with username option and enter the desired username.
- Clear the Set regional options to the same values as this user’s option.
- Clear the Disable data collection option.
Step 9. Start the Process
- Click the Start button.
- Click OK to confirm the USB drive’s formatting and the creation of the bootable drive.
- Rufus will now begin creating the bootable USB with the Windows 11 installation media.
Once the process is done, you’ll have a ready-to-use bootable USB drive for installing Windows 11.
Method 3: Create Windows 11 bootable USB for Incompatible Hardware using Rufus
In this method, you’ll learn how to use Rufus to create a Windows 11 bootable USB that bypasses TPM 2.0, Secure Boot, and memory requirements, allowing installation on unsupported hardware.
Step 1. Download Rufus
- Open your browser and go to the Rufus website.
- In the “Download” section, click the link to download the latest version.
- Double-click the downloaded rufus-4.xx.exe file to launch Rufus.
Step 2. Prepare Your USB Drive
- Insert your USB drive into your computer.
- In Rufus, under the Device section, select your USB drive.
Step 3. Select the Windows 11 ISO
- Under the Boot selection section, choose the Disk or ISO image option.
- Click the Select button and navigate to your Windows 11 ISO file (version 22H2 or 21H2).
- Click the Open button to load the ISO into Rufus.
Step 4. Configure Rufus Settings
- Image option: Select Standard Windows 11 Installation.
- Partition scheme: Choose the GPT option.
- Target system: Select UEFI (non-CSM).
- Volume label: Give your USB drive a descriptive name like Windows 11 Setup.
- File system and Cluster size: Leave these at their default settings.
- Quick format: Ensure this option is checked.
- Create extended label and icon files: Check this box as well.
Step 5. Bypass Hardware Requirements
- Click the Start button.
- In the new window, check the box for Remove requirement for 4GB+ RAM, Secure Boot, and TPM 2.0.
Optional Settings
- Remove the requirement for an online Microsoft account: Check this box if you prefer to create a local account during setup.
- Create a local account with a username: If desired, specify the account name for a local account installation.
- Set regional options: Optionally, clear this box if you don’t want to set regional settings to the same values as your current user.
- Disable data collection: Optionally, uncheck this box to allow data collection.
Step 6. Create the Bootable USB
- Click the OK button to confirm the settings.
- Rufus will now create the bootable USB media, bypassing the security and memory requirements.
And that’s it! You’ve created a Windows 11 bootable USB that can be used on unsupported hardware.
Bottom Line
Creating a Windows 11 bootable USB with Rufus is easy, whether you need to download a new ISO, use an existing file, or bypass hardware limits.
If you have any questions or get stuck in the Windows 11 Bootable USB Rufus process, then please comment below.
FAQs
Rufus is a free tool to create bootable USB drives for installing or repairing operating systems
Use a USB drive with at least 8GB of storage and good read/write speeds.
A bootable USB lets you install or upgrade to Windows 11, recover your system, or do clean installs easily
Download Rufus from its official website at rufus.ie.
Download the Windows 11 ISO file from the official Microsoft website.
Rufus can bypass TPM 2.0, Secure Boot, and memory requirements, so you can create a bootable USB for unsupported hardware.
Rufus will format the USB drive, but back up any important data first.
Rufus only works on Windows. Mac users can try Balena Etcher instead.
Absolutely! Rufus is a trusted tool used by many professionals.
You need an internet connection to download Rufus and the Windows 11 ISO file. Once you have both files, you can create the bootable USB drive offline.
It takes a few minutes to half an hour, depending on your USB drive and computer speed.
Insert the USB, restart the PC, and press the ‘F11’ or ‘Delete’ keys repeatedly until you reach the boot menu. Select ‘Boot from USB’ from the boot menu.
Yes, Rufus supports creating UEFI bootable USB drives.
Alternatives like Balena Etcher or UNetbootin are also good, but Rufus is very popular for Windows.