
Install Android VCOM drivers on Windows 8, Windows 10, Windows 7 32 bit, and 64 bit OS. Download Latest MediaTek MTK USB VCOM Drivers using our easy steps guide. Whenever any software gets outdated, it starts giving errors when getting your device recognized by the PC. In particular, you might get This device cannot start. (Code 10) error under this situation.

Also, you can see the MTK Preloader USB VCOM port for a second, and then it disappears from the Device Manager list. The main reason for this problem is outdated and corrupted device drivers. Sometimes, restarting your computer can fix the code 10 error. However, it is a scarce scenario. To recognize your Android phone by PC, all you need is to install drivers specifically made for your device.
Moreover, you can even update the already installed driver and fix device driver issues. Whenever a device is connected to the PC, the operating system automatically detects the phone and installs a generic USB driver. Many Android devices come with USB driver installation CDs. You can quickly run the CD and install the entire Software Suite on your PC.
Most importantly, this will fix the connection and update the already present drivers. Moreover, updating drivers can solve various issues, add new functions, and upgrade to the latest version. Do you own a MediaTek phone like Xiaomi Redmi 6A, Realme 3, Oppo F9 Pro, or Vivo Y3? If yes, you should install MediaTek MT65xx USB VCOM Drivers on your Windows PC.
An app called SP Flash tool or SN Write tool is used mainly to root, install TWRP recovery, flash custom ROM or stock firmware on MediaTek phones. However, this SP Flash tool will not detect your Android phone unless the latest Mediatek USB VCOM drivers are installed. If you don’t want to root or install ROM, you should still have the MediaTek MTK drivers installed for proper data transfers.
How to Install MediaTek MT65xx USB VCOM Drivers
We’ll install the latest MediaTek USB VCOM (Android) Driver version 3.0.1504.0 on Windows 7, Windows 8, Windows 10, Vista, and XP in this guide. These drivers are compatible with both 32-bit as well as 64-bit Windows OS. Furthermore, it is even compatible with MT66xx and MT67xx chipset devices. Below guide provides MediaTek DA USB VCOM driver download for Windows 7 32-bit, and 64-bit operating systems.
Downloads
Steps to Install MediaTek MTK Android VCOM Drivers
- Download and extract the drivers on your PC.
- If you have Windows 8, 8.1, or Windows 10 OS, you’ll need to disable digital driver signature enforcement.
- This is necessary to install unsigned drivers on Windows.
- So launch Command prompt window (cmd) and run it as Administrator.
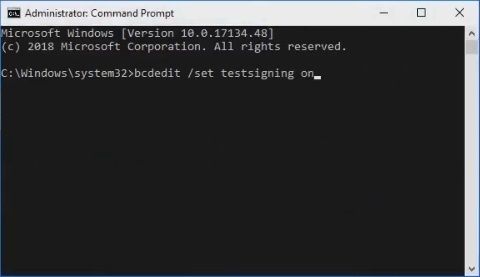
- Type the following command in the cmd window and press the enter key:
bcdedit /set testsigning on
- As soon as you hit the enter key, a message saying operation completed successfully will appear, as shown below.
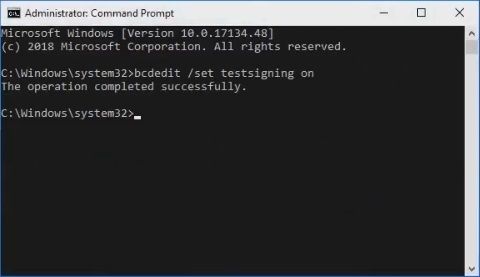
- This will disable Digital Driver Signature Enforcement on your Windows PC.
- Restart your computer to apply the changes done.
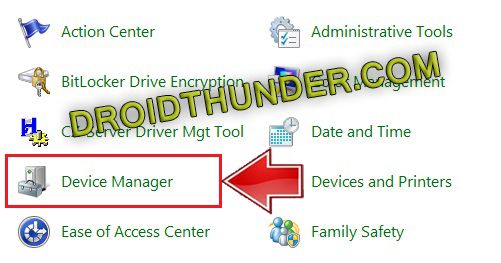
- On PC, open the control panel and launch Device Manager.
- Under Device Manager, single click on your Computer Name, which is present at the top.
- Click on the Actions tab and select Add legacy hardware.
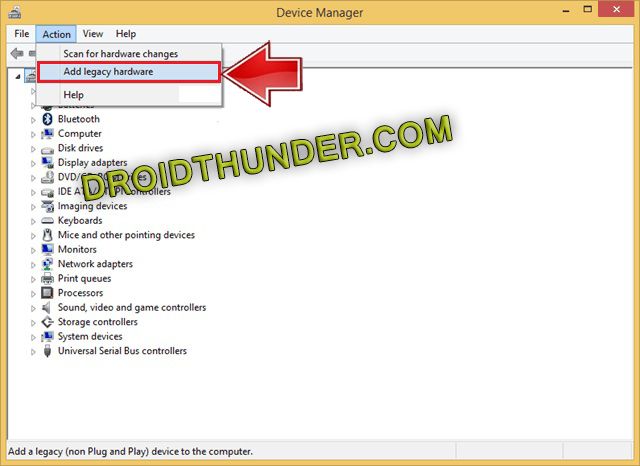
- This option will not appear unless you single click on your Computer Name.
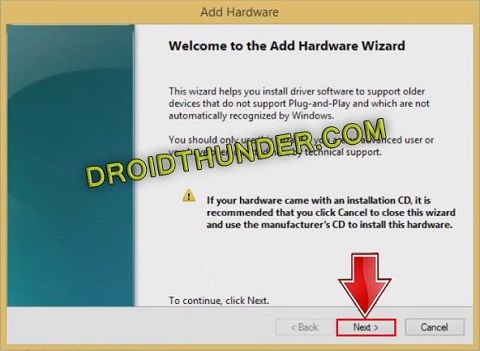
- This will launch a Welcome to the Add Hardware Wizard window.
- To continue, tap Next.
- Further, choose the second option, i.e. Install the hardware that I manually select from a list (Advanced).
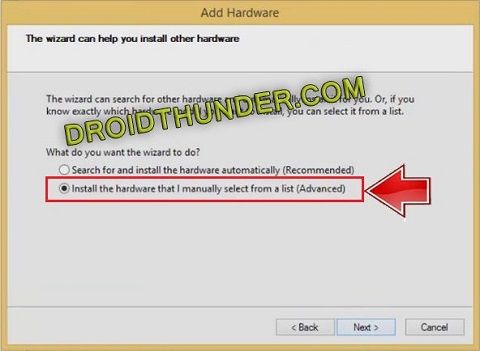
- Then click on Next.
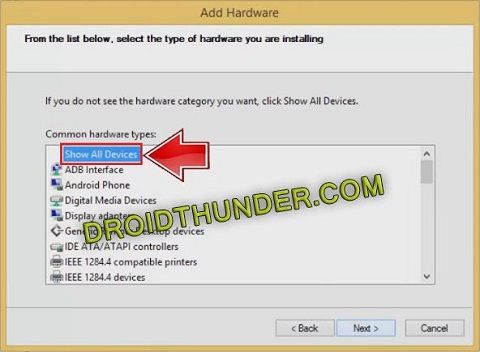
- Now Windows will ask you to select the type of hardware you want to install.
- Click on Show All Devices and tap Next.
- A new window will appear, as shown below.
- Just tap on the Have Disk option.
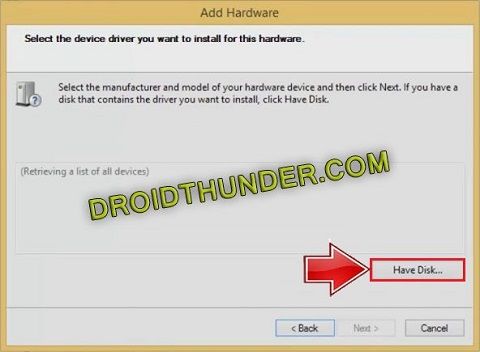
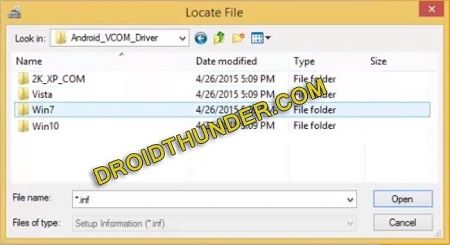
- Click on Browse and select the Android VCOM driver setup file from the extracted folder.
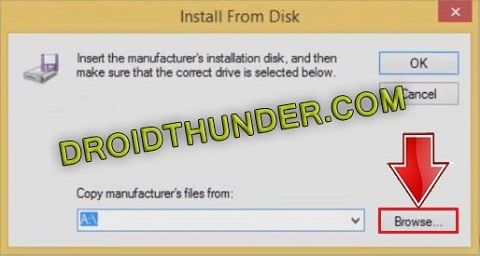
- Depending upon your Windows OS, whether it may be Windows 7, 8, 10, XP, or Vista, select the appropriate drivers.
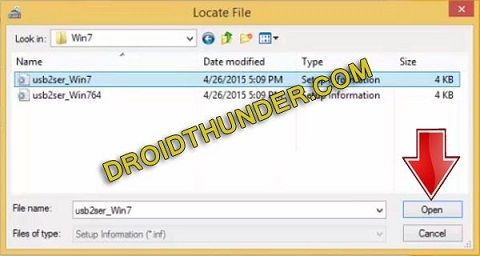
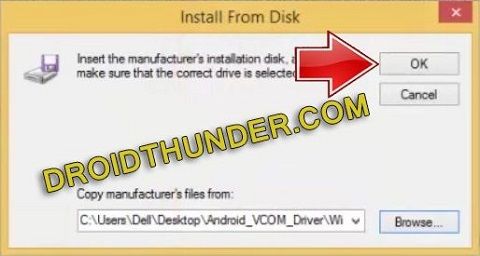
- Ensure to install the MediaTek DA USB VCOM driver as shown below.

- After selecting the Android VCOM driver, click Next to begin the actual MTK driver installation process.
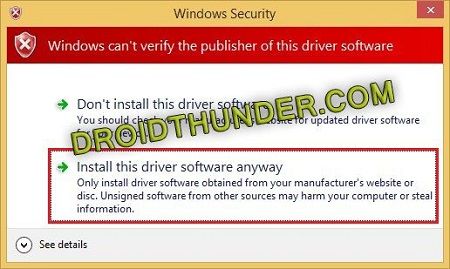
- As soon as you click Next, a Windows security prompt will appear.
- Just click on Install this driver software anyway option.
- This will start the MTK VCOM Driver installation process.
- It will be completed within a few minutes. So wait and be patient.
- As soon as the process is completed, a successful message will pop up.
- Just tap on the Finish button.
Wrapping Up
Finally! This is how you can install MediaTek MT65xx Pre-loader USB VCOM Drivers on the Windows operating system. You can quickly transfer files, images, videos, and documents between MediaTek smartphone and PC. Moreover, you can also gain root access, flash custom ROM, install kernels and mods like Xposed framework, etc. If you find any difficulty while going through this process, please comment below.


4 thoughts on “How to Install MediaTek MT65xx USB VCOM Drivers”
I’ve installed the above drivers but how to connect my phone to computer? Should i remove the battery ? My redmi 6a got bricked and it is not accessible!
Very detailed instructions. thanks mate
a mi al abrir el simbolo de sistema me aparece y poner el comando me aparece
“Error al establecer los datos del elemento.
El valor está protegido por la directiva de arranque seguro y no se puede modificar ni eliminar.”
que quiere decir y que puedo hacer.
Gracias.
Best instructions yet. Well done and thanks.