
6 Best Methods to increase the internal storage space of the Android device. Avoid the insufficient storage available message and increase memory using these 6 methods. Nowadays the Android phone comes with a large devastating internal memory.
That’s the reason these phones are very smooth as well as fast in performance. But there was a time when the Android smartphones used to come with low internal memory of 250-450 megabytes.
Moreover, due to such limited memory, there is always a problem while installing a new app. One way is to delete any of the pre-installed apps to carve out some space for a new one. But this method is not so effective.

Increasing the internal memory can be the only solution for this. Furthermore, you must have noticed that with the increase in apps, the performance and smoothness of any phone decreases. This is because the internal memory of your phone cannot withstand the plenty of loaded apps in it.
Furthermore, you can partition your external memory card and use some of its space for internal memory. Besides, different techniques are available for partitioning a memory card. Out of which we have listed some easy and basic six methods.
Use any of these methods to increase your phone’s memory. Moreover, methods 1 and 2 are the most widely used techniques as they do not restrict the use of Stock firmware or Custom ROM.
How to Increase Internal Memory of Android Phone
Interested users can proceed to our actual easy and step-by-step article on how to increase the internal memory of any Android phone.
Disclaimer
Proceed at your own risk. we at Droid Thunder will not be responsible for any damage.
Pre-requisites
- Your phone must be ROOTED. This is essential for all the mentioned methods.
- Backup all the contents of the memory card on your computer as everything gets wiped out.
- Charge your phone at least up to 60% to decrease the risk of interruption during the process.
Method 1: Using Clockworkmod (CWM) Recovery
At first, we’ll use the CWM recovery to expand the Android mobile storage space.
Downloads
Steps to Increase Internal Storage using Link2SD and CWM
- Download and install the Link2SD app.
- Now switch off your phone until it vibrates.
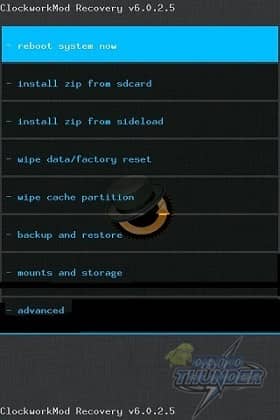
- Enter your mobile into CWM recovery mode.
- Navigate to the advanced option and select it.
- On the next screen select the partition SD card option.

- Next, select the ext size. Note that this size should be less than your memory card size. Select swap size as zero.
- Wait for a few minutes to complete the partitioning SD card process.
- After successful partitioning of the SD card, select +++++go back+++++ and then select reboot system now.
- Start your phone. Install the Link2SD app in it.
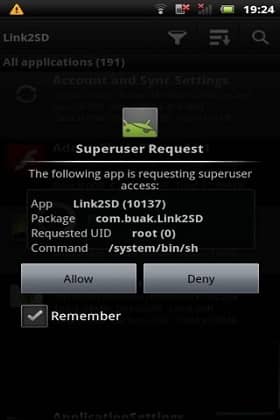
- Launch the app and grant Superuser permissions.
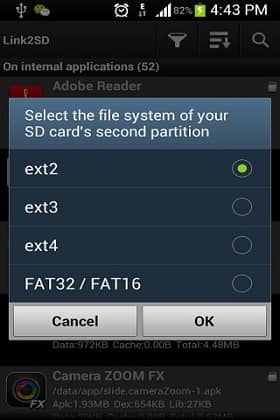
- A popup window will appear to choose the file system of your second partition. Select the Ext2 format.
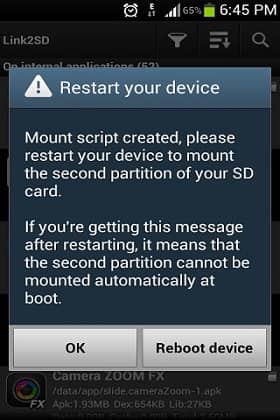
- The app will then ask to reboot your device. So reboot.
- After rebooting, launch the Link2SD app again.
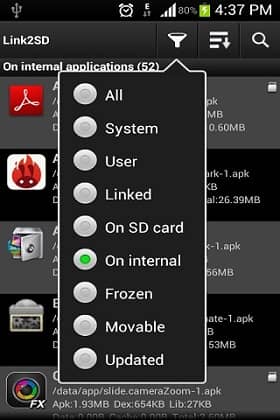
- On the top, you’ll find the filter option. Click on it & choose on internal.
- This will show you all the apps present on the internal memory.
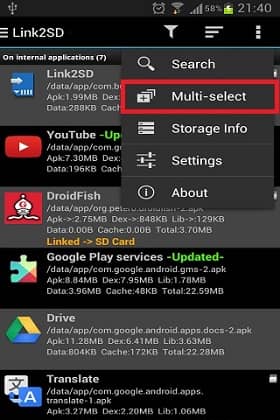
- Now click the option key and select a multi-select option. Then select all the apps.
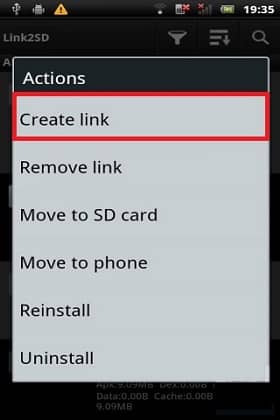
- Again click on the option and select the Create link option.
- Next tick all three options i.e. Link application file, Link Dalvik cache file, and Link library files. Then ok.
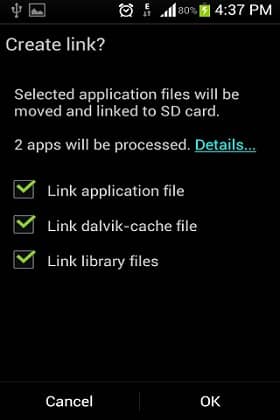
- Wait a few minutes to create a link for this partition.
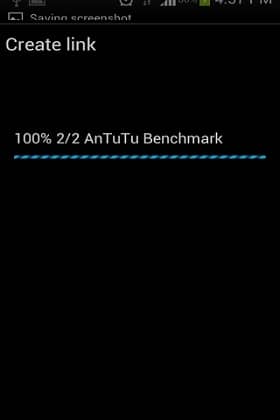
- After completing everything as mentioned above click ok.
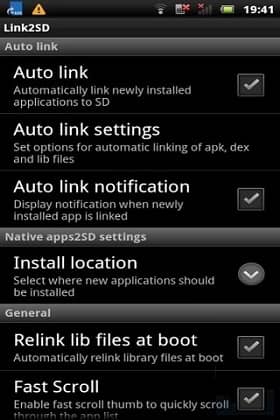
- Now to link every new app that you will download to this partition, select options and then auto-link.
- Every newly downloaded app from the Play Store will get saved in this partition.
- Finally, you’ve successfully increased your phone’s internal memory.
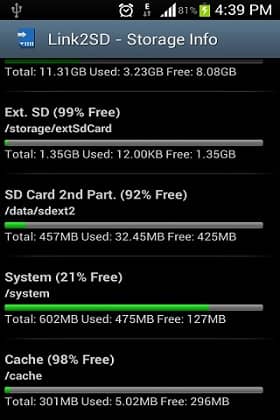
- You can see the memory status from link2sd > options > storage info.
Note: Do not remove/replace the memory card as it may corrupt the apps.
Method 2: Using Mini Tool Partition Wizard
Here, we’ll use the Mini Tool Partition software on a Windows computer.
Downloads
Steps to Expand Storage using Mini Tool Partition
- First of all, download and install the Mini Tool Partition Wizard software on your computer.
- Now remove the memory card from your phone and insert it in the card reader.
- Connect your memory card reader to the computer.
- Launch the Mini Tool Partition Wizard software on the computer.
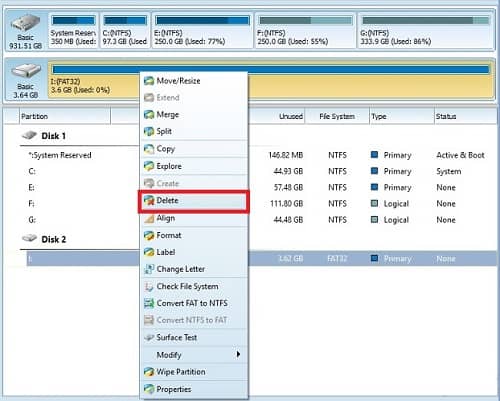
- It’ll show all your disk drives along with the memory card that you’ve just connected.
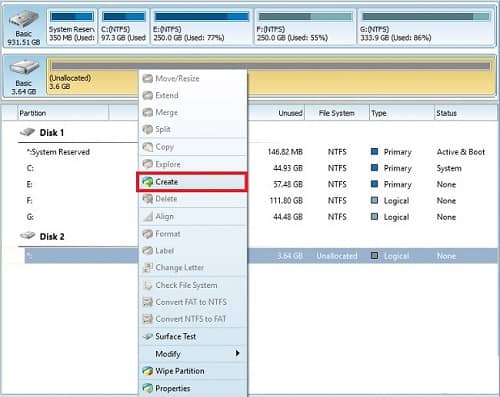
- Now right-click on the memory card and select delete.
- Note that this will format the SD card completely.
- Hence, make sure to back up everything before this step.
- The memory card will then show unallocated space.
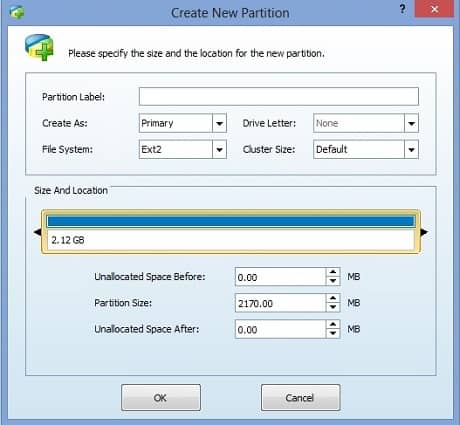
- Right-click on the memory card showing unallocated space and select Create.
- A popup window will appear.
- In the create option, select primary and in the file system select FAT32 (since I use a 4GB memory card here).
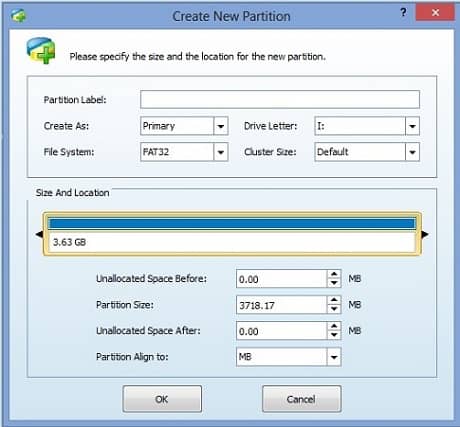
- Note: If your memory card size is less than 2GB then select the FAT file system.
- If your memory card is more than 2GB, then you should select the FAT32 file system.
- Select the partition size of your memory card for storing data and click OK. Here I select 1.5GB.
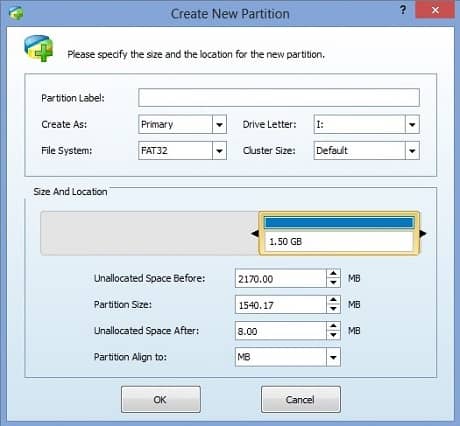
- Then select the unallocated space and right-click on it and select Create.
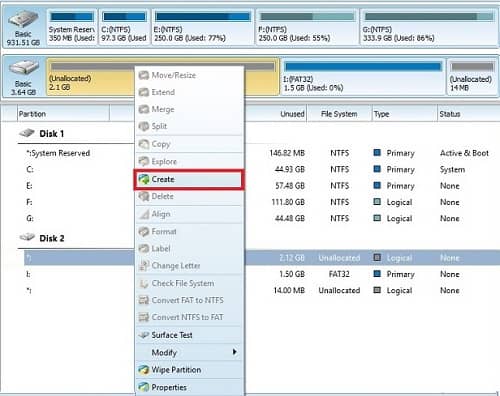
- Again in the popup window select primary in creating an option.
- Choose Ext2 in the File system option and click ok.
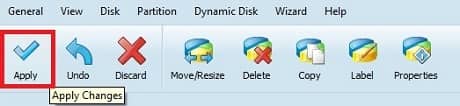
- Click on the Apply button present at the top left corner of the Mini Tool Partition Wizard.
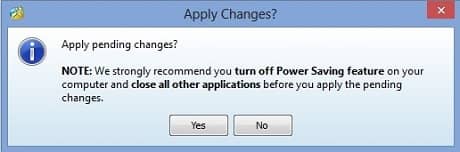
- A popup window will appear. Click on the Yes option.
- As soon as you click on it the partition process will start.
- Wait for the process to finish.
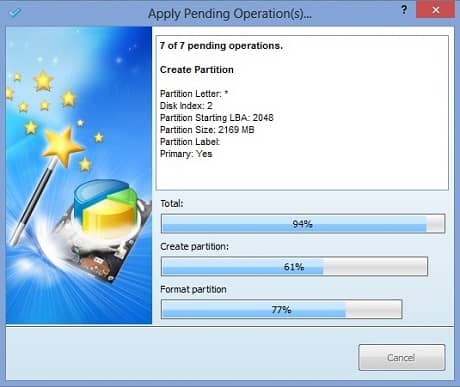
- After completion of the process, you’ll get a successful message on your PC screen.

- Now copy all the data back into the memory card and insert it in your phone.
- Then restart your phone and follow the steps of method 1.
- Finally, you have successfully increased your phone’s internal memory.
Method 3: Using Terminal Emulator App
This method can be performed without using the Link2SD app.
Downloads
Steps to Expand Internal Storage using Terminal Emulator
- Make a partition of your SD card using Mini Tool Partition Wizard software.
- Then install the Terminal Emulator App on your phone from the link given above.
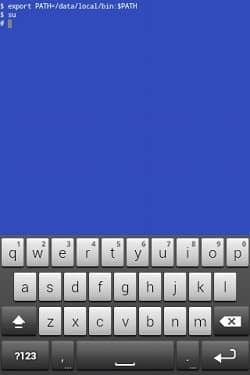
- Launch the application.
- Type this command in it and press enter:
$ su

- This will grant Superuser permissions.
- On the next line type the following command and press enter:
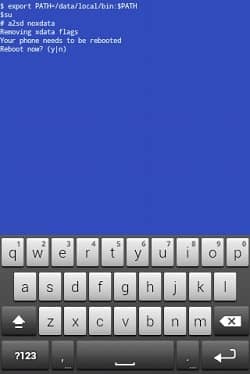
#a2sd xdata
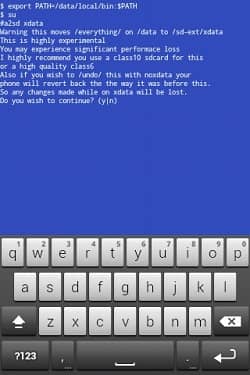
- As soon as you press enter, the app will ask you whether to continue with the process or not.
- So type y as the next command in the app.

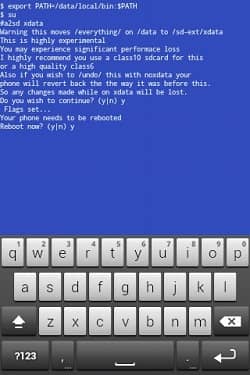
- Now the app asks to reboot your phone.
- Again type y as the next command to restart the phone.
- Finally, you have successfully increased your phone’s internal memory.
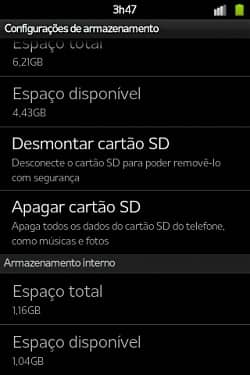
- You may check the same from the Menu > Settings > Storage.
- If you wish to undo the process and revert the phone the way it was before, follow these steps:
- Enter these commands one after another and press enter.
$su
- Then type the next command:
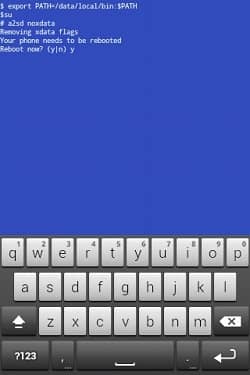
#a2sd noxdata
- The app will ask you to reboot your phone.
- So press y as the next command and press enter.
- After rebooting the phone will revert to the state it was before.
- Thus you can increase your device’s internal memory with the Terminal Emulator app.
Method 4: Using INT2EXT
In this method, we’ll use the INT2EXT file to expand phone storage.
Downloads
INT2EXT4+ (for new ROMs).
INT2EXT+ (for older ROMs).
Steps to Expand Phone Memory using INT2EXT
- Download the INT2EXT4+ zip file on your computer. Remember not to extract it.
- Boot your Android phone into CWM recovery mode.
- Navigate to the Advanced option and select it.
- On the next screen select the partition SD card option.
- Next, select the ext size.
- Note that this size should be less than your memory card size. Select swap size as zero.
- The partitioning SD card process will begin.
- Wait for a few minutes to complete it.
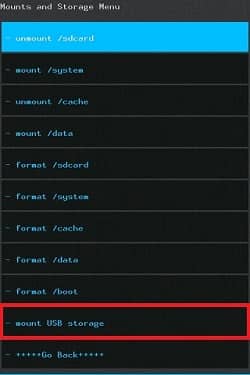
- After successful completion of the process, select ++++go back++++ then select the mount and storage option.
- On the next screen select the mount USB storage option.
- Now connect your phone to your PC.
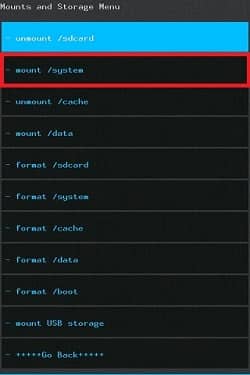
- Copy the downloaded INT2EXT4+ zip file on your SD card.
- Navigate to the mount and storage option and this time select the mount/system option.
- Return to the main menu and select the install zip from SD card option.
- On the next screen, select Choose from SD card.
- This will show all the contents present on your memory card.
- Just navigate to the INT2EXT4+ zip file and select it to start the installation process.
- Finally, this is how you can increase internal memory.
- Restart your phone by selecting the reboot system now option.
Method 5: Using Mounts2SD app (Requires ROOT)
Here, we’ll use the Mounts2SD application to increase the phone storage space.
Download
Steps to increase internal memory using the Mounts2SD app
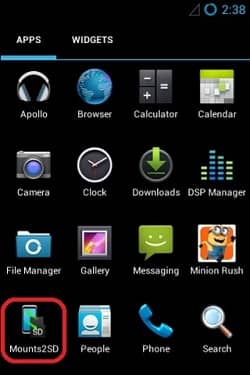
- Download and install the Mounts2SD app on your phone.
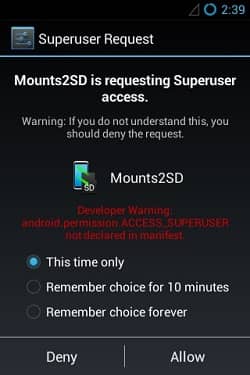
- Launch the app and grant Superuser permissions.
- As soon as you all the Superuser request the configuration message will pop up.
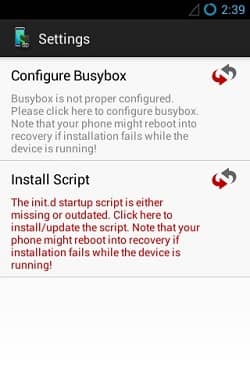
- Just click on the Configure Busybox.
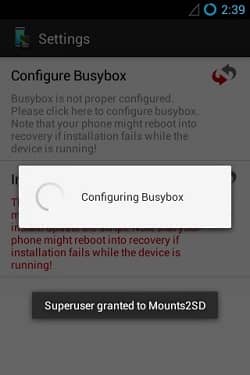
- Be patient until it is completed.
- A green colored tick mark will confirm the completion.
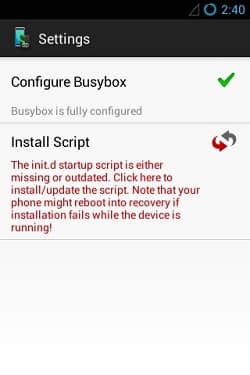
- Next, click on the Install Script option.
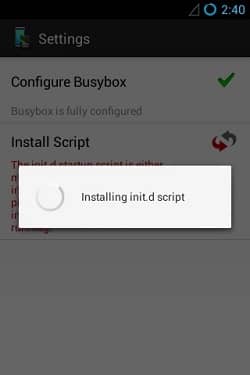
- After it is completed, you will see the following:
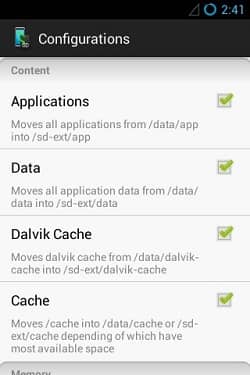
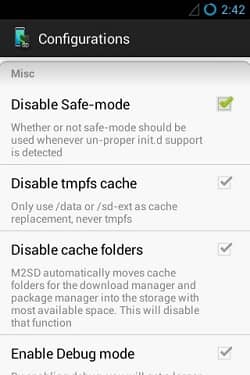
- Click on Configure and tick all these options: Applications, Data, Dalvik cache, Cache.
- Scroll further down and tick the Disable Safe mode option.
- Now exit the app and restart your phone.
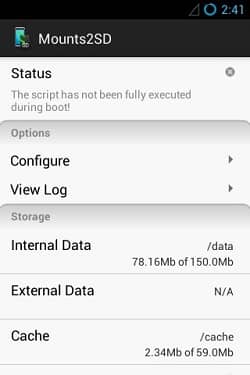
- After rebooting, launch the app again. You’ll see the following:
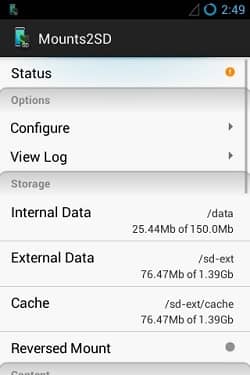
- Finally! Your phone’s internal memory is increased.
- If you see any kind of error or warning in your notifications due to this app, then don’t panic as it is caused by a swap.
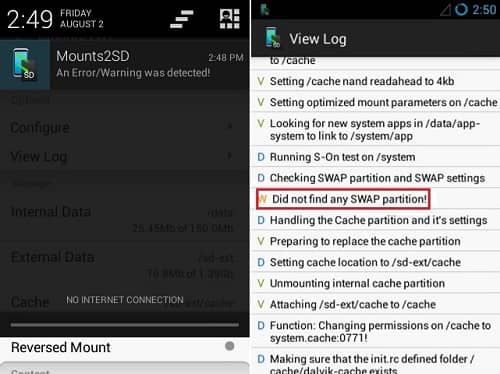
- Just a boot can blow away the error.
Method 6: Using S2E App
In this method, we’ll use the S2E application to expand the mobile storage space.
Downloads
Steps to expand Android mobile storage using the S2E app
- Install the S2E app on your phone from the given link.
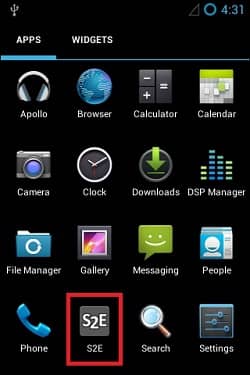
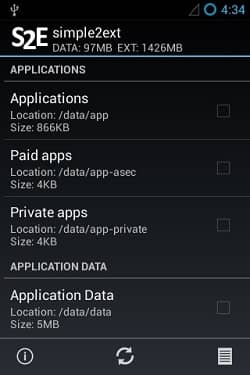
- Launch the app and grant Superuser permissions.
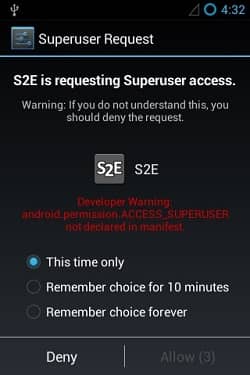
- For the first time, the App may somewhat look like this:
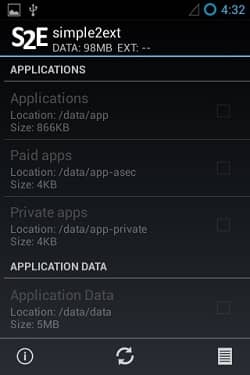
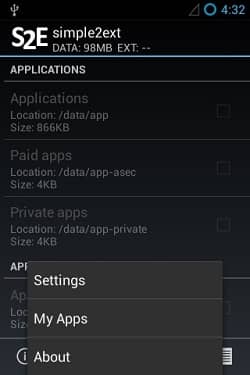
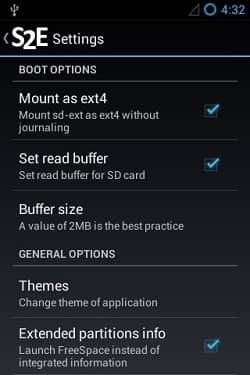
- Now press the menu key and enter the settings option.
- Next tick the first two options: Mount as ext4 & Set read buffer.
- Restart your phone after performing everything as mentioned above.
- After rebooting, launch the app again. You’ll see the following options:
- Tick all those options.
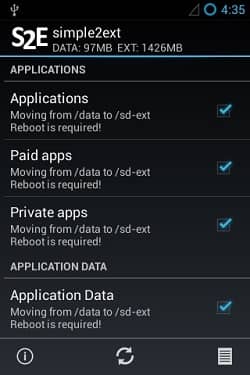
- This will move all the apps and their data to the external SD card.
- Make a final reboot to complete the process.
Conclusion
Finally! You’ve successfully increased internal memory. Just do not remove your external memory card as it may corrupt or damage the apps. If you face any problem while going through the process or have any queries then without hesitating comment to us. We’ll be glad to help you out. Thank you!


60 thoughts on “How to Increase Internal Storage of any Android Phone”
Plzzzzzzzzzzzzzzzzzzzzzzzzzzz help meeee….
In method 1, at the step 9, I select ext2 and I reboot…
After rebooting when I launch Link2sd, it again asks me to select ext2….
I cancel it and go through the step 11,12.. In step 13 when I click create link it shows
‘/data/sdext2 mount not found.’ Plzzzzzzzzzzz help me…
Plzzzzzzzzz reply fastttt……
When it asks for ext2 just select it, do not cancel..
Thanksss……. I just continued method 4 at step 6 and it is working….
method 1st din’t work for me but i tried method 2 and it worked! i’m having Galaxy y
Thanks Boss Method 6 Working Great
Glad 🙂
How can i extand internal memory?
How do increase internal memory on Samsung galaxys5.
Hi I followed the 1st procedure but my 8gb memory card’s space is show as 3.8 gb and all the files in it are missing. I did copy Link2SD app even that is missing did i do anything wrong ? please advice how to get the memory card’s space & files back.
Using Mini Tool delete the partition and re-do the process..
Which method is best and successful for Galaxy Y..
Is it important to select ext2 in method 1 in link2sd app beacuse I have selected FAT32(in step 8) in mini tool partition wizard… Can we select FAT32 instead of ext2..
Yes you can..
i have just installed cynogenmod 11 ,but how to increase internal memory,and big games like candy crush, temple run can run on samsung galaxy fit?
Use the above guide to increase internal memory..But due to hardware incompatibility of Galaxy Fit those games won’t work..
sir in Method 6
the data of sd card will be formated or not after comple the method 6?
It won’t be formatted
hello
none method is working for my BQ S37 phone ,it’s intenal memory is only 130 mb,Android 4.4 and RAM 512 mb.
How can I root for this phone?please
1. Download & install framaroot app on your phone..
2. Launch it and select install supersu option..
3. Click on boromir/barahir..
4. Reboot your phone..
Hi Abhijeet…
Need ur help.
I have rooted my BQ S37…
Now its stuck on boot animation…
I tried factory reset but still its not booting…
Please advise….
Regards,
King
simcard not detected….How to fix it it give me solution?????
why Link2SD write “Mount script cannot be creted”
plese help me
I follow all the step of Method 1 and 2
which method is best in terms of performance for galxy y gts5360??
Mini tool partition wizard asks for wiping method and by default it was on fill sectors with zero and on applying everything its taking quite a long time.
um …. how can i increase the internal memory of my O+ 8.33 kitkat android phone ? its internal is only 125 mb …
OMG! Method 2 saved my cheap Nobis nb09 tablet. Used a 16GB sd, 10GB for 2nd partition, rest for other partition. Google Apps keeps stopping and restarting, but doesnt seem to be a problem so far. Thanks, so happy I could kiss u!!
Glad! 🙂
I am using Samsung GTS-5360….I’ve already rooted my phone and its currently running on CyanogenMod 11 ( KitKat 4.4.4 ) … main problem is that when I try to increase my internal memory….it gets increased but Temporarily….after sometime the 2nd partition goes where…I don’t know and it creates a lot of disturbance…..plzzz tell me all the steps specifically in detail how to deal with this problem!!??!!
Could i get the lollipop rom for me connect v3
my mobile datawind pocket surfer 3g4 (sp7715) is’nt listed cwm list. so what can i do. please help me.
thanks.
i use method 6, i might say yes it increase my internal storage but whener i install app my phone keeps rebooting.
It looks quite simple and method 1 revealed successsfull on my GT-S5830, with a 8Gb SD, 2 of which for extension. Thanks for the tuto so easy.
However it appeared that some apps do not install on the SD partition despite the positive notification by Link2SD (this is the case for Google play services or Avast).
Do you think all 6 methods would provide same limitation ?
G.
Hye,can I use that method 2 to increase my internal storage on galaxy Y GT S5360??
Yeah sure..
keeps getting this error “/data/sdext2 mount not found” on my BQ S37. What to do?
1.Install updated Link2SD from Playstore.
2.Launch it and open all applications.
3.Click on Link2SD from the list of apps.
4.Click on Actions and select convert to system app option.
5.Then create EXT2 partition.
6.Go to options and clean up dalvik cache.
7.Reboot device.
Can I root my techno J7 running 4.4.4 and increase my memory
Yes
abijeet can you tell me why i s2e aap is not working..i installed it and allower su permision and after rebot it does not show as you showed in this post..i still could not tick the selected fiels like data files
oohh i got it…its only works upto 4.1 android so thatwhy i could not get it worked
Hello admin nice tutorial. Will these methods work for lg f260s.. and 2ndly how to revert back to oringal state rest f the methods.
WILL THE METHOD 2 AND 1 WILL WORK WITH OPPO JOY PLUS R1001 PLSSS REPLY ASAP!! 🙁
yes
how to increase the internal memory of BQ mobile without rooting
Sir if i use method 3 all my data saved will be lost?
pls reply:)
ty.
Yes.Its better copy all data from SD card somewhere..
Abhijeet what is the best method for My Phone.. And what happened if its failed will my phone be destroyed?
çok teşekkür ederim … thankss 😉 htc one wildfire Method 1 successful …fantastic
very very nice i just so much love this post
just love this post a lot… it has really helped me and my friends
How to increase internal storage in My Phone Agua Rhio?
which method works for techno y6
How to get internal in Samsung Galaxy ace gt s5830i
How to get internal in samsSam Galaxy ace gt s5830i
In the second method it is said – Now copy all the data back into memory card and insert it in your phone.Which partition should I copy the backup files to ?
Whichever partition you want. Usually it is the Unallocated one. But if your SD card is less than 4GB, select the Primary FAT32 partition.
Wow. Though I am 66 now, I am interested in learning more about phones/computers. From somewhere I downloaded and saved an article on installing Lollipop in Galaxy S Duos S7562 a few days back. While reading it now somehow I landed at 3 of your pages. I must say all are great and interesting. I have never read an article on increasing internal memory in an android phone. I am sure all pages I read now are of great use to many. Wish you all the best.
Thanks for your kind words Sir. I really appreciate it. 🙂
Galaxy j2 sm-260A can I root it without pc? If so how detailed explanation plz sir thank you
1. At first, install TWRP recovery using this guide.
2. Boot into TWRP recovery mode.
3. Finally, flash the SuperSU.zip file to gain root access.