
Download and install the latest official TWRP Recovery on Samsung Galaxy using the Odin tool. This tutorial will guide you on how to safely flash TWRP 3.2 custom recovery on any Samsung phone using Odin software.
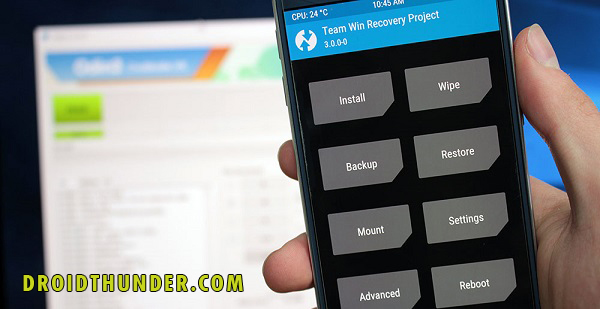
TeamWin Recovery Project, or TWRP for short, is a touch-based custom recovery for Android. It is the most preferred custom recovery over CWM (ClockworkMod) because of its uncountable features.
With TWRP recovery, you can easily root your Android using CF-Auto-Root, SuperSu, or Magisk. You can also use TWRP to flash custom ROMs, kernels, and mods, take Nandroid backup, increase internal memory, and much more.
In this guide, we’ll use the Odin tool for flashing TWRP recovery on Samsung. You can also install TWRP using the official TWRP app. Developed by Samsung, Odin is a utility software commonly known for flashing files with .tar or .tar.md5 extension.
It is used to perform multiple tasks on Samsung phones. These include flashing official Stock firmware, flashing unofficial custom ROMs, installing custom recovery, rooting Android by flashing root packages, etc.
Odin Multi downloader helps in un-bricking specific devices as well. Before proceeding ahead, we strongly recommend backing up your data, including contacts, apps, call logs, messages, notes, etc.
This is because there is a chance of your data getting wiped out during this process. Also, make sure to charge your Samsung device at least 50% to avoid any accidental shutdown.
How to Install TWRP Recovery on Samsung Galaxy Devices
In this guide, we’ll flash TWRP custom recovery using the Odin Tool.
Disclaimer
Proceed at your own risk. We at DroidThunder will not be held responsible for any damage.
Compatibility
This guide is only for Samsung Galaxy Devices. So it is highly recommended NOT to try this method on any other device than Samsung.
Requirements
- A Computer (Windows OS).
- A standard USB cable compatible with your device.
- Install Samsung USB Drivers on your computer.
- Enable USB debugging mode on your Samsung device.
- Also, enable OEM unlock mode from Developer options.
Downloads
TWRP Recovery (ALL MODELS)
Method 1: Install TWRP Recovery on Samsung using ODIN Tool
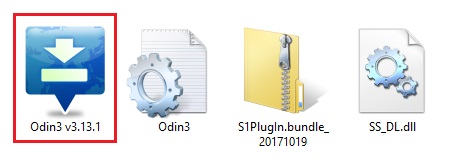
- Download the Odin tool and TWRP on your Windows PC.
- If the downloaded TWRP recovery file is in .img format, you need to convert it into .tar.md5 format.

- To convert the TWRP recovery.img into recovery.tar.md5 file, use our guide:
- Now power off your Samsung phone.
- Besides, boot your phone into download mode.
- To do so, press and hold the Home button + Power button + Volume down buttons for a few seconds until you see a warning screen.
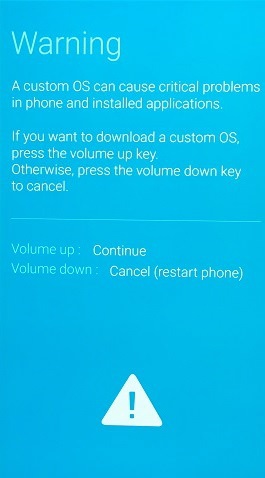
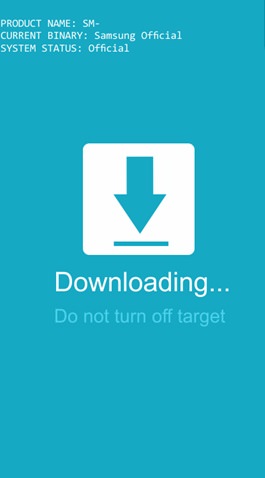
- Leave all the keys and press the Volume Up button to enter the Downloading mode.
- Keeping the phone in download mode, connect it to your Windows PC using a standard USB cable.
- Download and install the latest Samsung USB drivers on your PC from the link given above.
- On PC, download and launch the Odin Tool.
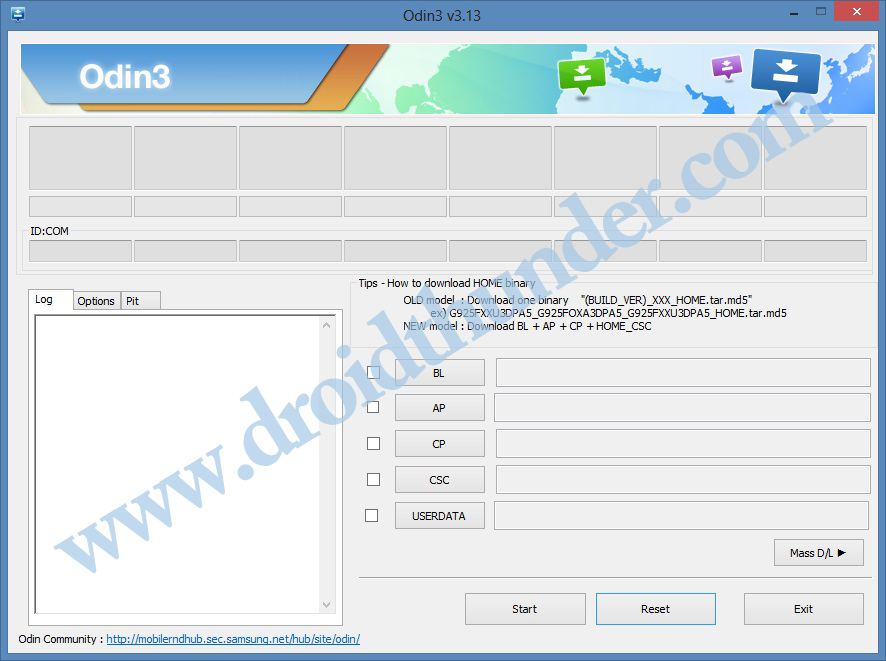
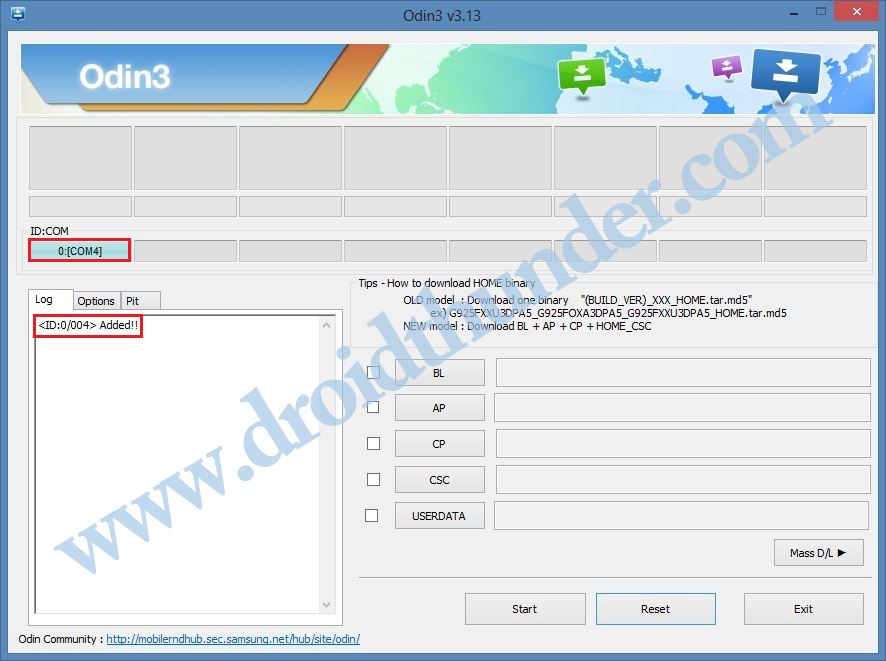
- The ID: COM section located at the top left corner will turn light blue as soon as you launch it.
- Also, an Added message will appear in the message box window.
- This will confirm that your Samsung phone is successfully connected to the computer.
- If such a thing doesn’t happen, then re-install Samsung USB drivers from the links given above. If the problem persists, change the USB cable/PC.
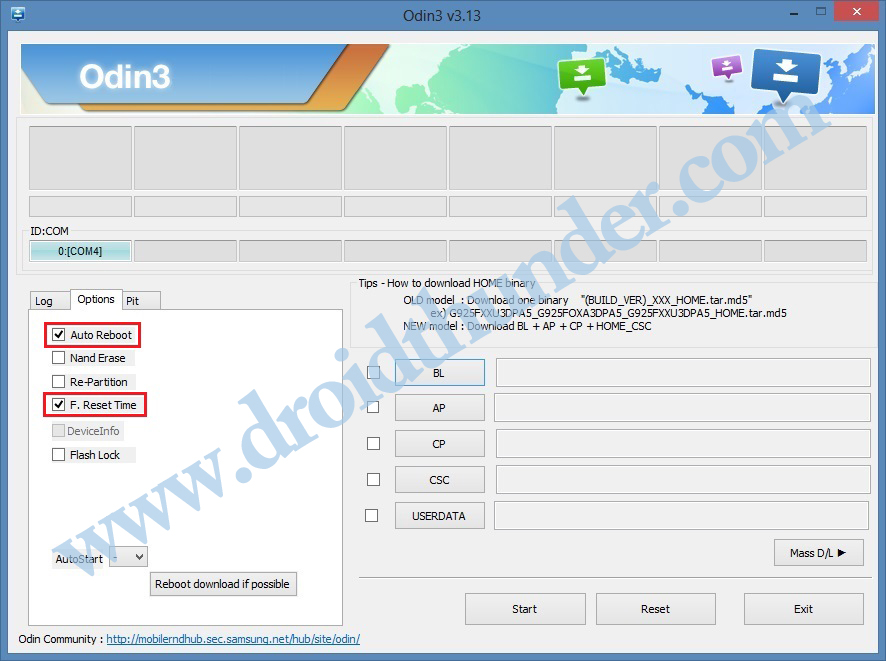
- Then click on the Options tab and tick the Auto Reboot and F.Reset Time options.
- Do not tick the Re-partition option, as it might brick your device. Don’t use the PIT tab, either.
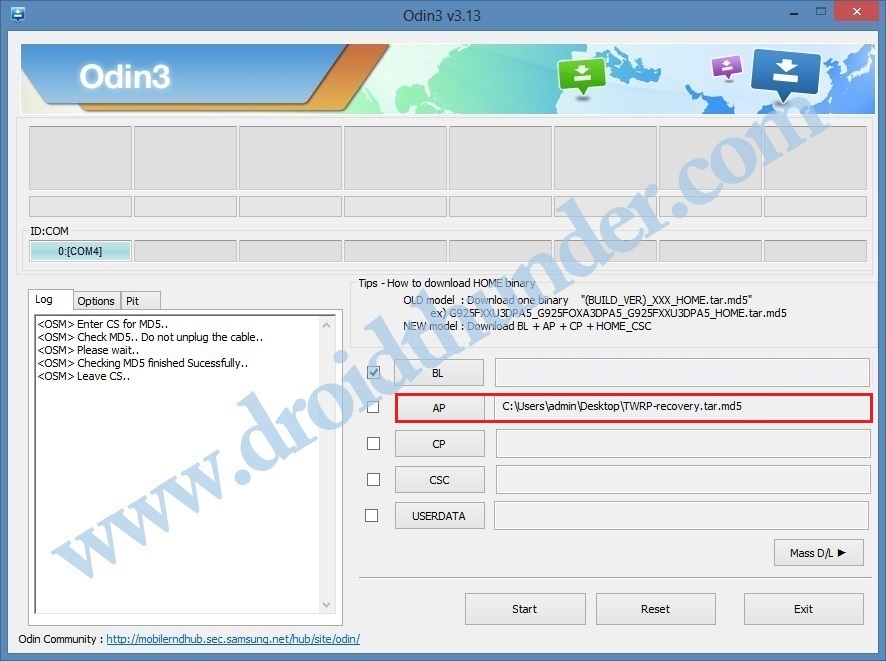
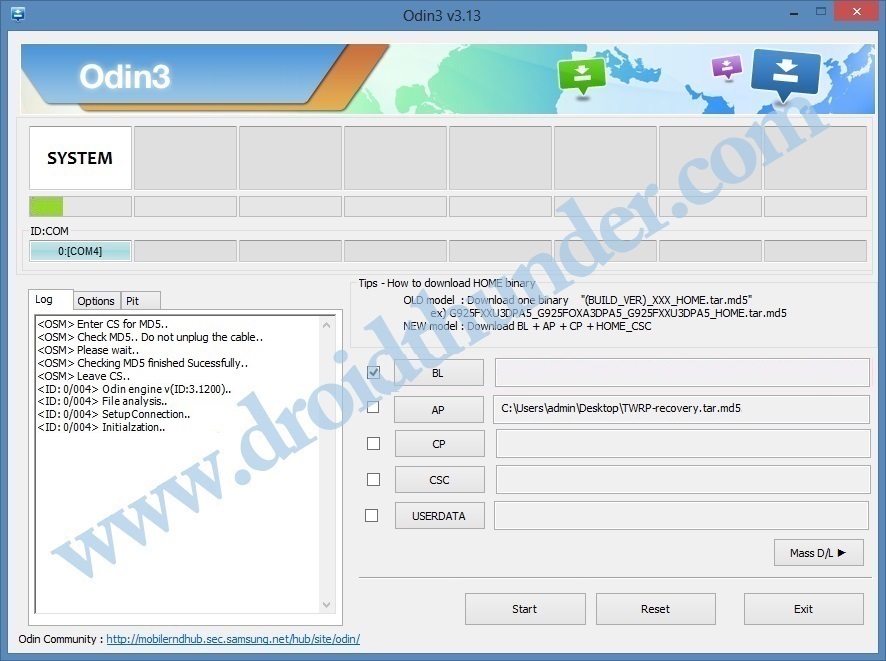
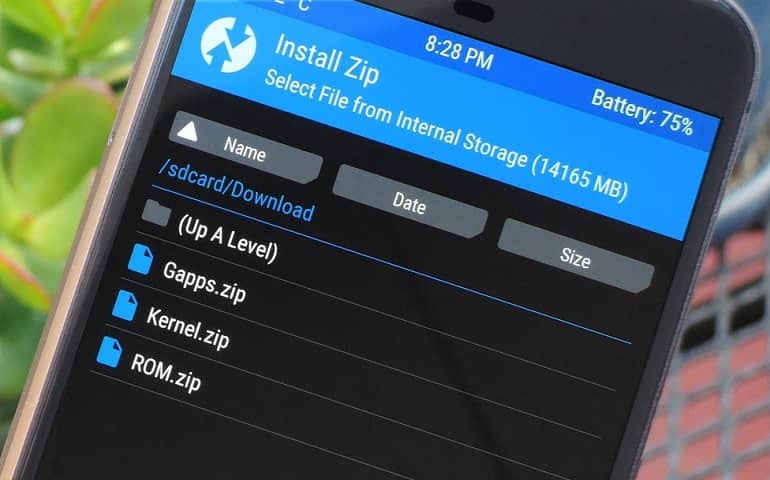
- Click on the AP tab located on the Odin window and select the TWRP recovery.tar.md5 file, which you downloaded earlier.
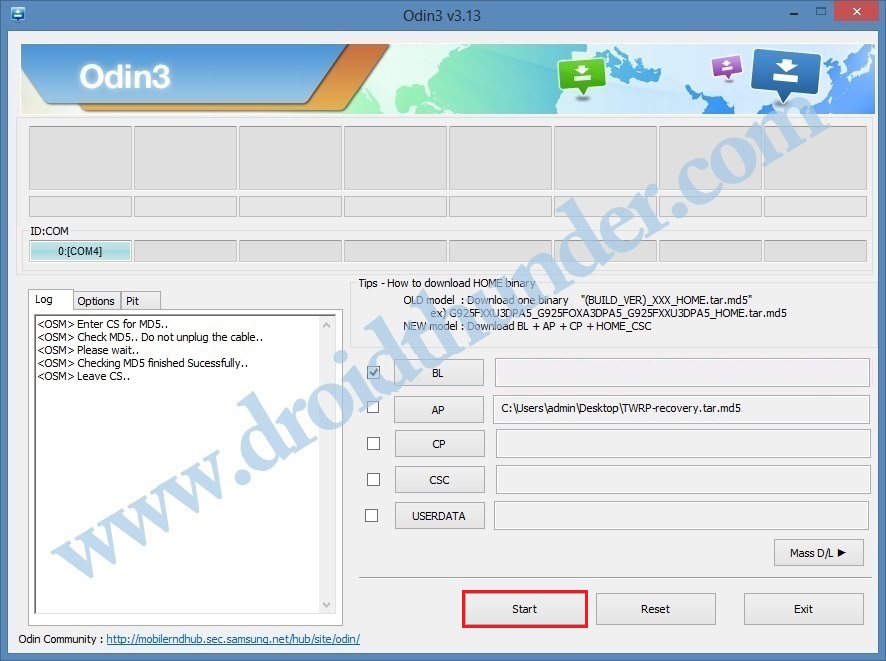
- After implementing everything as mentioned above, let’s install TWRP recovery on the Samsung device.
- To do so, hit the Start button present on the Odin tool.
- This will initiate the installation of TWRP recovery on Samsung.
- Be patient and wait until the process is completed.
- It will hardly take a few minutes.
- When it completes successfully, the ID: COM section will turn green with ‘Pass.’
- This will confirm that the TWRP recovery installation on Samsung has been completed successfully.
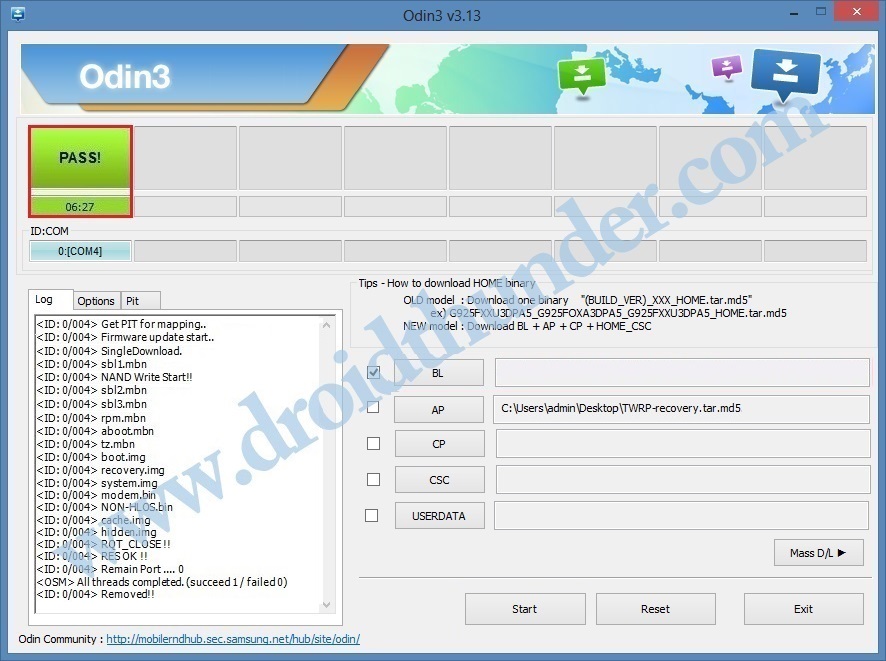
- Now safely disconnect your device from the PC by removing the USB cable.
- Note: If this flashing of TWRP recovery on Samsung fails, then close the Odin window. Again boot into download mode and repeat the entire process.
- Finally! This is how you can install the latest official TWRP recovery on a Samsung Android phone using Odin Flash Tool.
Method 2: Install TWRP using CMD on Samsung Galaxy phones
- Install ADB drivers on your Windows PC.
- Download and copy the TWRP.img file to the ADB folder (for example, C:\Program Files\Minimal ADB and Fastboot).
- On the other hand, connect your Samsung phone to a PC via a USB cable.
- In the ADB folder, hold the Shift button on your keyboard, and right-click anywhere.
- You’ll see a list of options.
- Just press the Open command window here option.
- This will launch a CMD window.
- Type the below command in the CMD window and press the enter key:
adb devices
- This will show a message saying ‘List of devices attached.’
- Next, enter the following command to boot your Samsung device into Fastboot mode.
adb reboot bootloader
- This will restart your device into fast boot mode.
- Now confirm whether fast boot is functional or not. For that, type:
fastboot devices
- Finally, we’ll enter the below command to flash TWRP using CMD:
fastboot flash recovery twrp.img
- The TWRP recovery flashing process will start now.
- At last, this is how you can install TWRP recovery using ADB and Fastboot commands.
Steps to Boot into TWRP recovery on Samsung phones
- Power off your Samsung Android device.
- Press and hold the Home button (middle button) + Volume Up key + Power button for a few seconds.
- Release all the keys as soon as you see the TWRP logo.
- If your Samsung device does not have a Home button (middle button), press the Volume up key and Power button to enter the TWRP recovery mode.
- In this way, you can enter the TWRP recovery mode on the Samsung Galaxy device.
Wrapping Up
Finally! You’ve successfully installed the TWRP recovery on your Samsung Galaxy smartphone or tablet. We hope that this tutorial was helpful for you guys. Kindly contact us for any issues or queries related to this guide in the comment box below.


2 thoughts on “How to Install TWRP Recovery using ODIN”
Thanks for this detailed article
Thank you