
Root and install TWRP recovery on Galaxy S2 i9100. The Samsung Galaxy S2 i9100 was the most used phone back in 2011. Even today it remains as a phone that packs quite a punch when it comes to hardware. It boasts a 1.2 GHz dual-core cortex-A9 processor with 1 GB of RAM and 32 GB of internal memory.
Related: Install Lineage OS 15 ROM on Samsung Galaxy S2 i9100.
It was launched with Android 4.0.4 Ice Cream Sandwich OS which was further upgraded to Android 4.1 Jelly Bean OS by Samsung. After Jelly Bean, Samsung stopped releasing further updates for this smartphone. But suffice to say, Galaxy S2 i9100 can easily handle any software you throw at it without a single discernible lag.
There are plenty of third-party custom ROMs developed by Android developers for this beautiful smartphone. So you can easily flash those custom ROMs and enjoy the newly launched Android versions on your Galaxy S2 i9100. However, root Android phone and install TWRP recovery first. In this guide, we’ll root and install TWRP v3.1.0-0 recovery on Galaxy S2 i9100.

Disclaimer
This rooting and TWRP flashing guide is intended for advanced users. If you brick your Galaxy S2 by implementing the steps given this article, whole responsibility will be yours. We’ll not be responsible for any damage. Although the chances are very low.
Compatibility
This guide is only for Samsung Galaxy S2 with the model number GT-I9100. Do not implement this process on any other Samsung device. It might brick your phone.
Requirements
- Rooting will void your device warranty. But don’t worry if you want to regain it back just unroot the device.
- Backup your contacts, apps, messages, call logs, etc. for safety.
- Charge your phone to a minimum of 60%.
- Enable USB debugging mode from the settings.
- Also, install Samsung USB Drivers on your computer.
Downloads
Steps to install TWRP recovery on Galaxy S2 i9100
- Download and extract TWRP and Odin tool on your PC.
- Now Power off your Galaxy S2 i9100 completely.
- Boot your Galaxy S2 i9100 into downloading mode. For that, press and hold the Home button (middle button) + Volume Down key + Power button until you see a warning message.
- Leave all the three buttons and just press Volume Up key to continue.
- This will land your device into downloading mode.
- Keeping your phone as it is in downloading mode, connect it to PC via USB data cable.
- Then launch the Odin Multi Downloader3-v3.12 from the extracted zip file.
- As soon as you launch it, you’ll see an ‘Added’ message appears on the Odin window.
- Also the ID: COM section will turn light blue in color with a random COM PORT number below it.
- If such a thing doesn’t happen then it’s a problem with mobile drivers.
- Hence fix USB device not recognized error.
- On the Odin window, click on the AP tab and add the ‘twrp-3.1.0-0-i9100.tar.md5’ file.
- Just hit the Start button located on the Odin window to initiate the TWRP 3.1.0-0 flashing process.
- Your Galaxy S2 will automatically reboot itself as the process goes on.
- Do not unplug USB data cable until the process completes.
- The TWRP flashing will hardly take few minutes to complete.
- As soon as it completes, the ID: COM section will turn green with a message ‘Pass’ below it.
- Now safely remove the USB cable.
- If the process fails or if Odin gets stuck or in case your device gets into boot loops, then don’t panic.
- Just close the Odin window, go into downloading mode, and repeat the whole process again.
- That’s it! You’ve successfully flashed the latest TWRP 3.1.0-0 custom recovery on your Samsung Galaxy S2 i9100.
Steps to Root Galaxy S2 i9100
- Download and copy the Super SU zip file on your phones internal storage.
- Then you need to boot your Galaxy S2 into the installed TWRP recovery mode.
- For that first power off your phone completely.
- To boot into TWRP recovery mode, press and hold Volume Up key + Home button + Power button simultaneously until your Galaxy S2 lands into recovery mode.
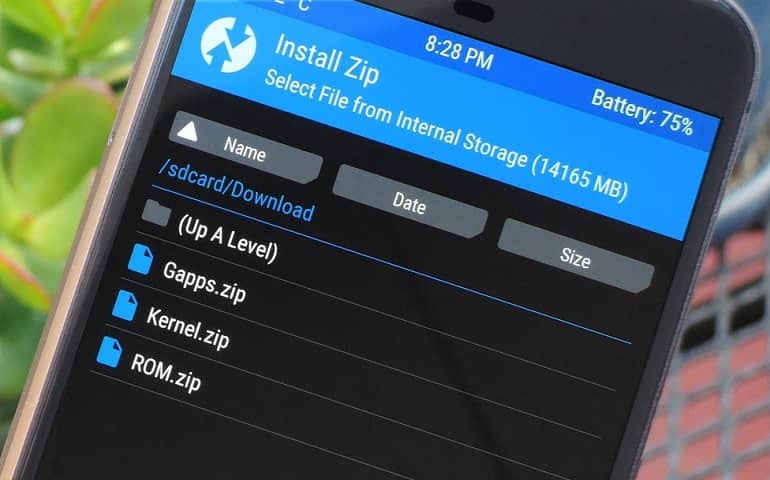
- Just click on the Install option present on the main menu of TWRP recovery to flash the Update Super SU zip file which we’ve copied earlier.
- As you select the Install option, all the files and folders located on phones internal storage will be shown on the screen.
- Just select the Update Super SU zip file to install.
- On the next screen just swipe right to initiate the actual Rooting process.
- Wait until the process completes successfully.
- As soon as the process completes, you’ll see a successful message on the screen.
- This will confirm that you have rooted your Galaxy S2 i9100 smartphone.
- Just click on the Reboot System option to restart your device.
- You can use Root Checker app to confirm whether your Galaxy S2 is successfully rooted or not.
Conclusion
Finally! This is how you can install TWRP 3.1.0-0 custom recovery on the Samsung Galaxy S2 i9100 smartphone. Now you can easily change and view the system settings, do Nandroid backup, flash custom ROMs, mods, kernels, increase internal memory, wipe data/cache and do much more. If you have any queries related to this guide, then do comment below.


2 thoughts on “Root and install TWRP recovery on Samsung Galaxy S2 i9100”
can you help me, i can’t flash twrp use odin fail result
Flash this TWRP.img using our Guide: link